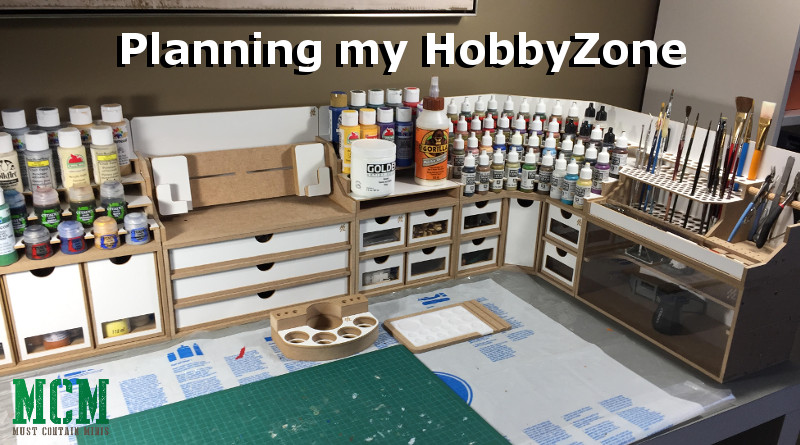
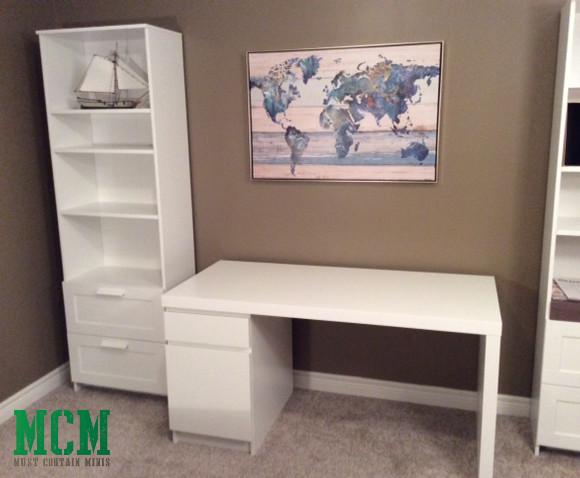
In some of my previous posts, I discussed planning my prefect hobby room and the IKEA furniture that I bought for that space. In today’s post, I take a look at the planning process I went through to determine how to organize my desk. As discussed earlier, I was looking between two different organization systems to top the desk with. The one that my wife liked better won out in the end. That system is the HobbyZone Modular Workshop System by HobbyZone.
Today’s article covers a few bases. It covers the process I went through in planning what to buy from HobbyZone, and it acts as a review of the system in general and the ordering process. It is also a continuation of my “Planning the Perfect Hobby Room” article.
In the interest of full disclosure, HobbyZone sent me this station as products for review. That said, I did have to pay the customs fees to get these items into Canada – but those costs were relatively small. At the time I was going through this exercise of planning my purchase, I did not know that HobbyZone would be covering most of my costs. I am very grateful to them for sending this product. When I start to go through the modules, you will see that the quality of the system and components is great. This stuff is fantastic!
Now, I don’t know about you, but I like to plan what I buy in advance. Part of this is for budgeting reasons, but a larger part of it is to optimize what I purchase. As such, I went through an exercise of inventorying what I owned (and what I want to buy in the future) to determine which HobbyZone Modules to order.
Determining my Needs
Once I decided on a HobbyZone Modular Workshop System, I set out to determine what my needs are. At its simplest, I need an area to store my paints and tools for miniature building while having the unit look good in our office space. The HobbyZone stuff looks great, so the second part of that requirement is covered simply by the company I chose to buy the product from. The first part required a little more thinking.
So I took my inventory. I had roughly 40 craft paints (for terrain), 8 GW paints and washes, and 50 26cm dropper bottles (mostly Vallejo). On top of that, I wanted to move my bits box into the HobbyZone unit as well as a number of tools and brushes. With my paints and items inventoried, I now knew what the modular system would have to accommodate.
The First Design
I batted around the idea of what modules to order. As you may remember from my IKEA Furniture in the Hobby Room post, I already had a hobby space setup. The HobbyZone system would have to fit into this space while fulfilling my needs. My desk surface is 140cm wide by 65cm deep.
I drew a to scale diagram of the table surface and module units to help me visualize the purchase. My first design was three modules high and four modules wide. In this design, I opted for all 30cm units to optimize my perceived value of the items. In the image below, you can see the design diagram of the intended HobbyZone and a legend of what I figured each component would contain.

After creating this image, I went to the room and measured everything to see if it fits. Three modules would take me to just above the height of my painting there. I did not want to move the painting, so I went back to the designing an alternative set up.
The Second Plan
In my second plan, I decided to wrap the unit along a corner of my desk. By doing so, I would stretch the unit out by one to two modules in length and reduce the height by one. This way, I would not have to move the painting on the wall.
Being that my wife encouraged me to build a paint station in our office, I consulted her during the process. Mrs. Must Contain Minis much preferred this second layout. It was actually her idea to add in an I-Pad (Multimedia) Holder Module. That item was a really nice add. More about that later.
Now, let’s take a look at that second layout.
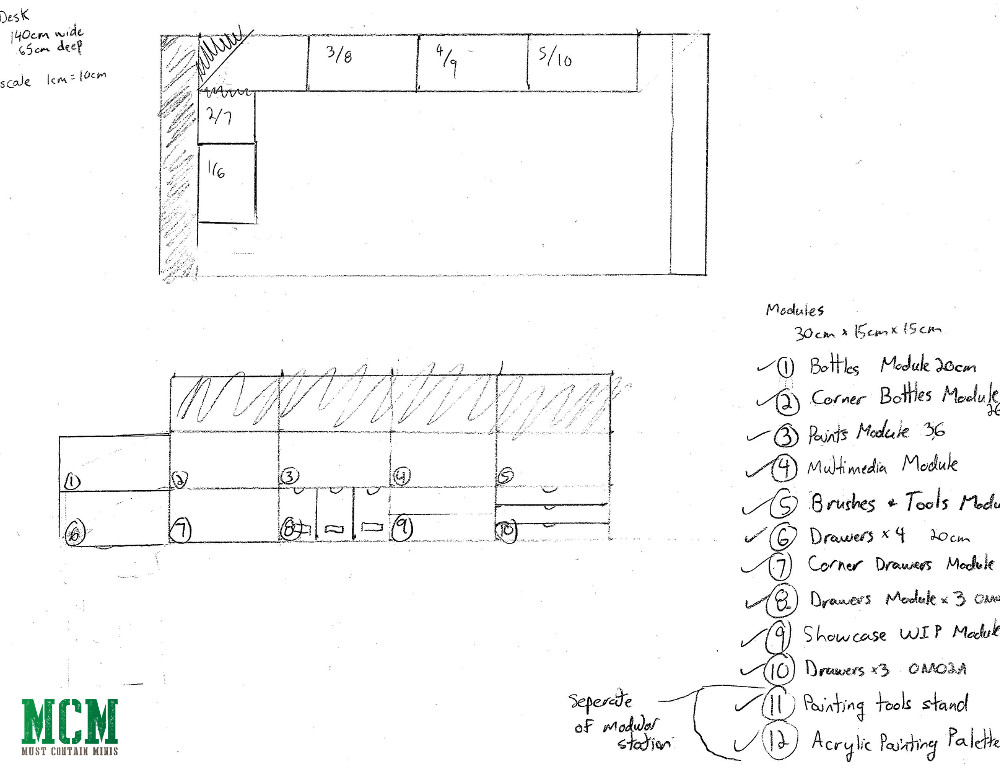
Unlike the previous layout, this unit would be 10 modules large instead of 12. I wanted to keep my order to 12 items, so I decided to add HobbyZone’s Painting Tools Stand and Acrylic Painting Palette into the mix in place of actual modules.
Placing the Order
After deciding on what to purchase, I touched base with HobbyZone.PL with a few questions about shipping and customs. To my delighted surprise, they got back to me and told me that they wanted to send me the product “on them” as review products for my posts on Must Contain Minis and Bell of Lost Souls. For that, I am very grateful.
With this plan set, I went to the HobbyZone website to place the order. Even though HobbyZone covered most of the costs of this system, I still went through the ordering process just as anyone else would.
One thing that I could not believe about HobbyZone is the speed in which the product got to me through their priority shipping. I received the product (in Canada) within 3 days of when they shipped it (from Poland). They shipped the product within a day or two of me placing the order.
I got a tracking number and was so excited as I saw the package travel from Poland, to Germany, to New York and ultimately my home in Canada. The speed at which it reached me really impressed me! My wife was also blown away by the speed of the delivery! That was simply amazing.
The modules come as flat-pack MDF kits and you have to build each module individually. These builds are not too difficult and the product does come with nicely illustrated instructions. I found them very easy to assemble – but I also like working with MDF kits.
There will be more about the build process in future posts. What I will say now is that we were really (really) impressed with the quality of the components of the modules.
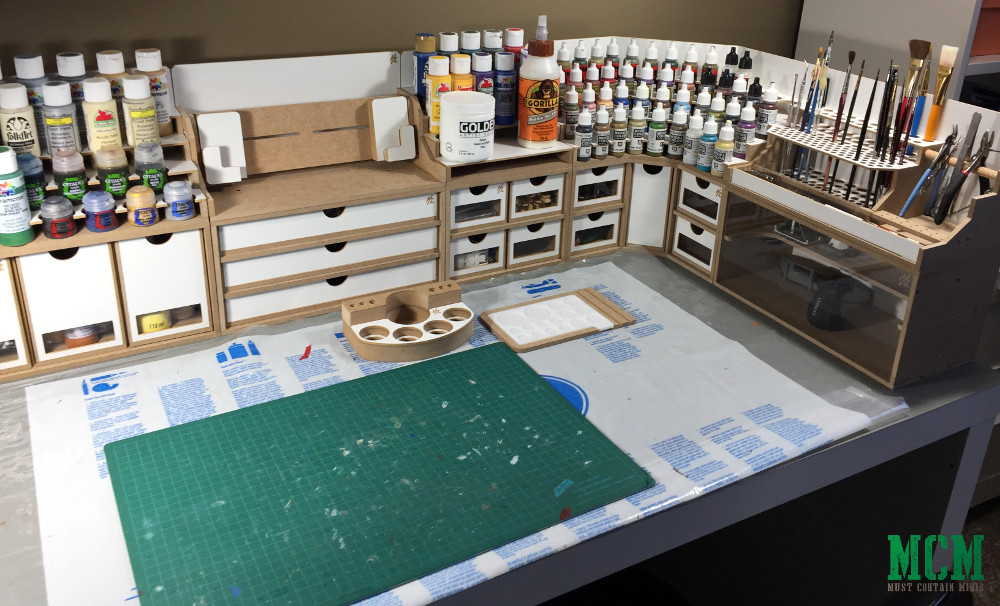
The Final HobbyZone Setup
The HobbyZone Modular Workshop system fit my wife’s requirements for my hobby space (“you can have the office for your painting and building room as long as it looks nice”) and my own requirements of being practical for the items that I already own. Once I built the modules, I was very (very) happy with the final product.
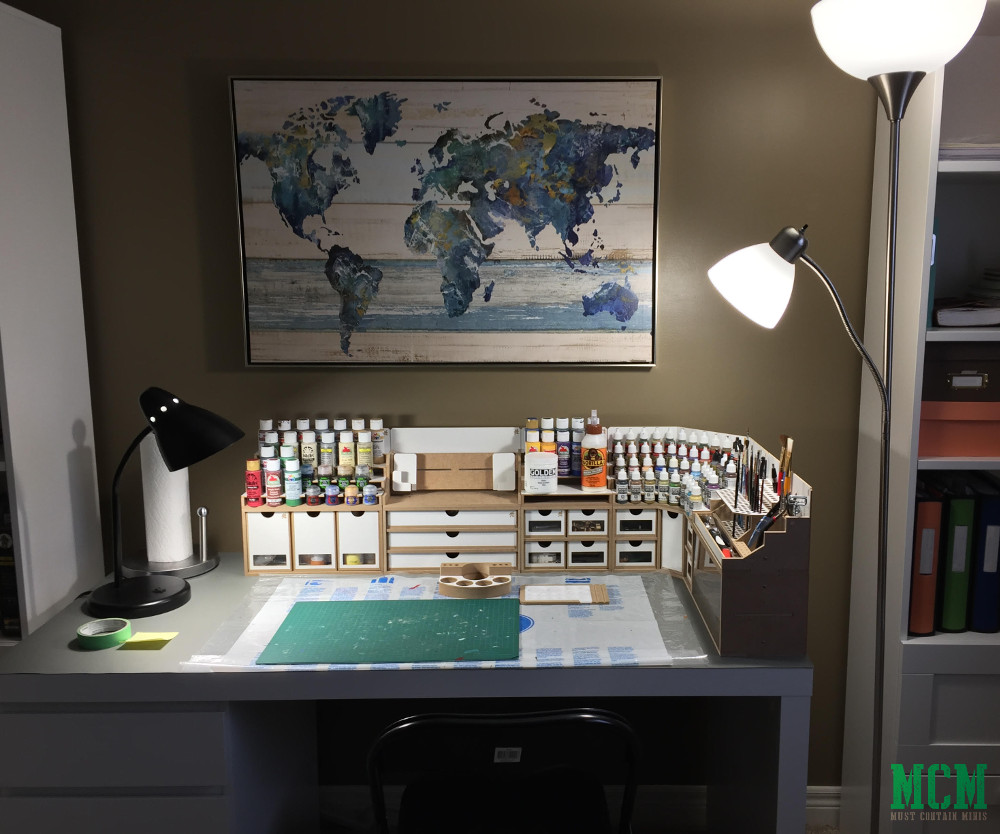
You may notice that the desk is reversed from what I laid out in the diagram. I did this change on the fly after receiving the product. Each module connects to the one next two it through rare earth magnets. Altering the set up is very simple, yet when they are all together, they act as one unit due to the magnets. I also swapped the positions of the 20cm and 30cm units so that I could place the I-Pad holder in a position best suited for me.
For my North American Readers, I want to put out a small warning about the paper towel dispenser. I really wanted to get the HobbyZone Paper Towel dispenser, but it is not sized for North American paper towels. If I had of got that unit, I would have had to re-purpose it somehow. The reason I found out is because I measured out everything before selecting which modules to order. Unless you have a special supplier of non-standard paper towels, avoid this module for now.
You can see on my desk I still have my old paper towel holder stand on the left side of the desk.
Overall, I absolutely love this system from HobbyZone and I can’t wait to start modeling and painting again.
Wrapping it up…
If you have a chance to get your hands on a HobbyZone Modular Workshop System, I highly recommend the products. The quality is amazing, the customer service is great and the unit looks just as sharp as can be. My hobby items now have excellent homes and I found the I-Pad Holder much nicer than I expected. Yes, I did get to hear my wife say afterwards “aren’t you glad I told you to order that,” and in all honesty, I am.
Now, I know that if you are looking into this system, you don’t have to draw it out like I did. Simply inventorying what you have and itemizing what modules you want should be good enough. For me though, I like to be sure that I am getting the best value I can when I purchase something, so I mapped it out to help me get a mental image of an optimized system for me.
Please leave any questions or comments you have about the system in the comments section below.
Until next time, Happy Gaming Everyone!!!
In the interest of full disclosure, HobbyZone provided Must Contain Minis with the products and shipping in this post for the purposes of review. That said, I still had to pay customs and I had planned on purchasing this system before reaching out to the company.
Pingback: Planning the Perfect Hobby Room for Miniatures - Must Contain Minis [MCM]
Nice setup! I’ll soon be in a situation where I will have to prepare my own hobby room (though shared with my wife; we won’t have that much space).
I find I can paint and build in pretty constrained places, but what drives me crazy is finding the space to store scenery and painted miniatures. It makes me despair. Painted minis and terrain take a lot of space — unsurprisingly way more than they took when neatly packed in their boxes. And they are fragile, too!
This is something very discouraging and which I haven’t figured out yet
Hey Andres F. I have to figure out the storage of miniatures and terrain myself yet.
Right now, I store terrain in large clear bins. Not the best solution, but it works as long as I am gentle when I stack things. The miniatures I have a few solutions. I keep my Flames of War Minis in a metal tool chest. They fit nicely in the thin drawers of that. For my other minis, I lined scrapbook containers (from Michaels) with soft cupboard liner and gently place the miniatures on there. It takes up more space than it needs too, and I can’t move the trays fast or I will have a disaster on my hands, but that is my current solution.
If anyone else has ideas for miniature and terrain storage, please let us know. I am always looking for new solutions and products to test out. 🙂
Pingback: Review - Hobby Zone Drawers Module x 3 (OM02a) - Must Contain Minis [MCM]
Pingback: Review - IPad Holder by HobbyZone - Must Contain Minis [MCM]
Pingback: Third Party GW Paint Holder Review - Must Contain Minis [MCM]
Pingback: Top 5 Posts of February 2019 - Must Contain Minis [MCM]
Pingback: Finding the Best Miniature Wargaming Table - Must Contain Minis