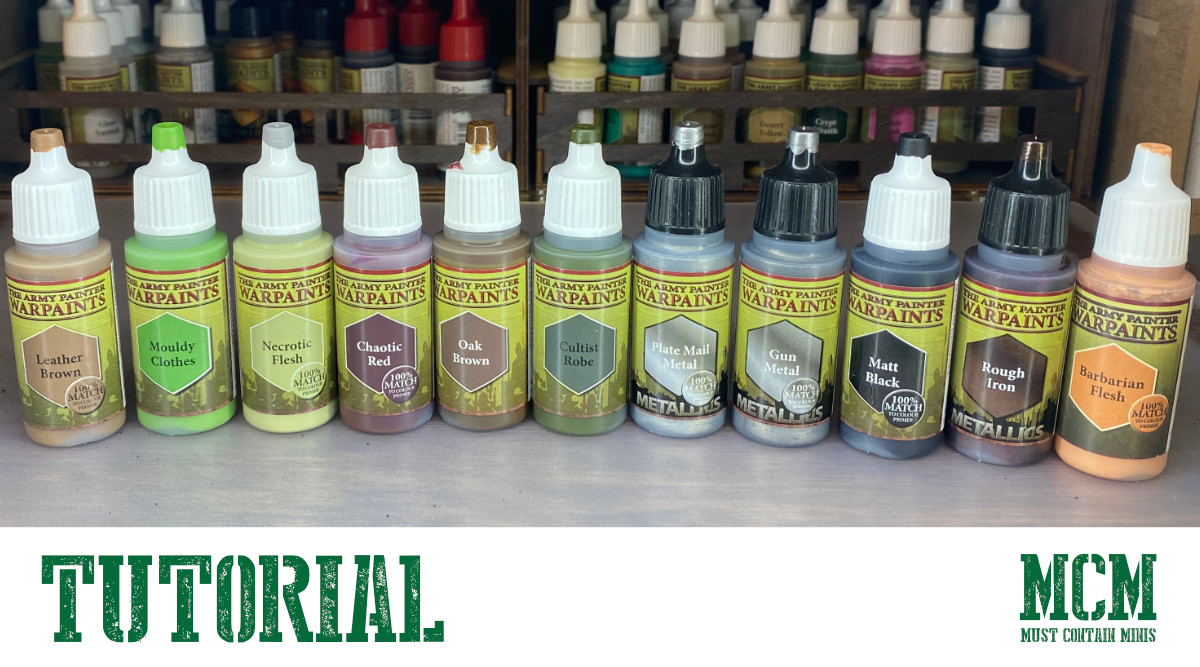
The Army Painter sponsored today’s post. Thank you for that!! They sent me the paints I needed to complete this project. If you are curious about the products that they sent me, check out my post about The Army Painter taking over my desk.
In this post, I share with you how I used their paints on miniatures for Wild West Exodus. While the miniatures I painted are specific to a game, you can use the steps within this tutorial on any miniatures. Warhammer, 40K, Legion, whatever. The same principles apply. Generally, I follow the five step process that I share with you in this article today. This process makes it really easy to paint your minis quickly. When you are done, they look good too!
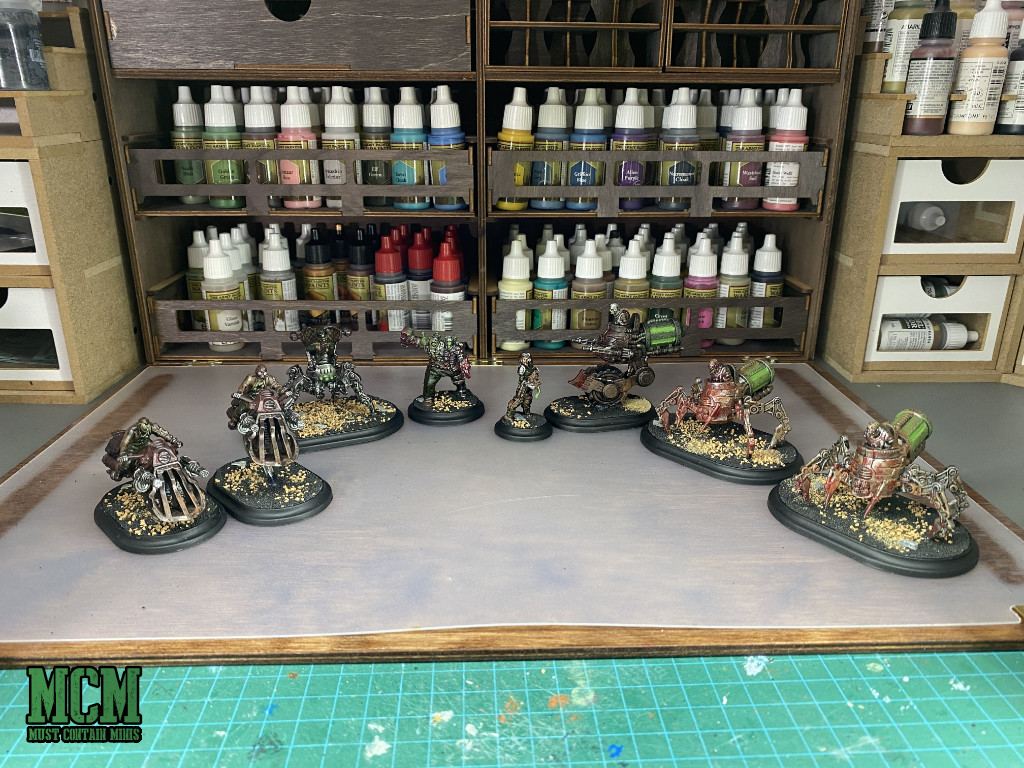
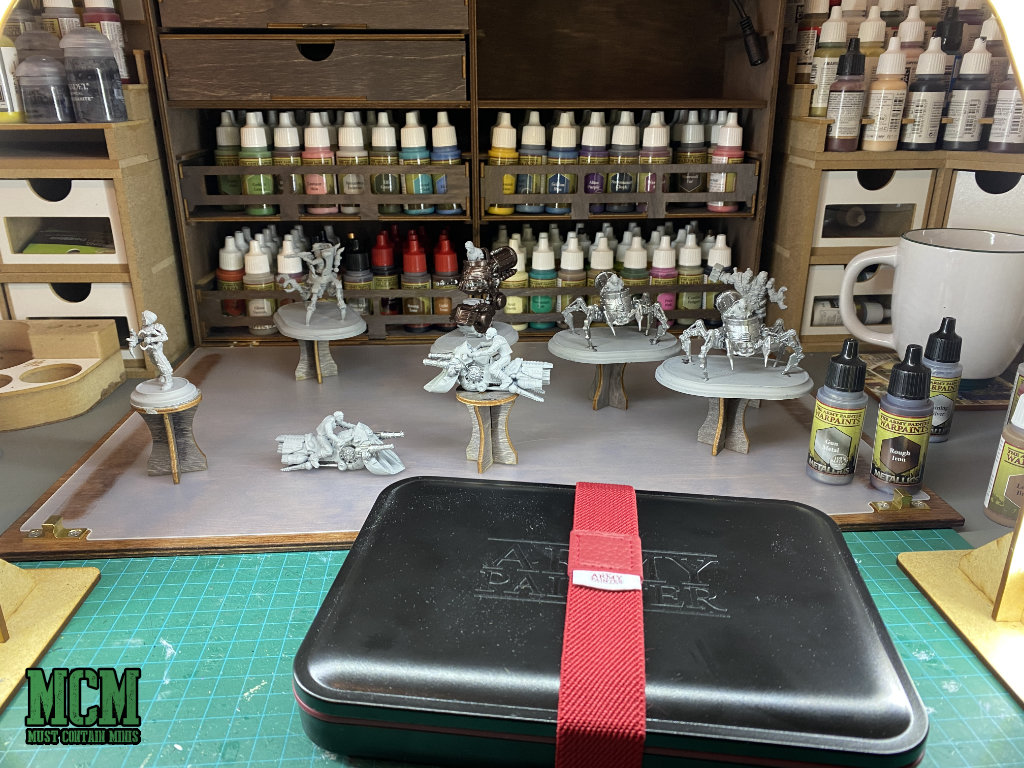
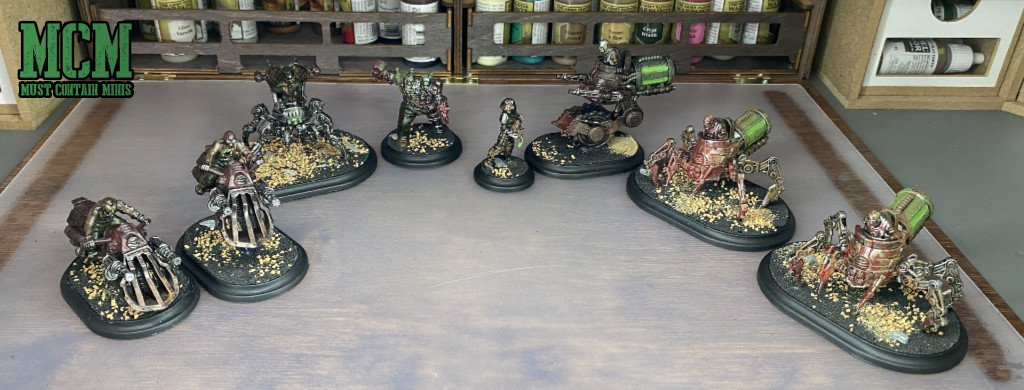
These miniatures come from the new two-player starter set for Wild West Exodus. That set is called “Wild West Exodus: Showdown at Retribution,” and I painted up the Enlightened side of this starter set. The box comes with minis from both the Union and Enlightened factions.
If you are interested in exactly which colors I used for these models, I will place a paint recipe at the end of the tutorial. With that, you will be able to use my color scheme if you wish.
This is my second article about painting miniatures for Wild West Exodus. My first painting article for the game is in my review of the Cerulean Clade Posse Set.
Now, let me tell you about the five step process that I followed in painting these miniatures.
My Five Step Process to Painting Miniatures Using The Army Painter Paints
No matter which minis I paint, I generally follow a simple five step process. Below is that process laid out as quickly as possible.
- Prime
- Base coat
- Shade
- Highlights and Effects
- Basing Materials
We will go through each step in this article. There is also a video coming to outline the process. That will get embedded into this article along with a tutorial about using brush on primer once they are ready.
I used this exact same five step process as this in my tutorial on how to paint miniatures for role playing games. I also used a similar process in how to paint space marines and how to paint skeletons too.
Step One – Prime the Miniature
This step is easy. You have to prime the miniature. Spray on primer works great, but I live in Canada and there are many months of the year that you can’t prime outside. Instead, I used brush on primer by The Army Painter.
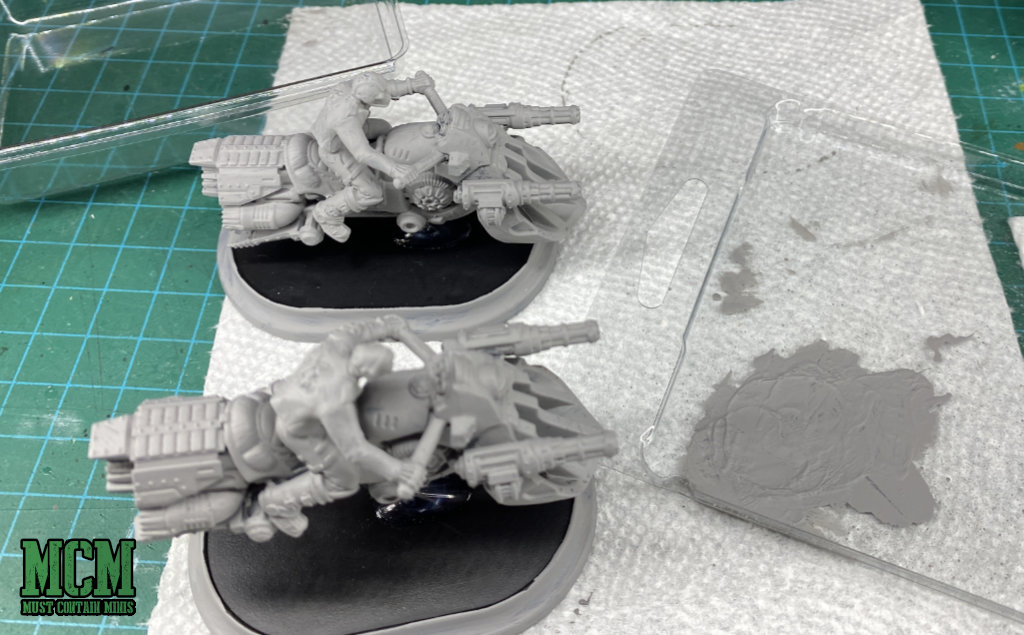
This stuff worked really well. For more on how to use the primer, check out this video.
Next up, we base coat the minis.
Step Two – Base Coat the Miniatures
At this stage, I paint all of the colors that I want on my models. I don’t worry too much about shading or how they look. I just keep going over them until I am happy that the proper color is on each part of the model.
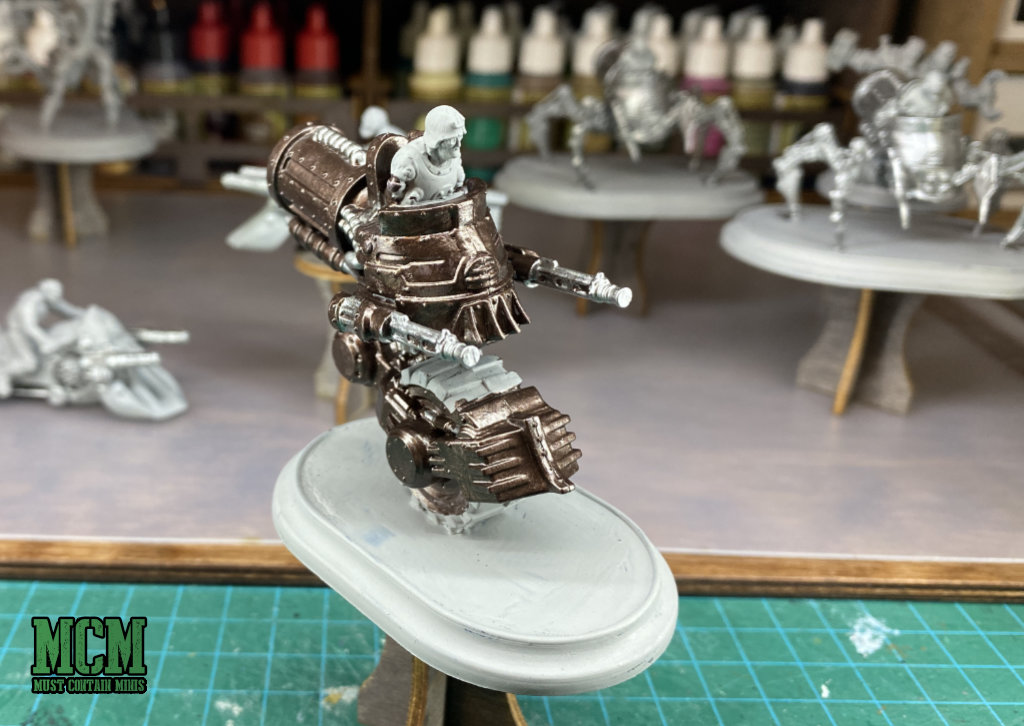
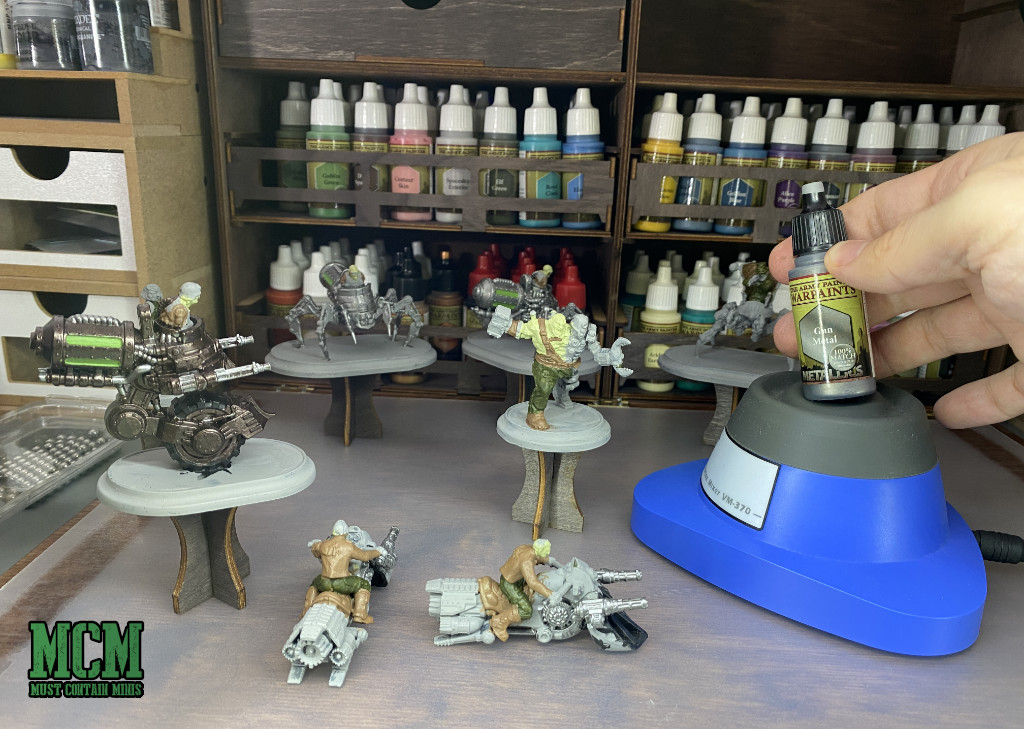
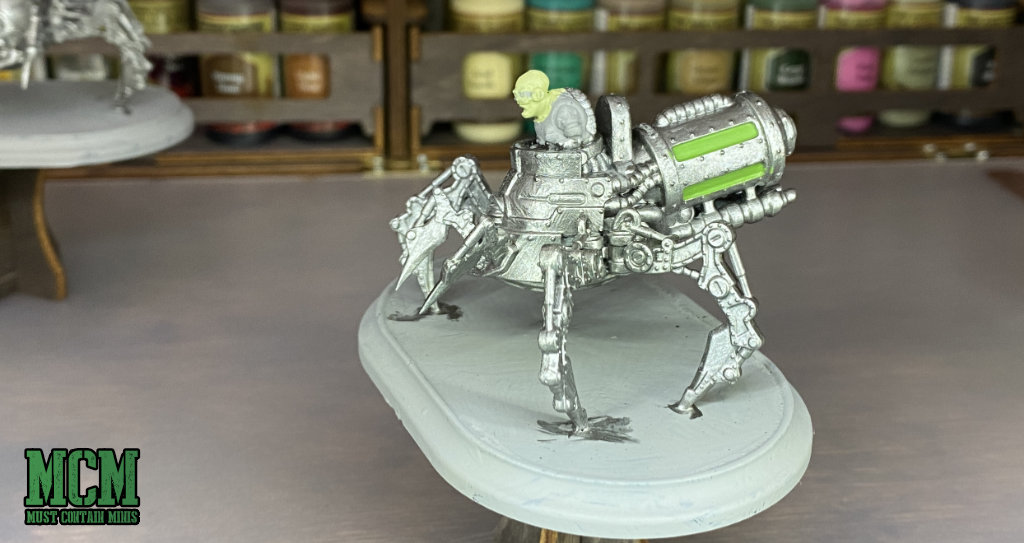
This is how the minis look after I base coat the minis. They are okay, but the next two steps are going to make a huge difference.
Check this out.
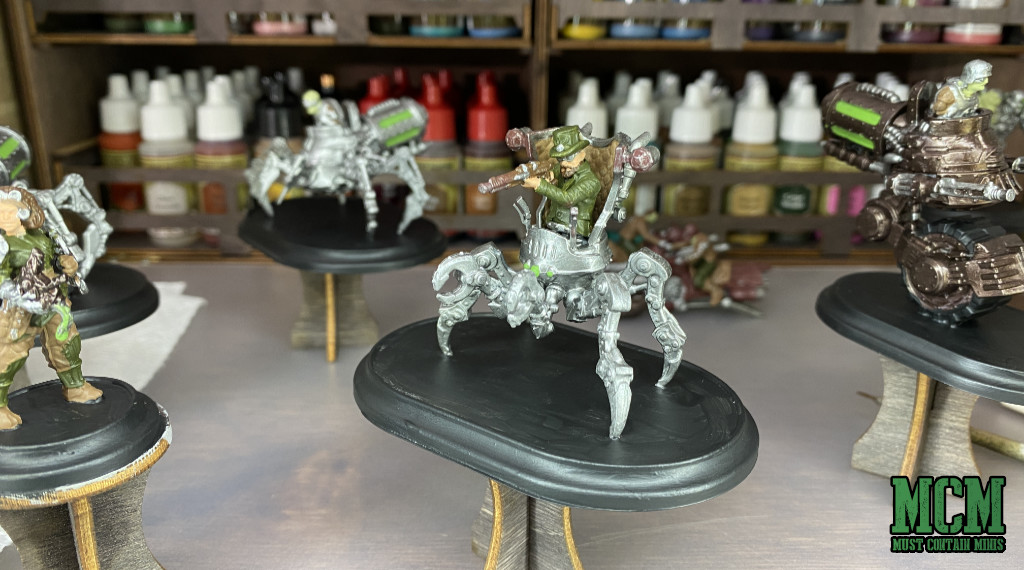
Step Three – Shading the Miniatures
For this next step I used The Army Painter Quickshade Dark Tone Wash. It worked out pretty quick with minimal effort.
When you apply Quickshade, sometimes it goes on too liberally. You can remove some of that by going back with a somewhat dry-brush and soaking it up while it is still wet. As a heads up, I always intend to go back and “repaint” the minis after this step. More on that in the Step 4.
The shade goes on heavier in the recesses and less heavy on the other parts of the mini. It makes the overall miniature darker. You can leave it as that or try to soak up some of it before it dries. When the video tutorial comes out, I will demonstrate to you what I mean and you will be able to find that video here on this page.
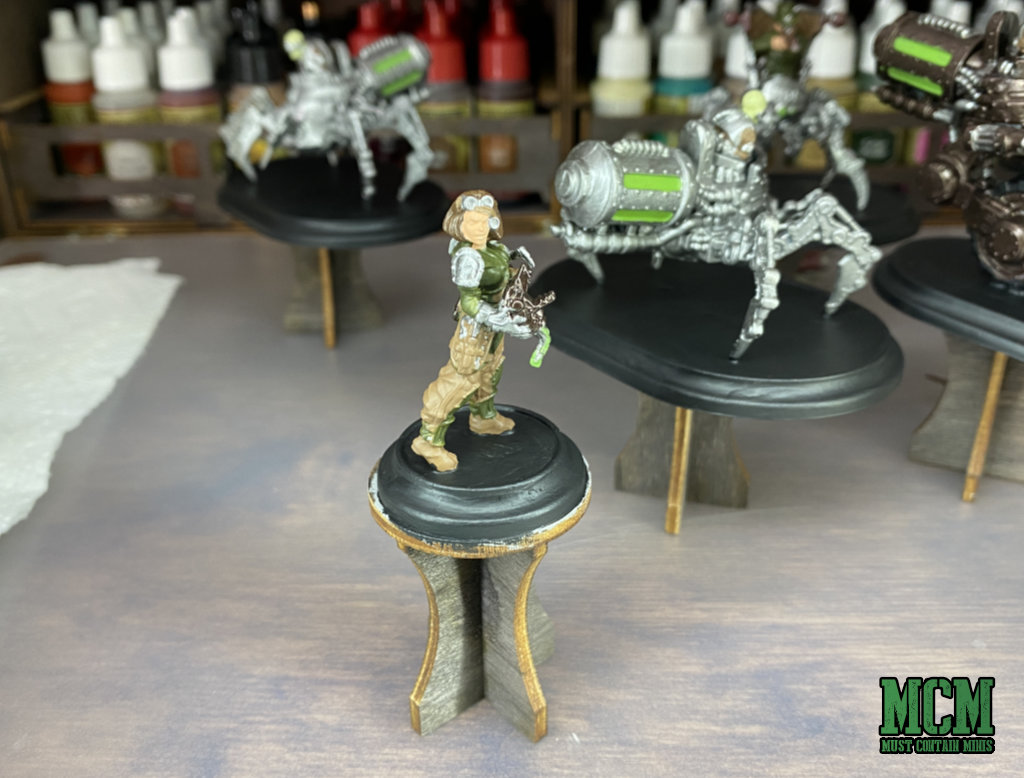
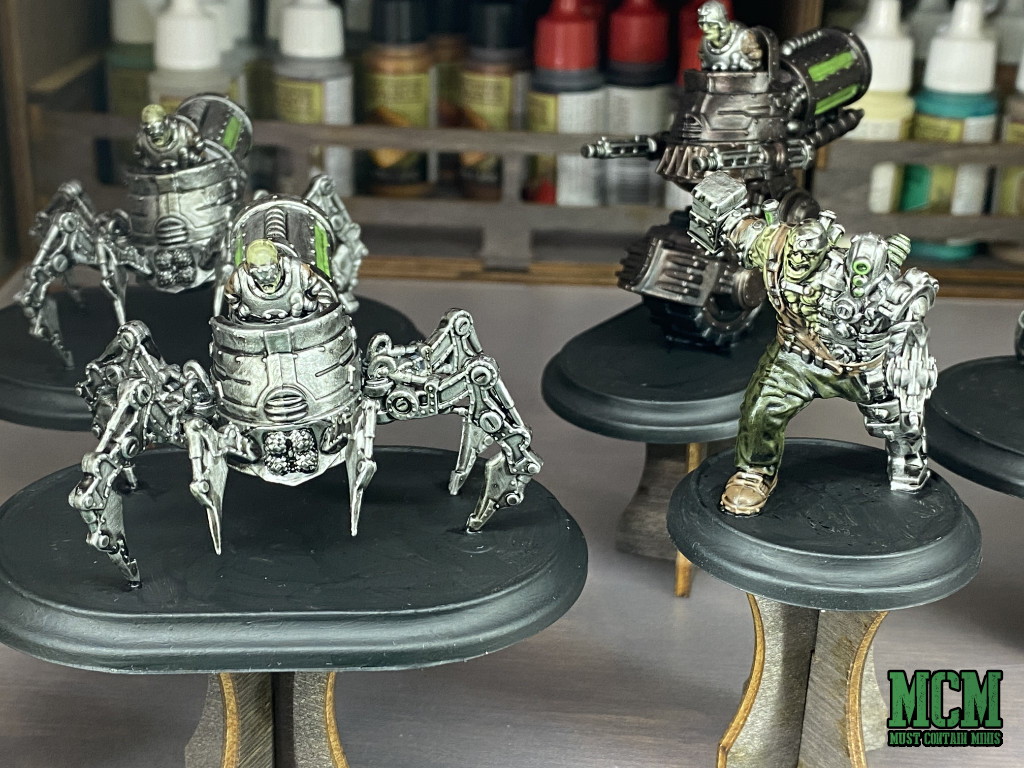
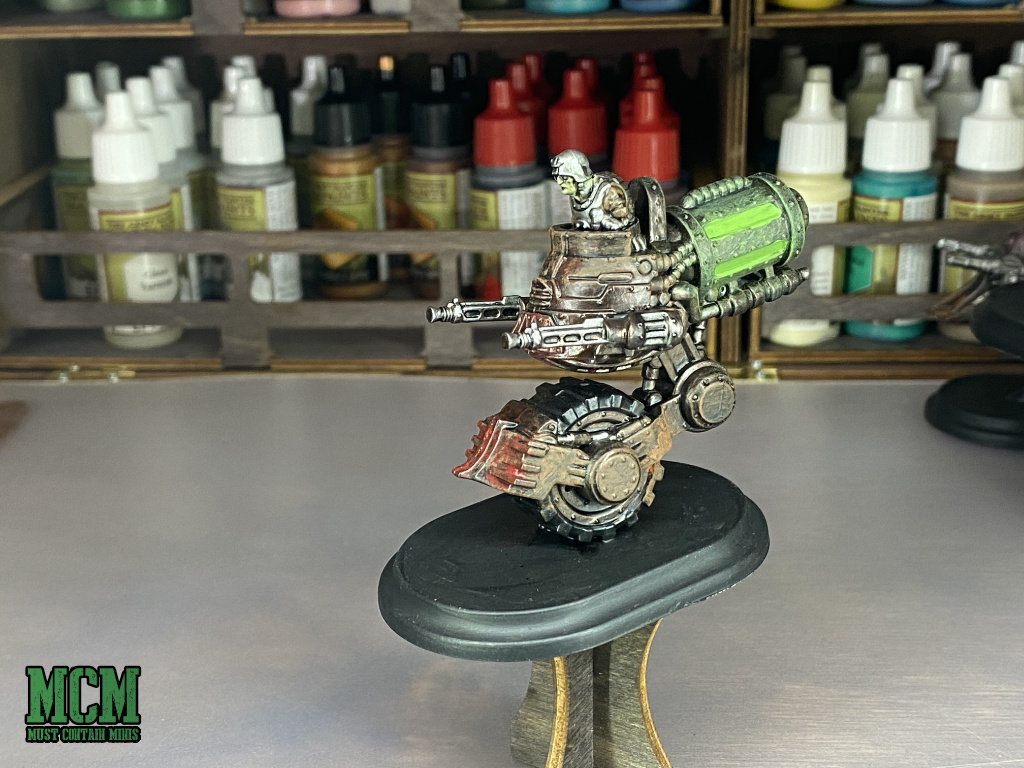
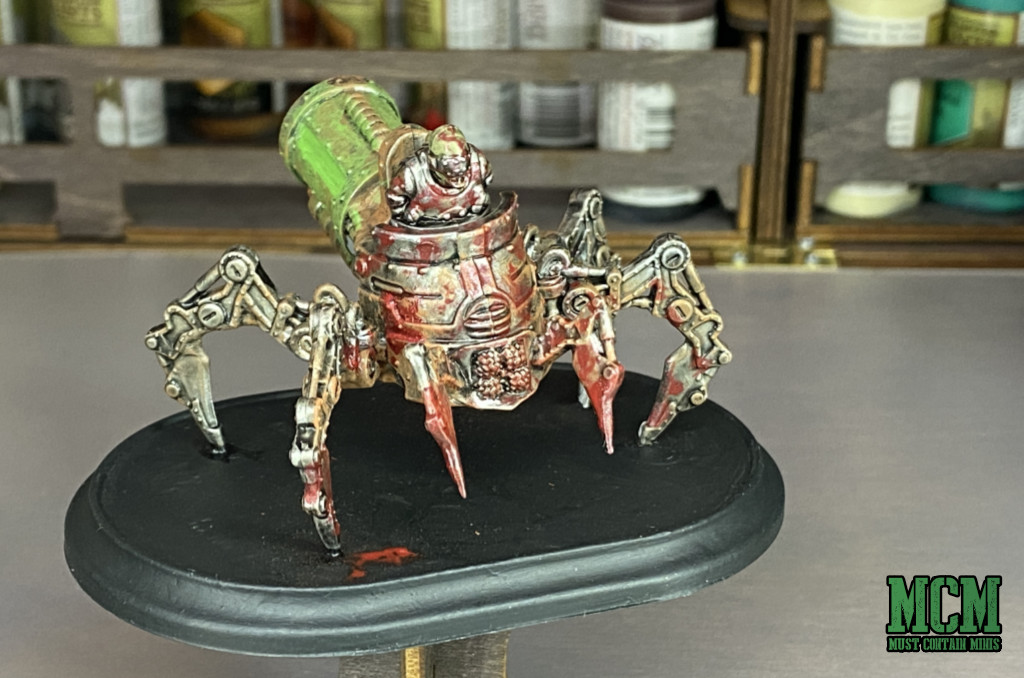
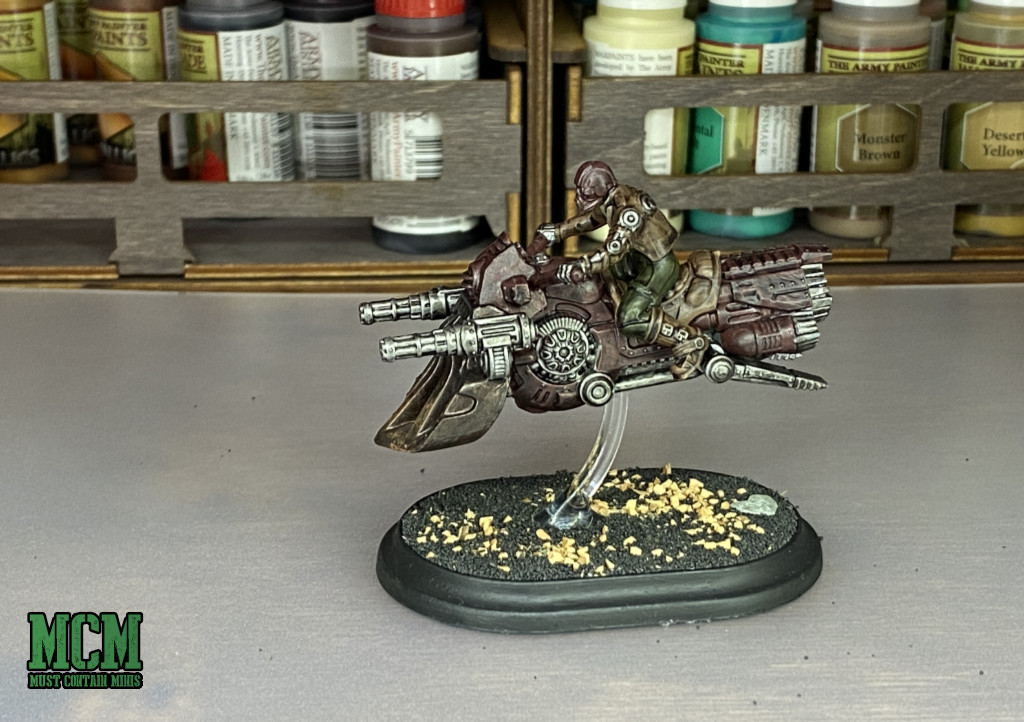
Once they are shaded, the minis look better than they did in step 2. Below are how my minis looked after the shading (step 3).
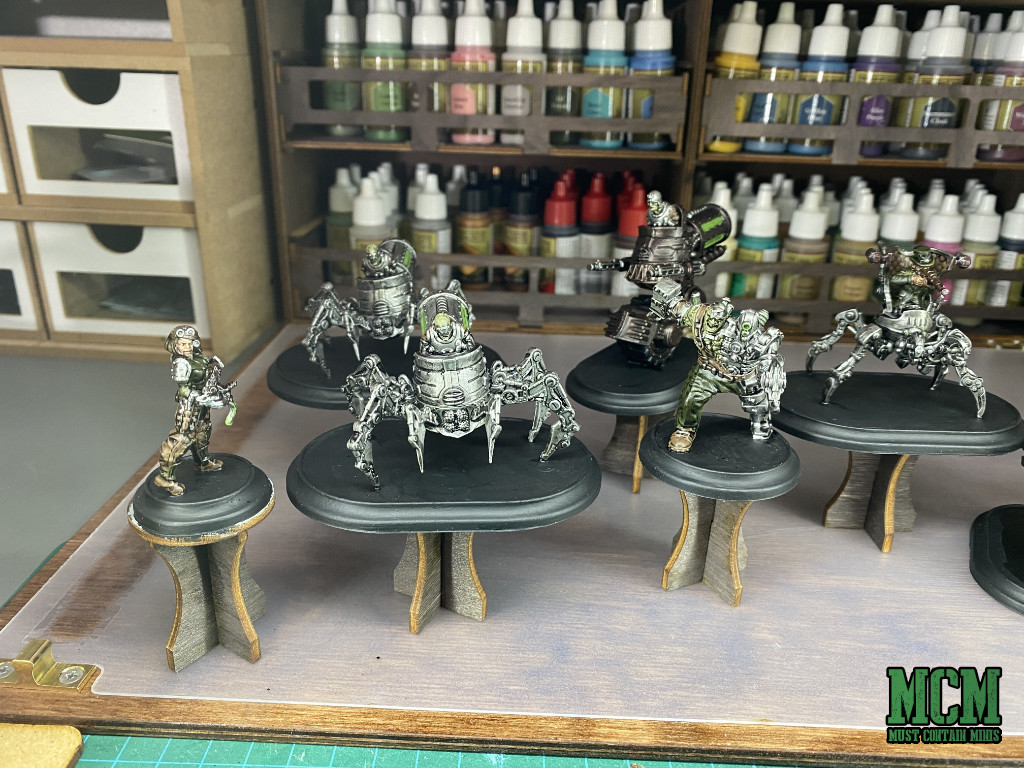
With my Space Marines, I figured that they looked good enough at this stage, so I skipped the next step. With these miniatures though, I wanted to put in the effort.
Next up, touching up the highlights and adding effects.
Step Four – Adding Highlights and Effects
Although not as quick as step three, this part of the process goes by quick when you paint for a tabletop distance. For this stage, I do a lot of dry-brushing. As such, you will notice in the video that I quit using the wet pallet at this point. The reason for this is because you don’t want your paints or brush to be wet when you dry-brush.
How to Dry-Brush
To dry-brush, you take a brush you don’t care as much about, dip it in paint and brush it on a paper towel. Once it is brushing off just a bit of dry pigment, you start using it on the miniature. By doing this, the desired color focuses on the raised parts of the miniature and not in the deeper parts of the model.
As a note, some people use purpose built brushes and makeup brushes for dry-brushing. I just use an old brush as dry-brushing can be hard on the bristles.
By dry-brushing your entire miniature with the original colors that you started with the whole model gets more dimension. The deeper parts of the model will remain shaded while the higher parts become brighter. This simulates how a light (or the sun) would illuminate you or me. Miniatures are so small though, they need some help to create depth.
Now, let’s add even more to the miniature with some effects.
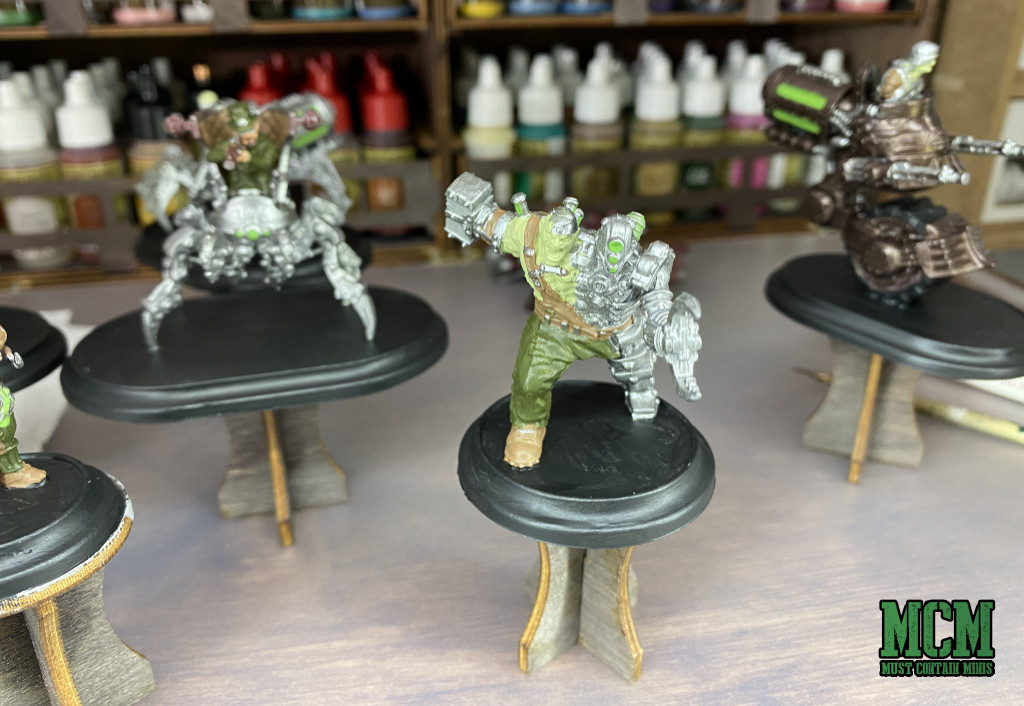
Adding in Some Effects
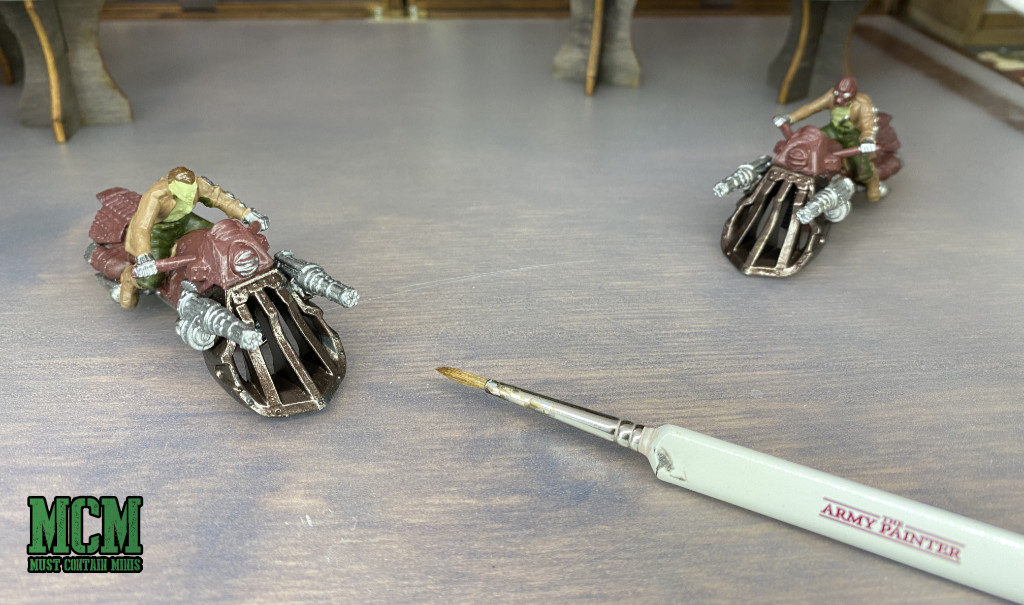
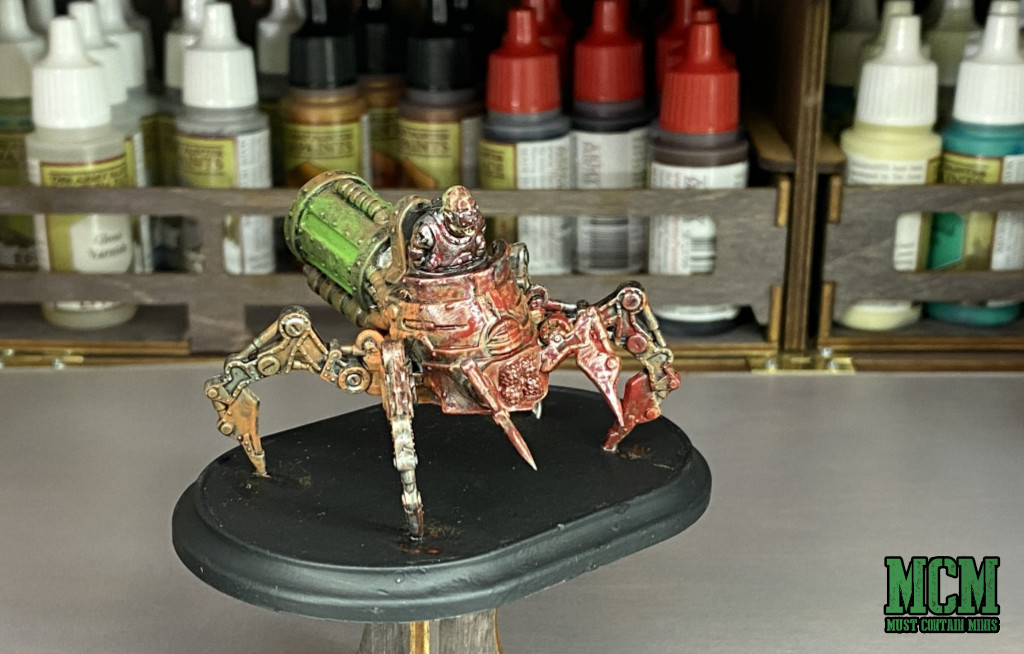
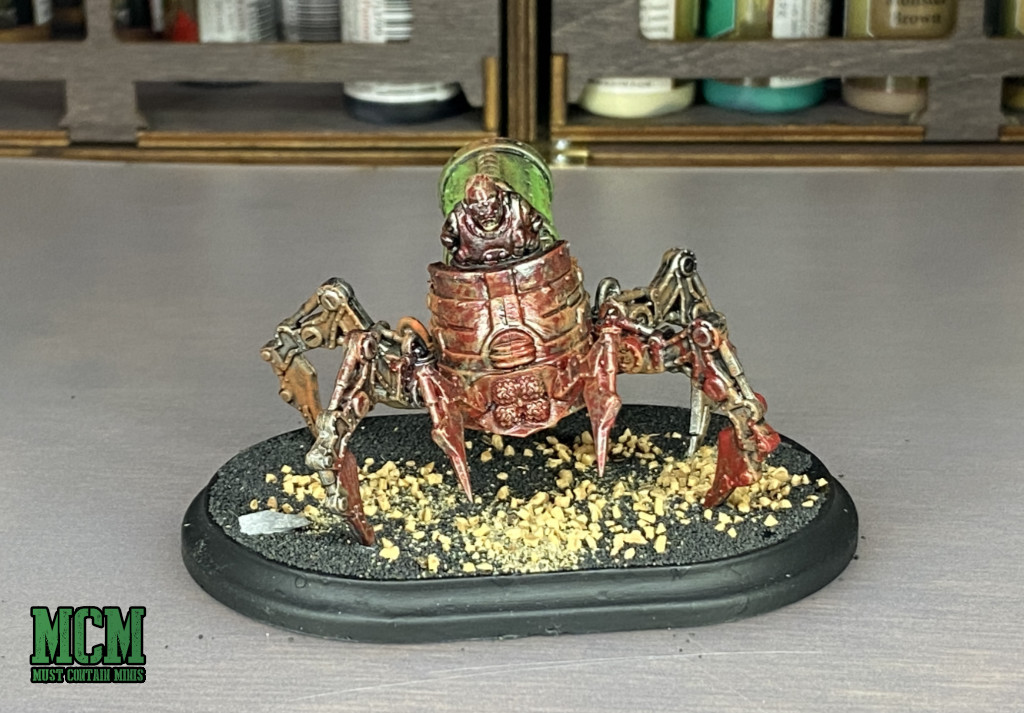
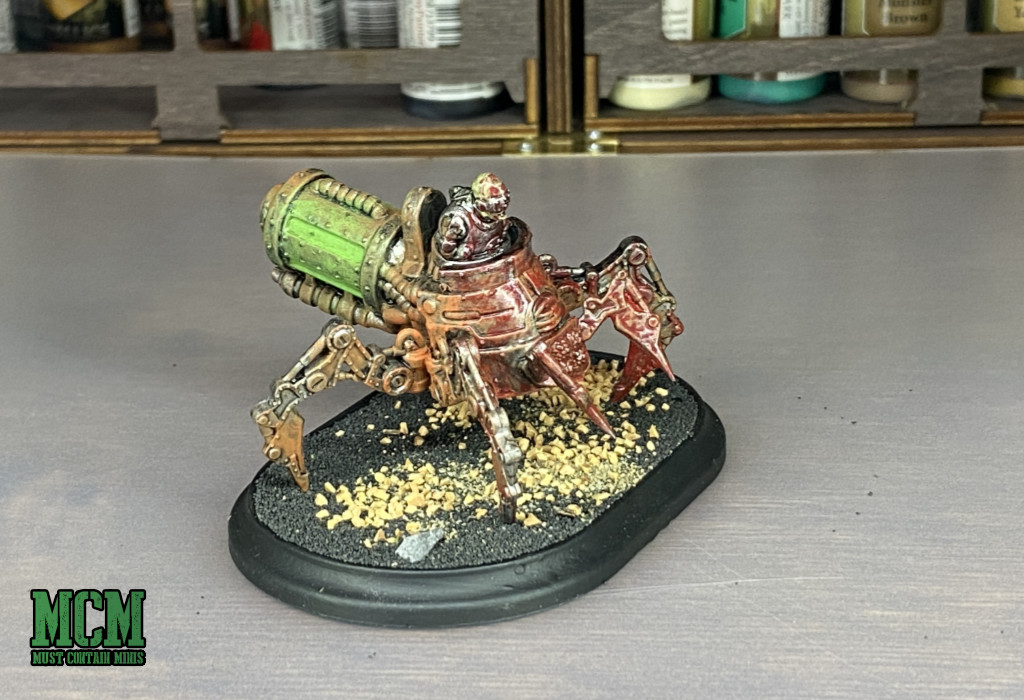
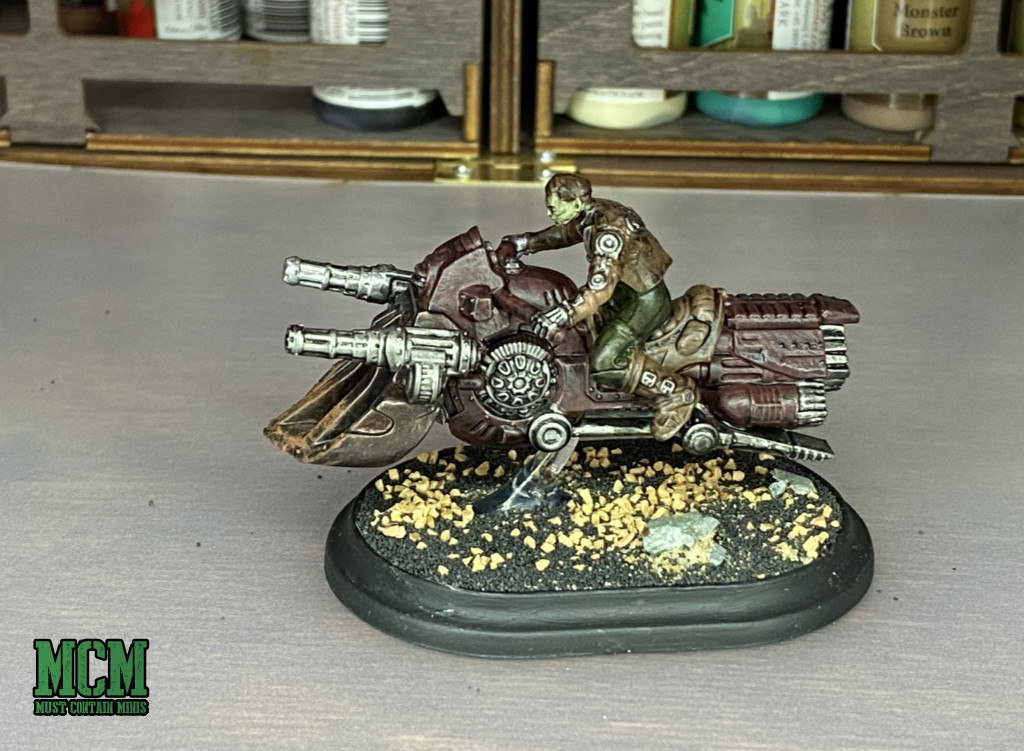
After dry-brushing on the original colors, and Dry Rust Effect, I used extra green for the glowing areas. Again, that is all done by dry-brushing. After that, I added on the blood splatter. To do this, I used The Army Painter Glistening Blood Effect. This time, I dabbed the effect on with a brush.
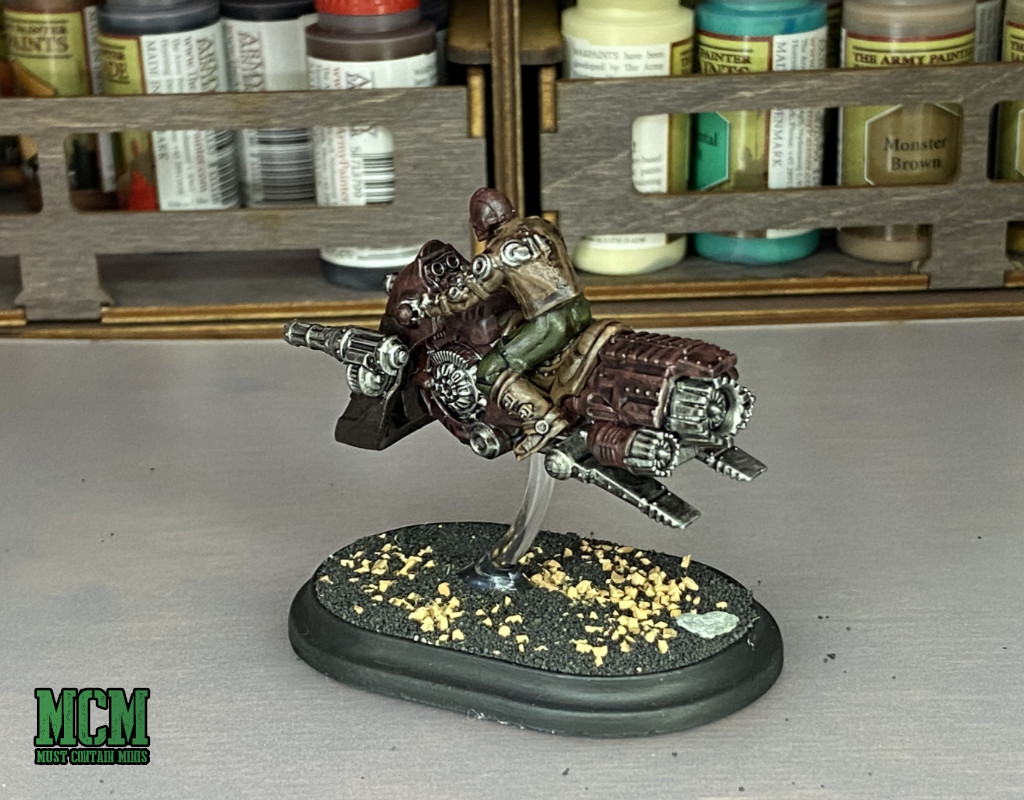
For completeness, here are the other minis at this stage.

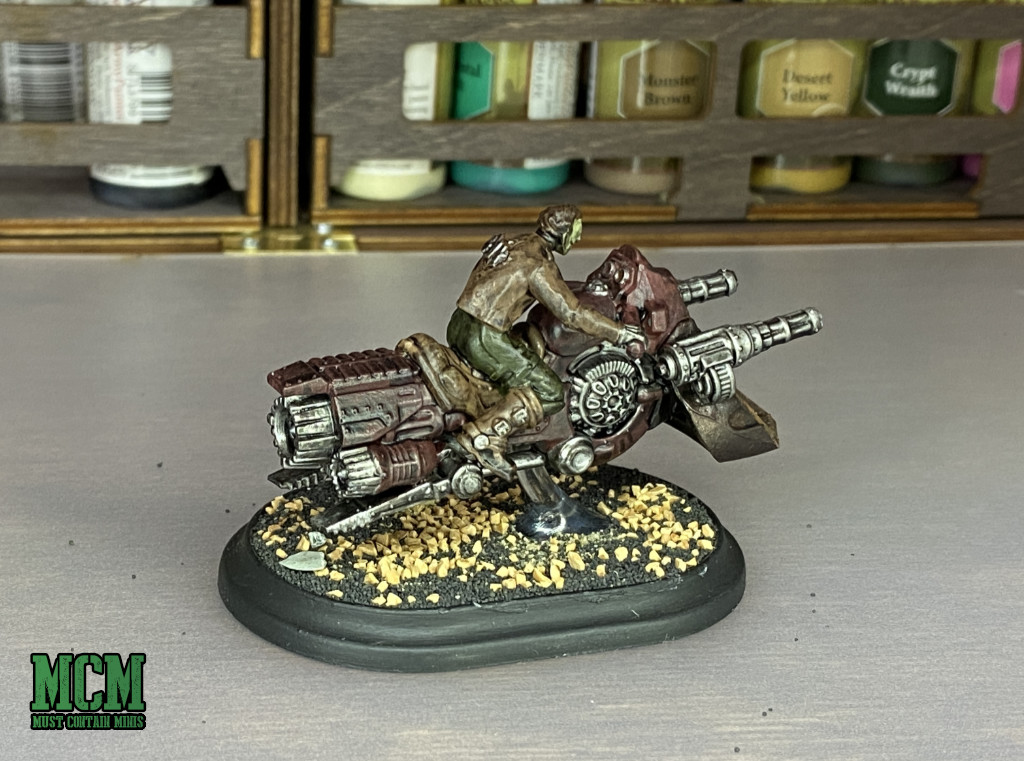
Step Five – Add the Base Materials
Some people do more, and some people do less. My approach is to cover the base in white glue (PVA glue) and to then cover it with basing materials. The Army Painter does some great ones. Unfortunately, I had to use basing materials from other manufacturers because what I own already by The Army Painter did not fit the setting.
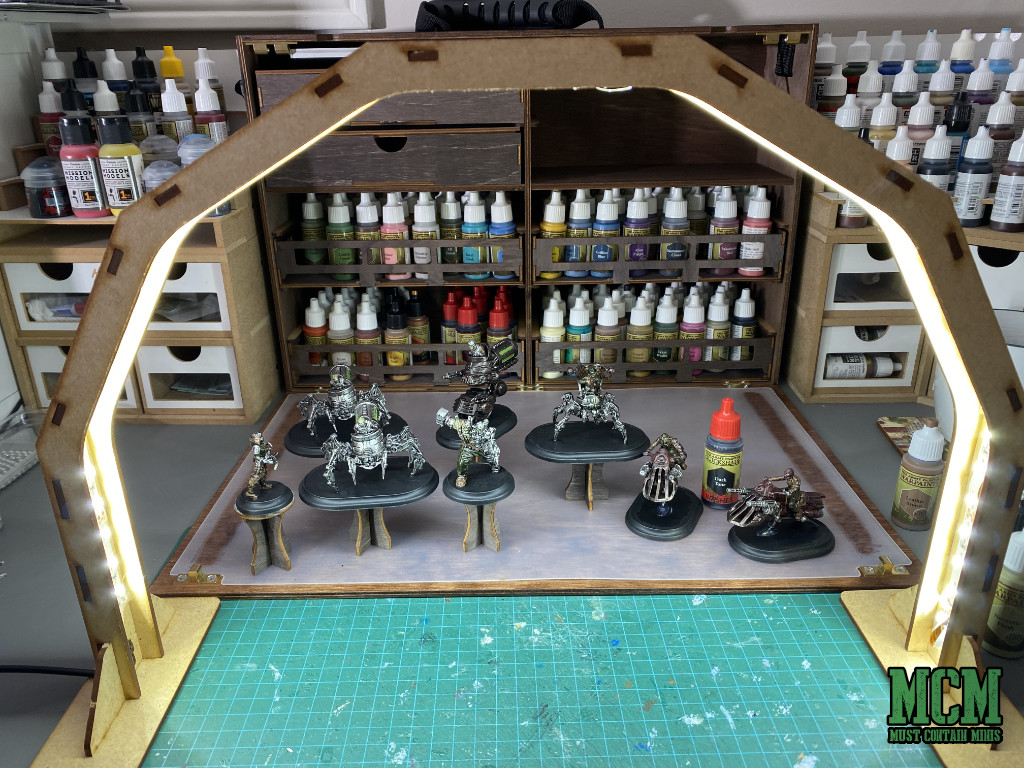
At this point, the miniatures are done. They look great and were fairly quick to paint too. Now, let me tell you which colors I used to paint these minis.
My Paint Recipe for the Enlightened Miniatures of Wild West Exodus with The Army Painter
To paint this group of miniatures, I used The Army Painter Brush on Primer, and the following colors.
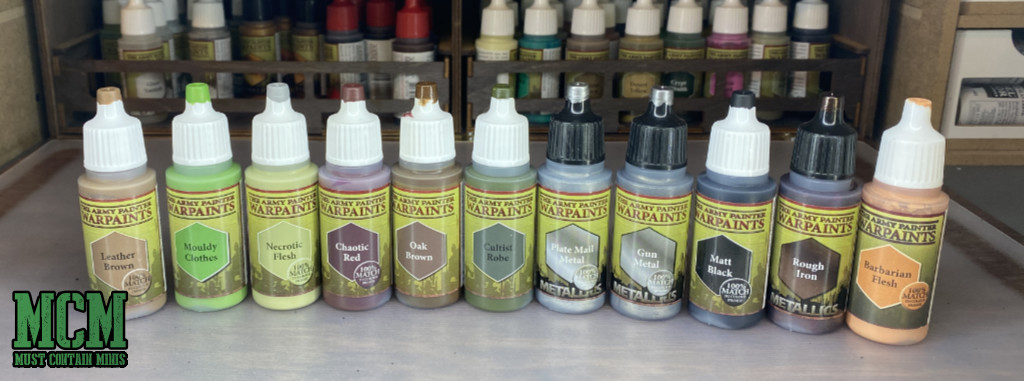
The Paints I Used by The Army Painter
| Color | Items Paitned |
|---|---|
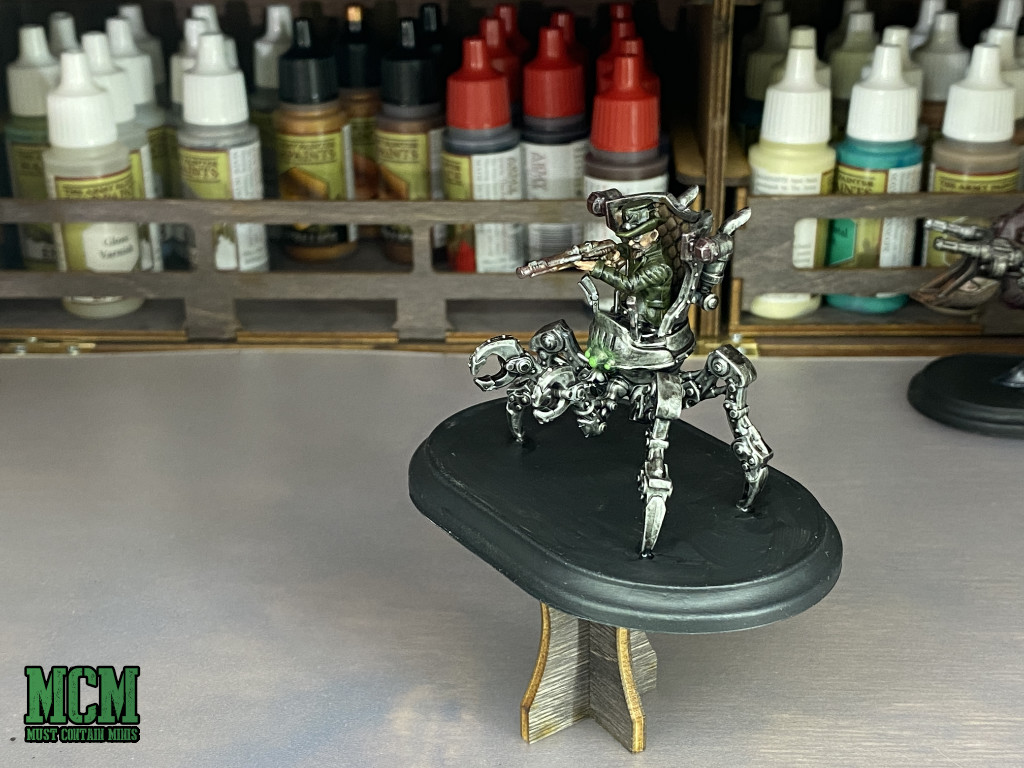
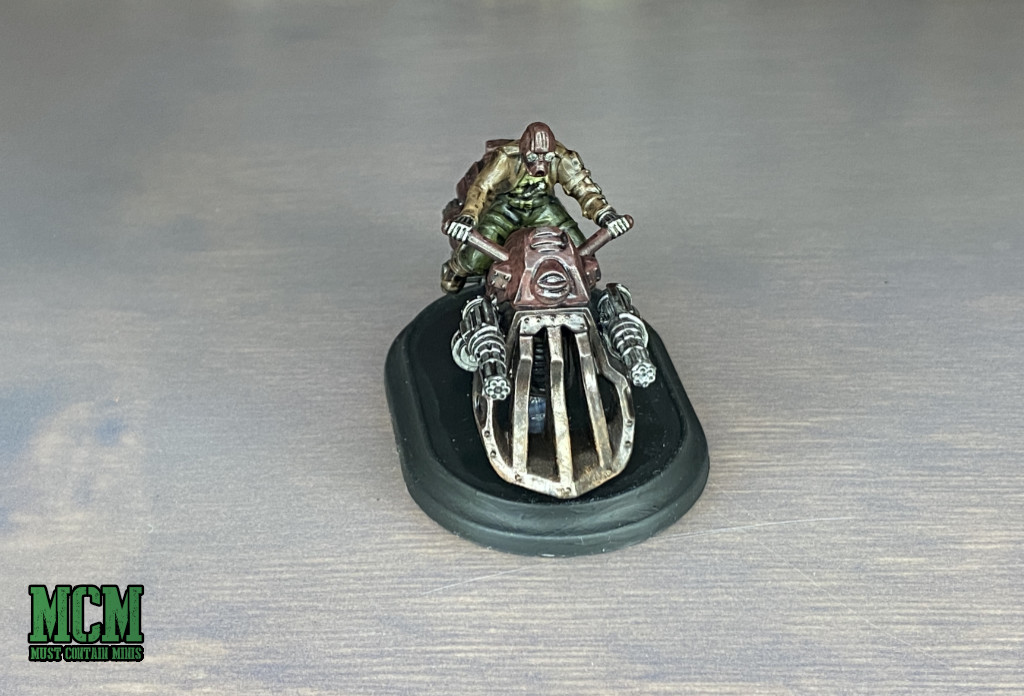
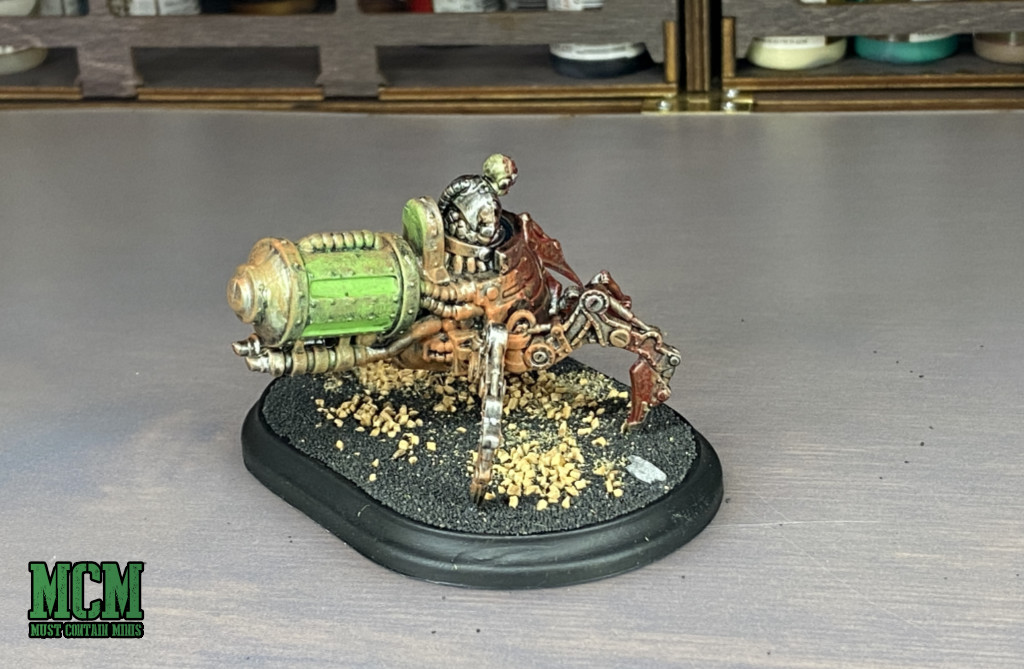
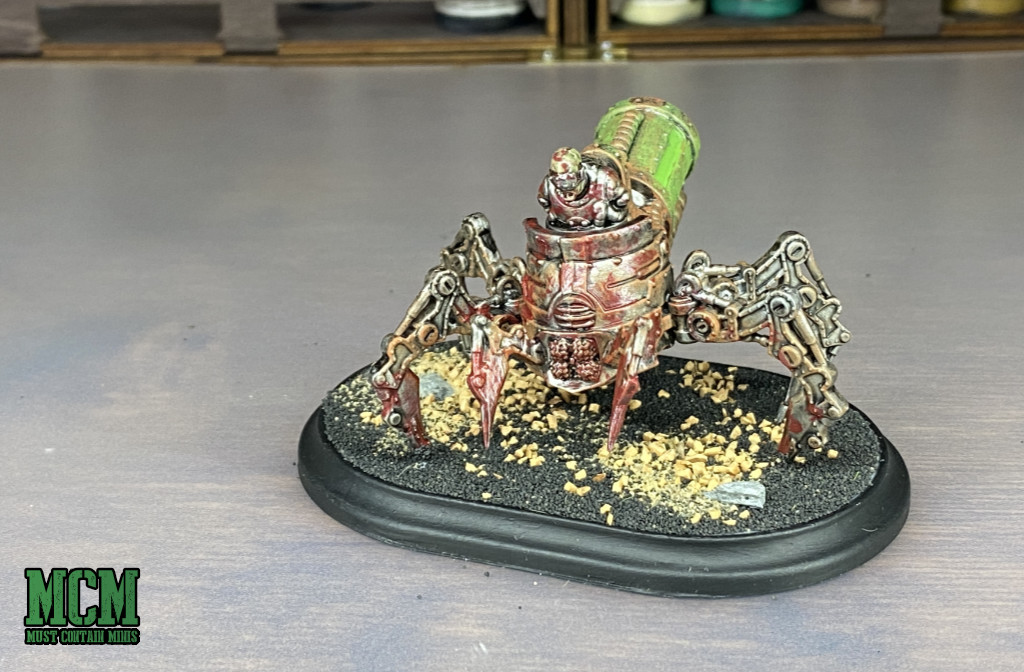
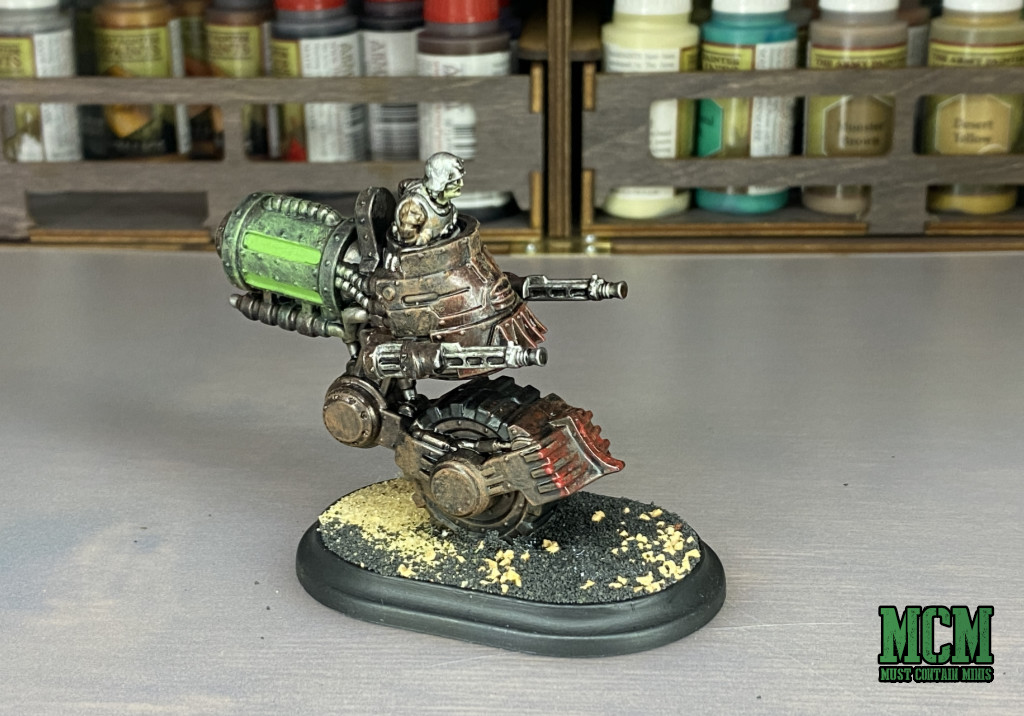
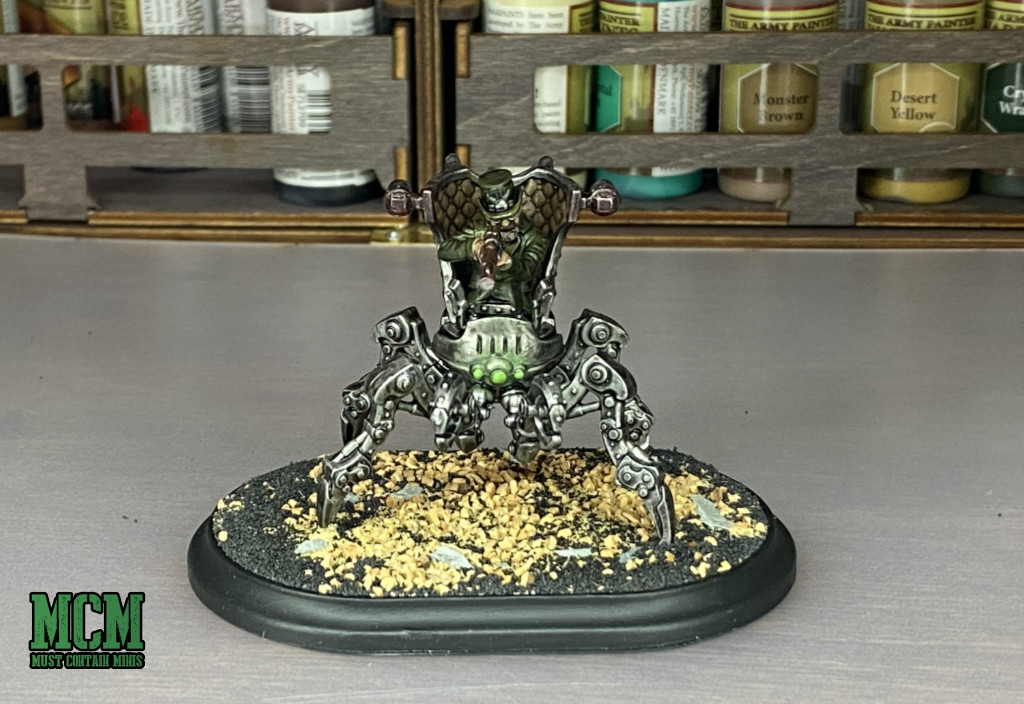
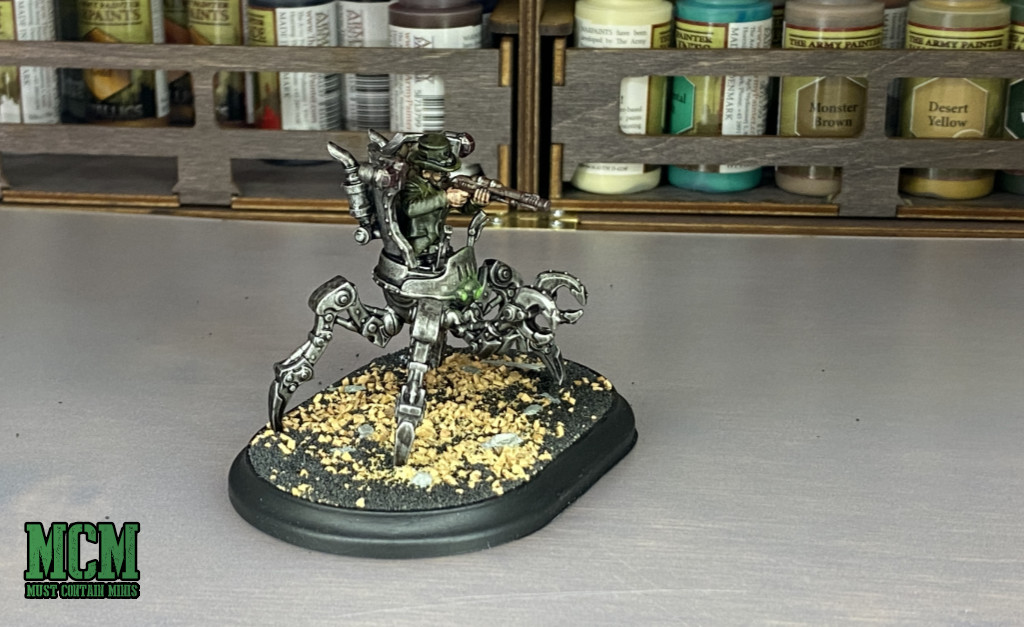
| Gun Metal | Body of Spider Cav, metal body of Smash & Grab, Emily’s armor, guns of Mono Cav and Iron Horse Hovercycles, body of the Boss’s spider. |
| Rough Iron | Body of the Mono Cav. Head of the Robotic Dog in Emily’s hand. |
| Plate Mail Metal | Torsos of Spider Cav and Mono Cav riders. |
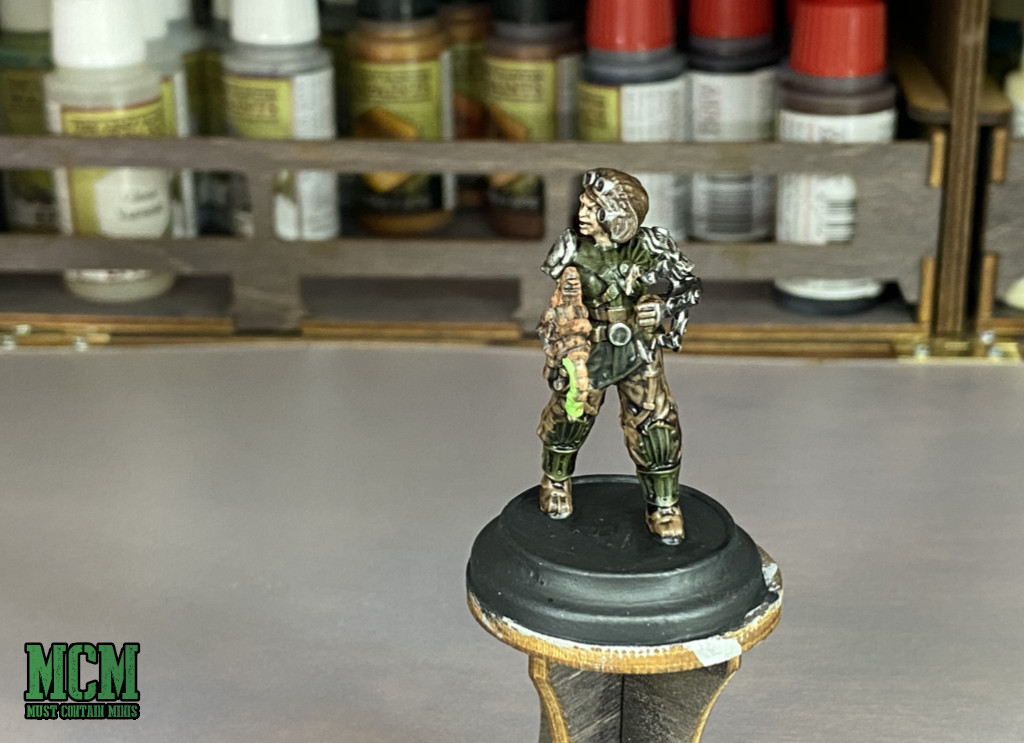
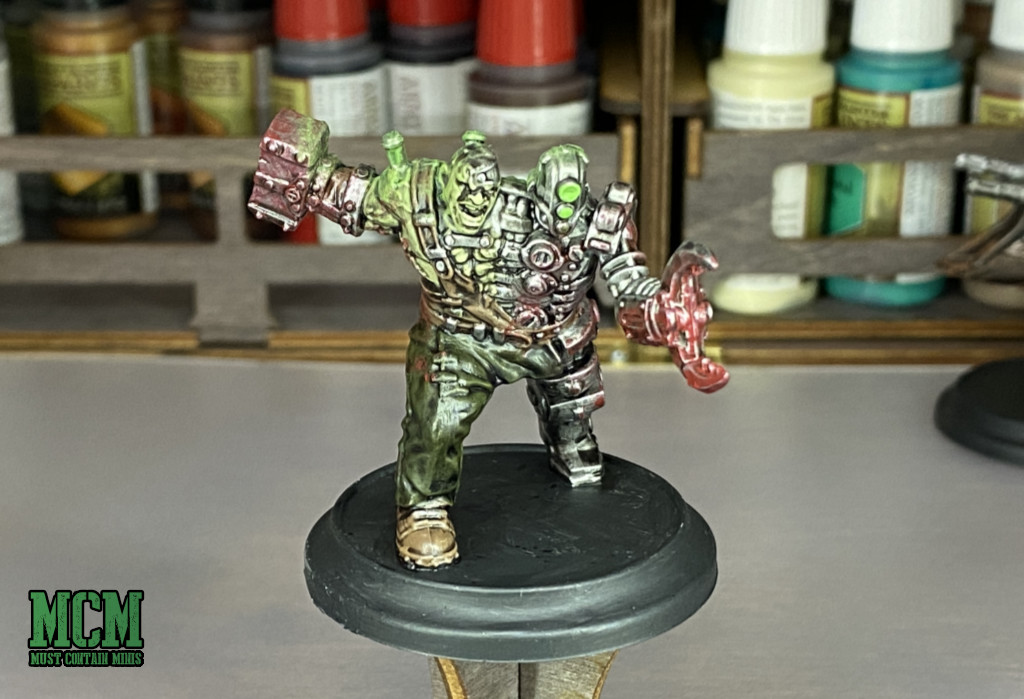
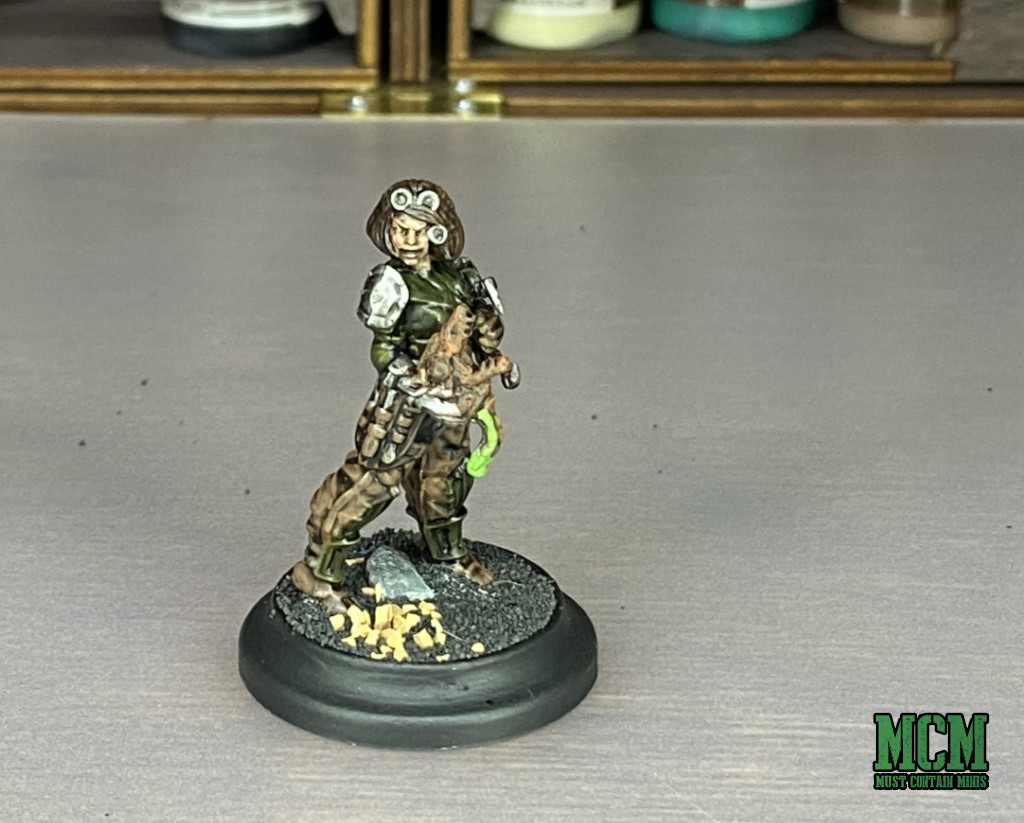
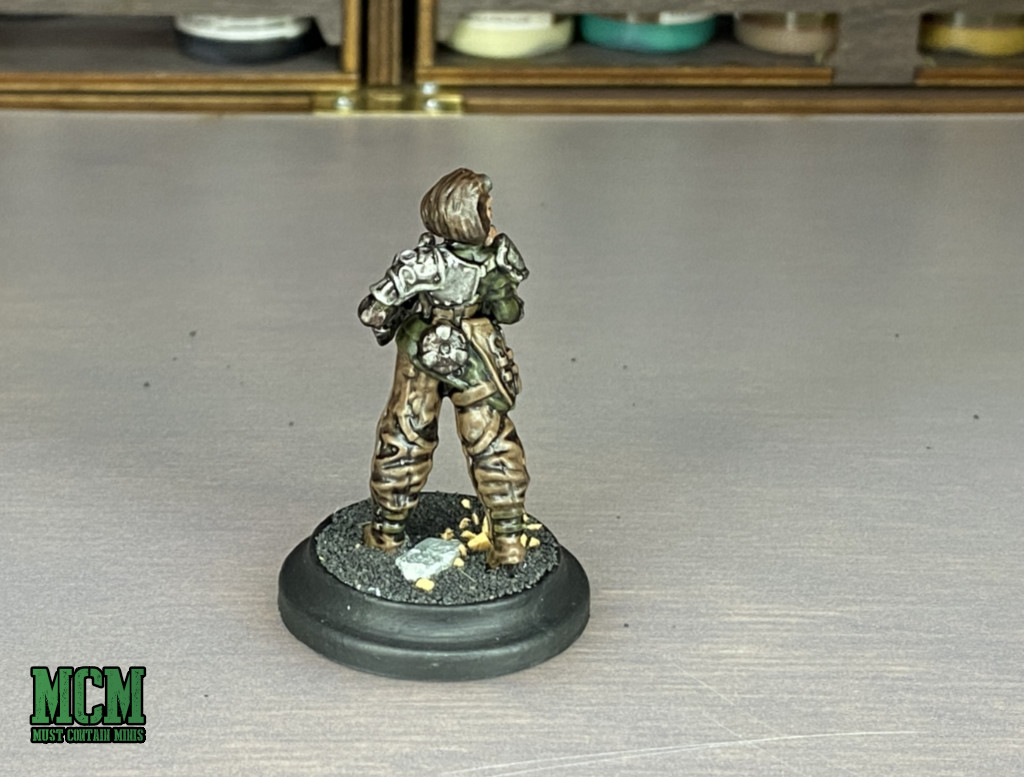
| Barbarian Flesh | Emily and the Boss’s (Gustave Eiffel’s) skin. |
| Cultist Robe | Pants of the Iron Horse Riders, Jacket and Hat of the Boss, and Emily’s shirt. |
| Oak Brown | Rifle carried by the Boss. |
| Chaotic Red | Body of the Iron Horse Hovercycles. |
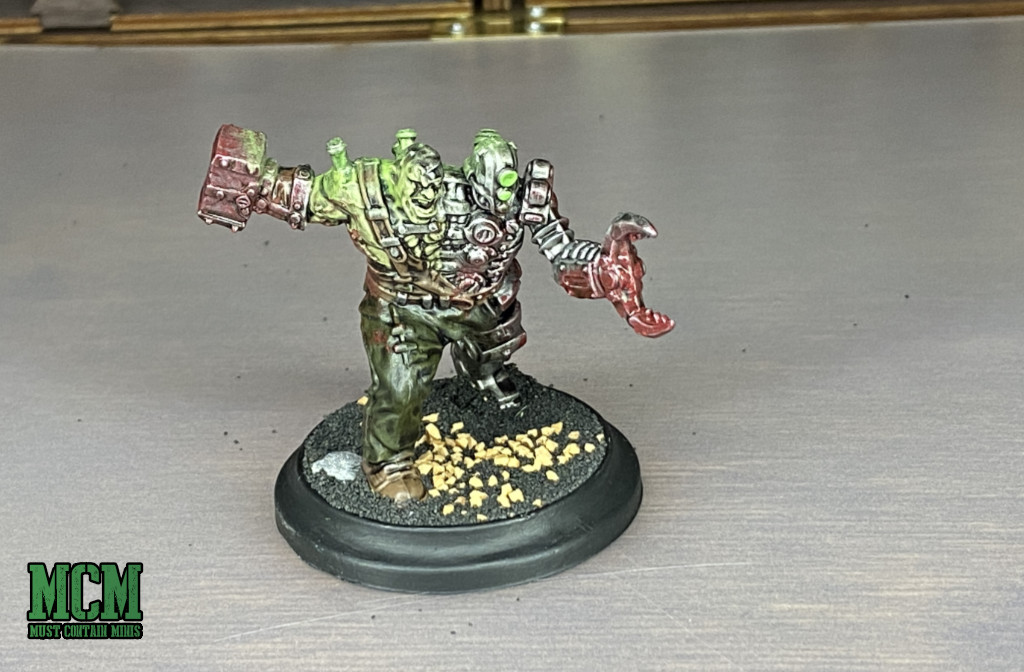
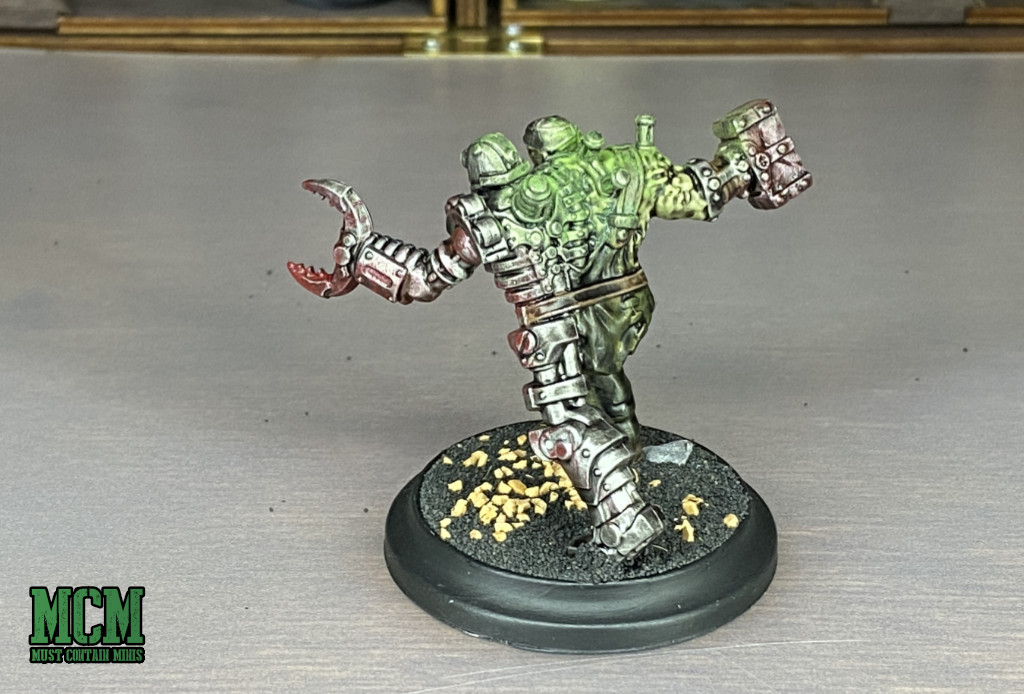
| Necrotic Flesh | Skin of the Iron Horse Riders and Smash and Grab. Also used for the faces of the Spider and Mono Cav Riders. |
| Mouldy Clothes | Bright green areas of the batteries, orbs and robotic eyes. Also used with dry-brushing to create a “glowing” effect. |
| Leather Brown | Used on the leather parts of the minis. Back of the Boss’s chair. Emily’s pants. Boots, coat and saddles of the Iron Horse Riders. |
| Matt Black | Used to paint the bases. |
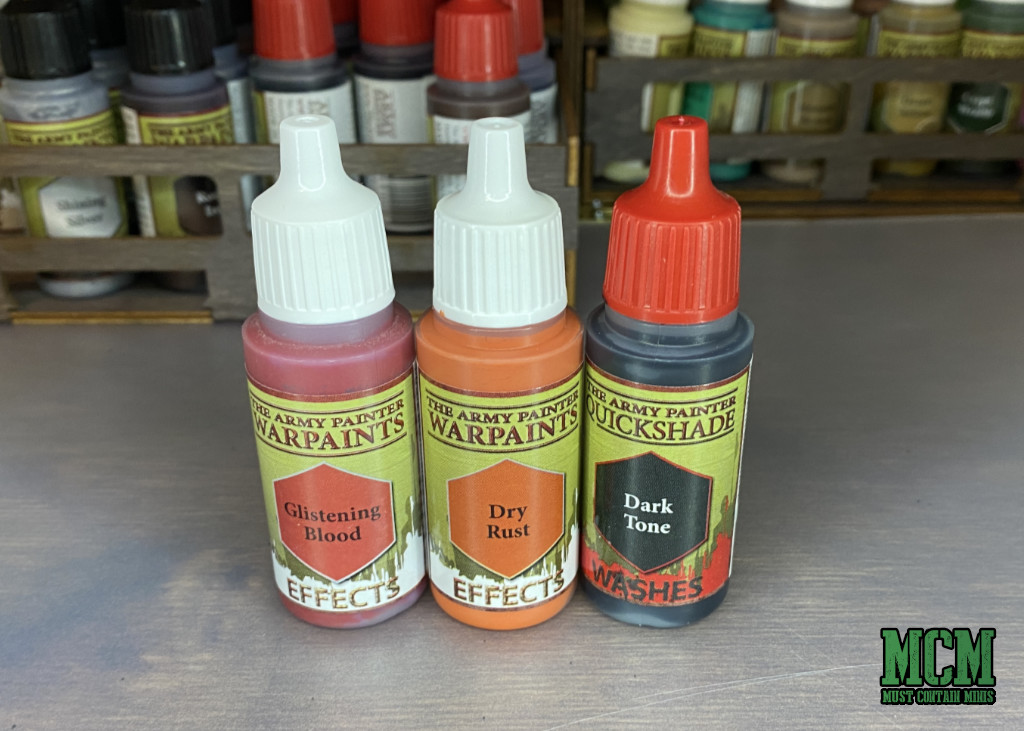
The Effects That I Used by The Army Painter
The Army Painter sure makes projects easy at an affordable price. I used their Quickshade Strong Tone Wash on this project as well as their Glistening Blood Effect and Dry Rust Effect. The Wash I used over the entire miniature. The Dry Rust I dry-brushed onto the Cav models as well as the Robotic Dog head in Emily’s hand. The Glistening Blood I applied by dabbing it onto the miniatures.
Where to Buy the Products in this Post – The Army Painter and Wild West Exodus
There are a few places that you can buy the products in this post. First and foremost, check your local stores and ask them. You could also check your favorite online stores. If you like them, it is good to support them with your business.
Missing that, you can buy the paints directly from The Army Painter or some online retailers too. Below is a list of some that you can try. If you buy from any with the word “Affiliate” beside them, those links earn Must Contain Minis a small commission at no extra charge to you.
- Check Price of the INTLLAB Vortex Mixer on Amazon [Affiliate Link]
- The Army Painter Wet Pallet on Amazon [Affiliate Link]
- Check Price of The Army Painter Mixing Balls on Wayland Games [Affiliate Link]
- The Army Painter Complete Wargamers Paint Set on Wayland Games [Affiliate Link]
- Check Price of Wild West Exodus at Wayland Games [Affiliate Link]
- The Army Painter
Wrapping it up…
There you have it. My five step process to painting miniatures. I had a lot of fun with these minis for Wild West Exodus.
The techniques shown in this post can be used for any system including Warhammer 40K, Legion, Oathmark and so many other games too. It is a general painting process that can be used on all miniatures to get some really nice results. I use this same approach to pretty much every miniature that I paint.
Hopefully you learned something from this tutorial, or at least enjoyed the read and pictures. Special thanks goes out to The Army Painter for sponsoring this post.
Until next time, Happy Gaming Everyone!!!