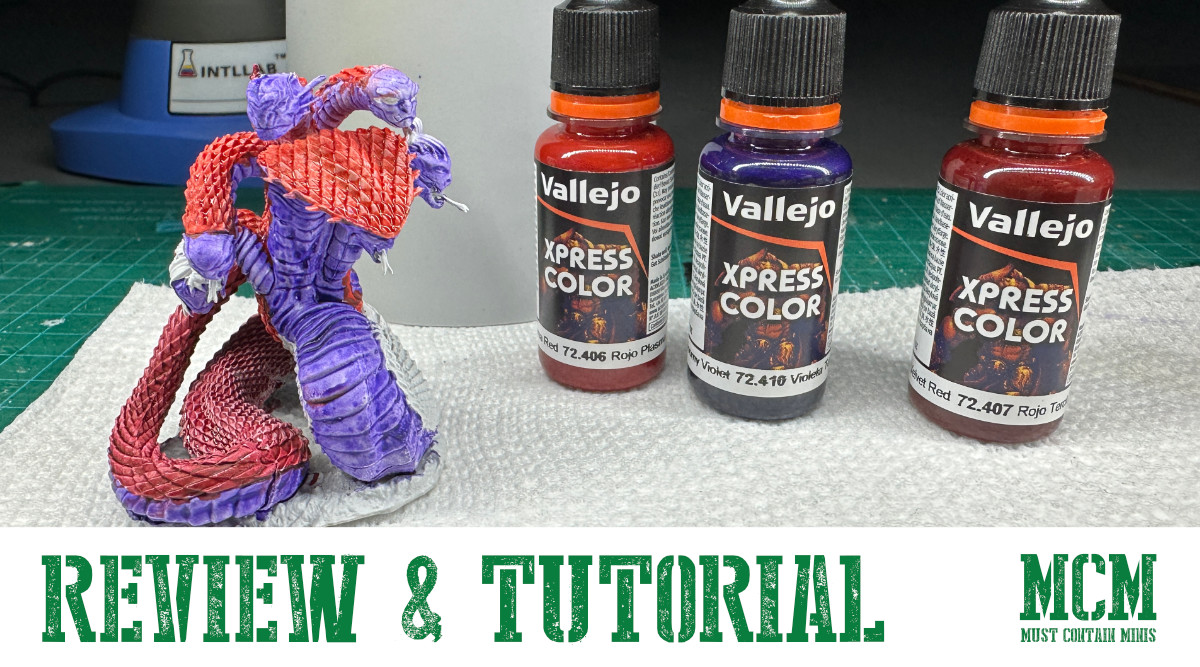
Recently I had a discussion with one of my friends who encouraged me to experiment and led to my first-time using Vallejo Xpress Colors Paint. The method I used to paint this miniature is essentially a quick version of slap chop. I will go over my steps used on this model in this post. The goal of this project was to see how much time Xpress colors save. The answer is a lot.
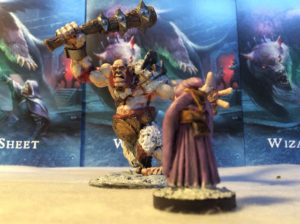
My friend told me it took 20 minutes for him to paint up his three 3D printed Les Grognard Ogres, while it took me about 4 hours to paint up the same three Ogres using a traditional method. After hearing this, I had to go out and buy a few Xpress Color Paints and test them out for myself.
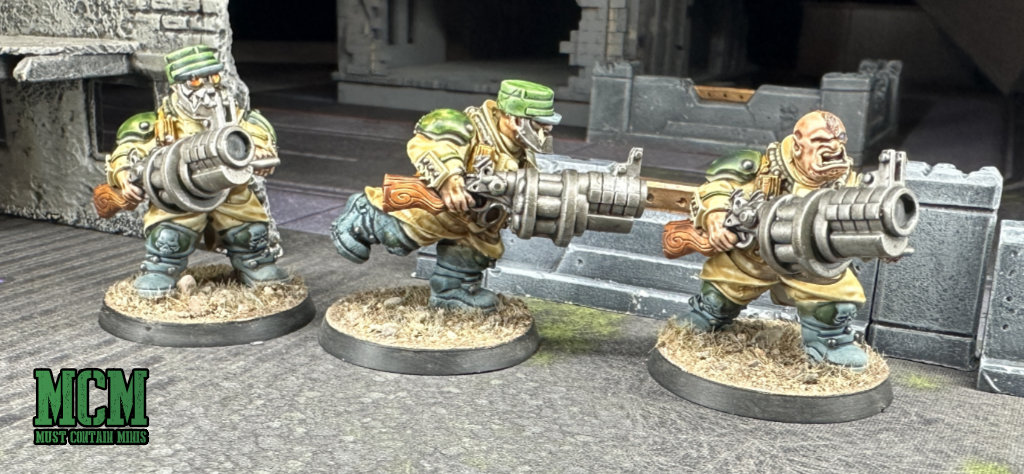
These miniatures took my friend just 20 minutes to paint! He used the method I am going to describe below.
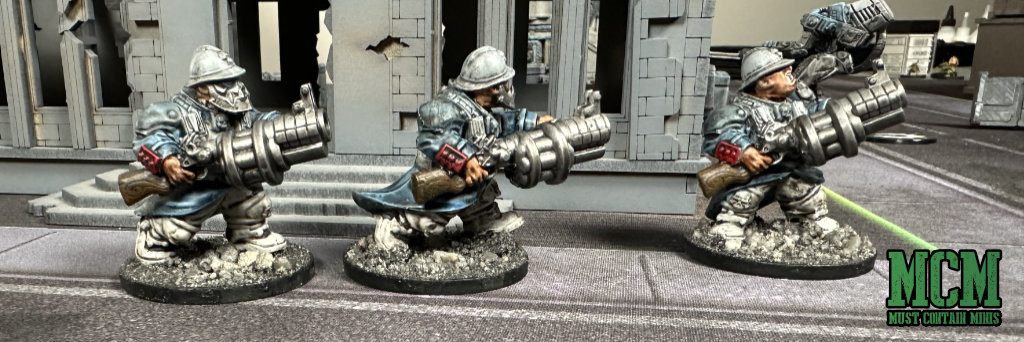
These guys took me about four hours, and I used the traditional method of Base Color, Shade, Highlight.
So, with his encouragement, I went out and bought some Xpress Color paints to see how fast I could paint up a somewhat large sized model. I chose to use a WizKids unpainted miniature because they come pre-primed. A nice benefit for those of us just wanting to paint up a miniature. Below is the end result of my paint job. I will describe how I painted the figure in this post.
Using this modified slap chop method, I painted this model quick! I believe it took under an hour. Let’s go through the model and process below. There is both a video version and written version of this post.
The Video – Using Vallejo Xpress Colors
If you prefer video, check this out below.
If you prefer written work, scroll past this and continue down the post.
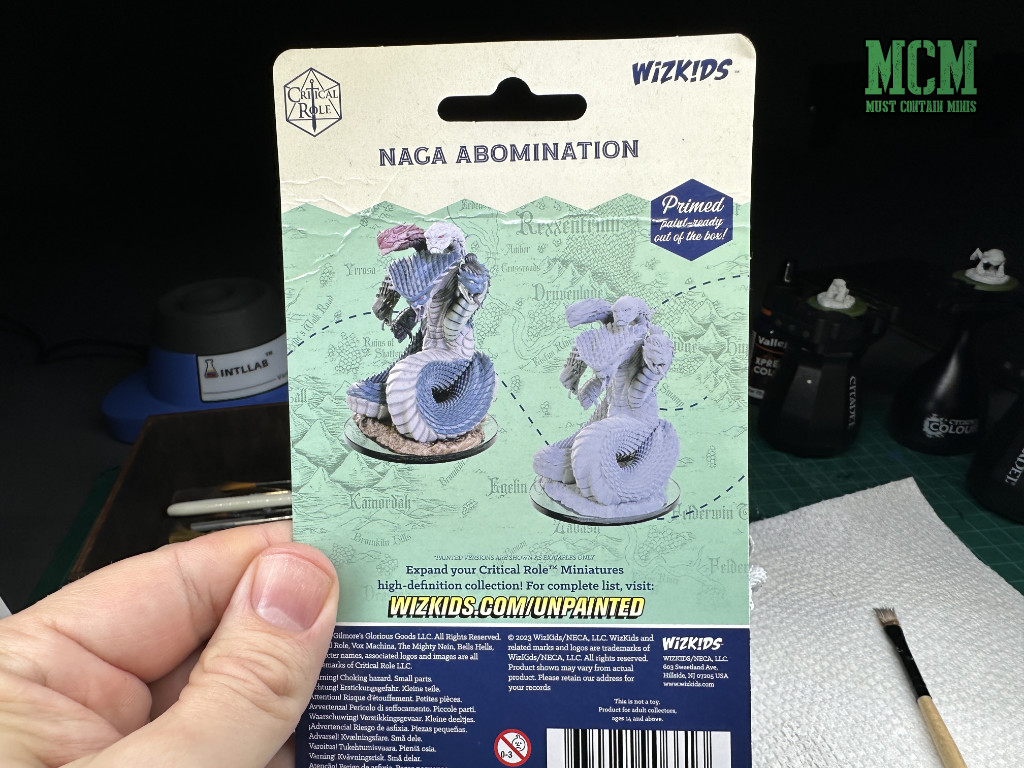
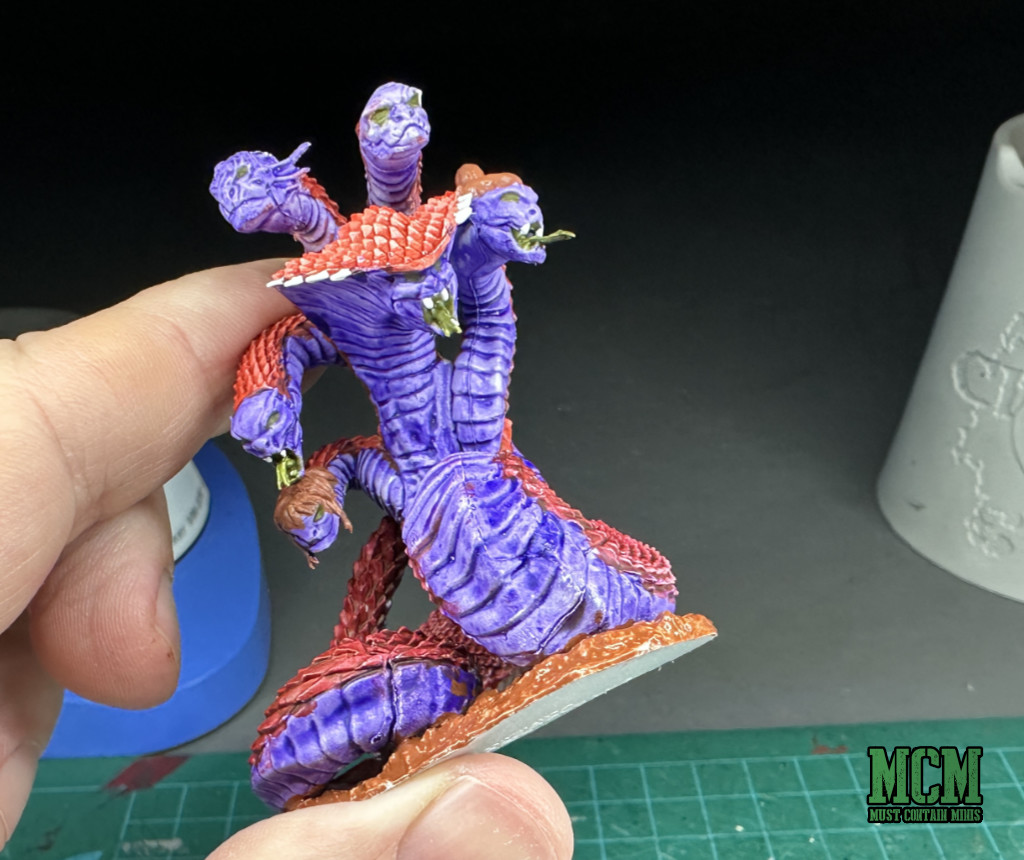
Painting The Model – WizKids Naga Abomination
For this project, I decided to use a WizKids Pre-Primed, unpainted miniature. This is the Naga Abomination from their Critical Role line of figures. To actually paint the miniature, I went through the steps below.
Step 1: Prime
This model is already primed in a light grey color. Step completed without having to do anything!
Step 2: Dry Brush White
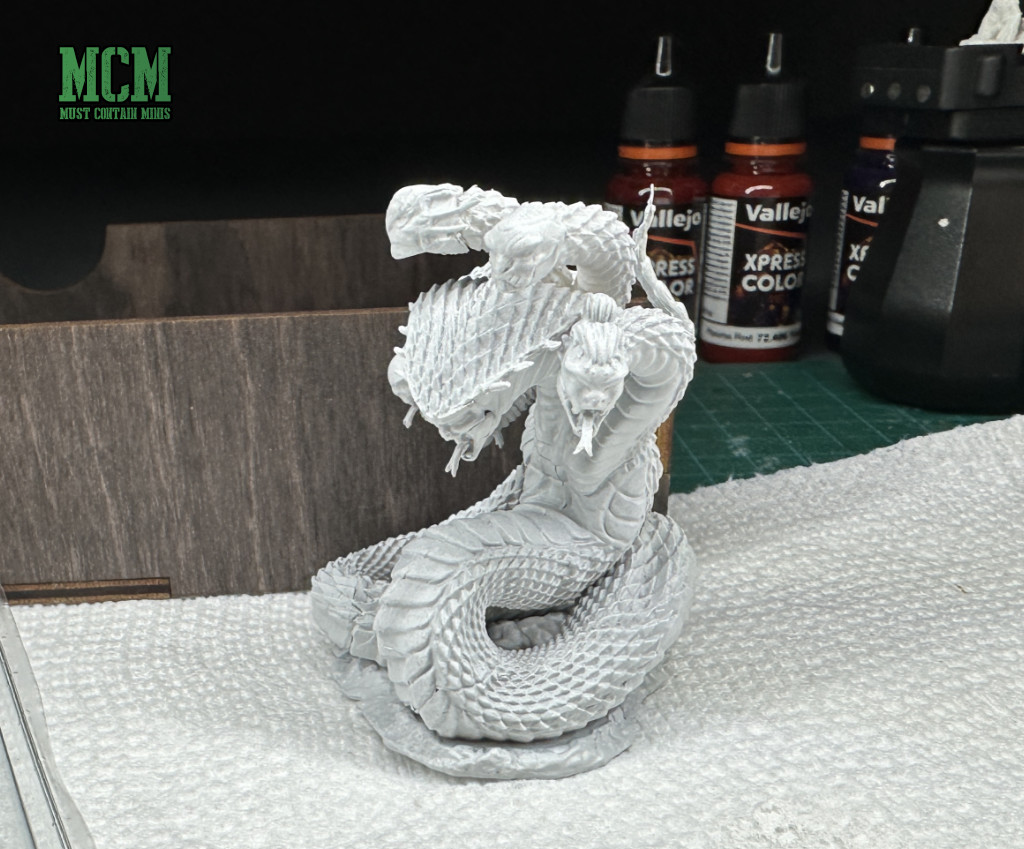
For step two I decided to quickly dry brush it with white to give a little of differentiation between the higher and lower parts of the model. It is a way to create highlights in the model for when you use Xpress Color Paint. Many people go further than this when they use the slap chop method. They will paint the model black, drybrush much of it grey and then paint the top parts white.
This approach makes the translucent xpress color paint do more work with less effort. The recesses of the model will be a dark version of the color while the top parts will be much brighter.
After painting the raised areas white, I proceeded to use Gloomy Violet Xpress Color paint to try these paints out for my first time. Here we go!
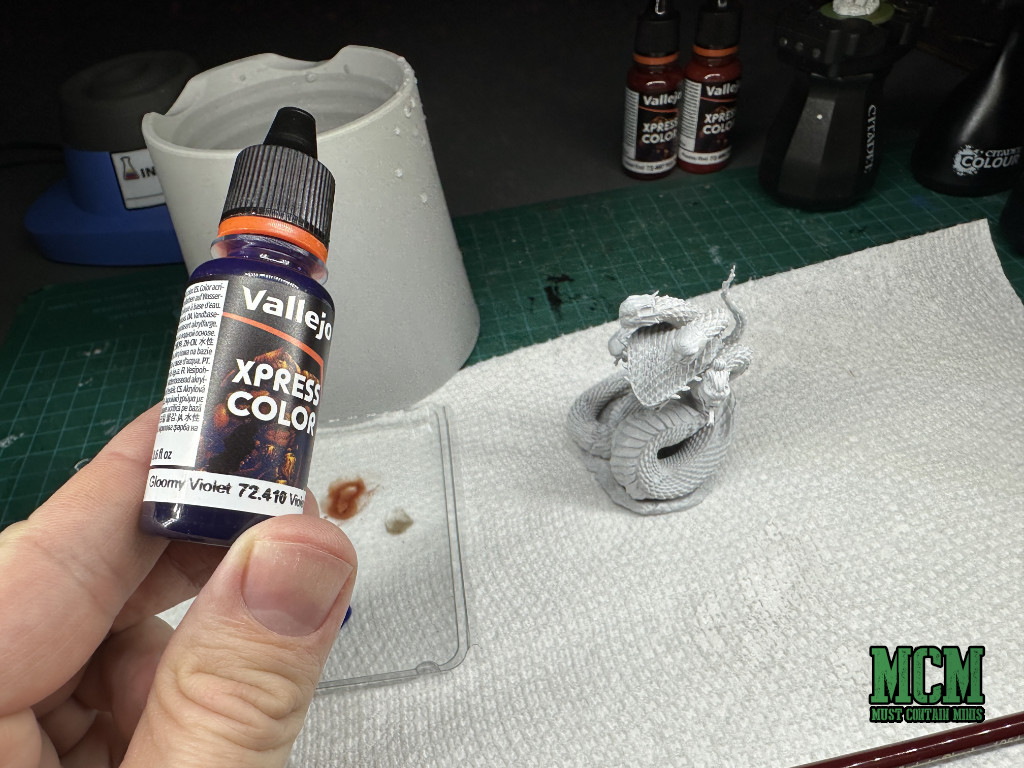
Step 3: Paint the Model in Xpress Color Paints
I gave the model a single coat of that xpress color paint. to ensure the paint went where I wanted it, I painted in small sections and pushed the paint towards the recesses so it would pool there. I was tempted to give it a second coat of purple, but my friend told me not to as it would eliminate some of the color differences on the model. So, I moved to the next color.

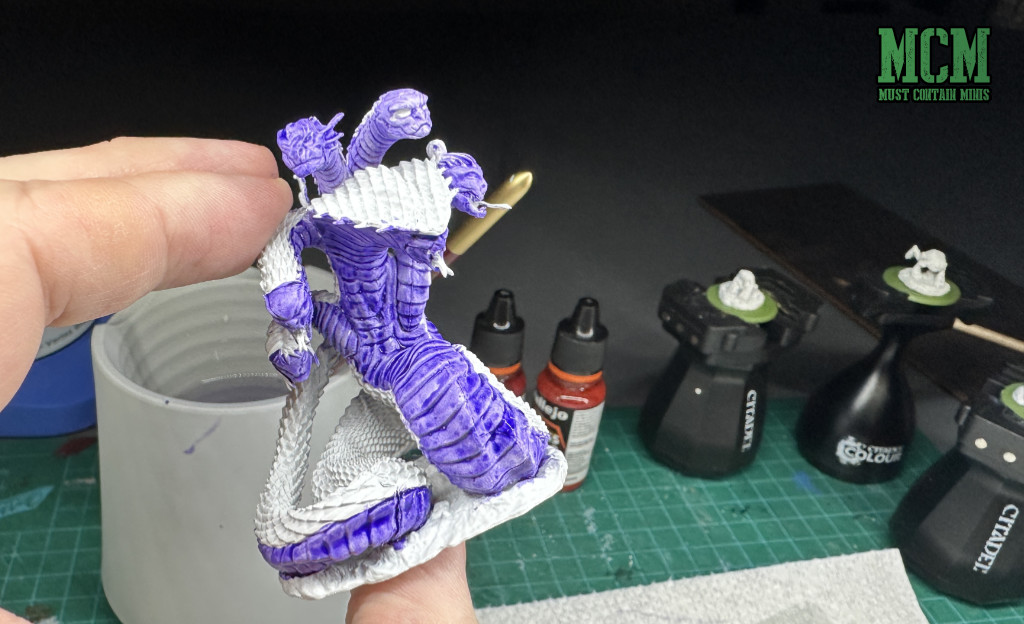
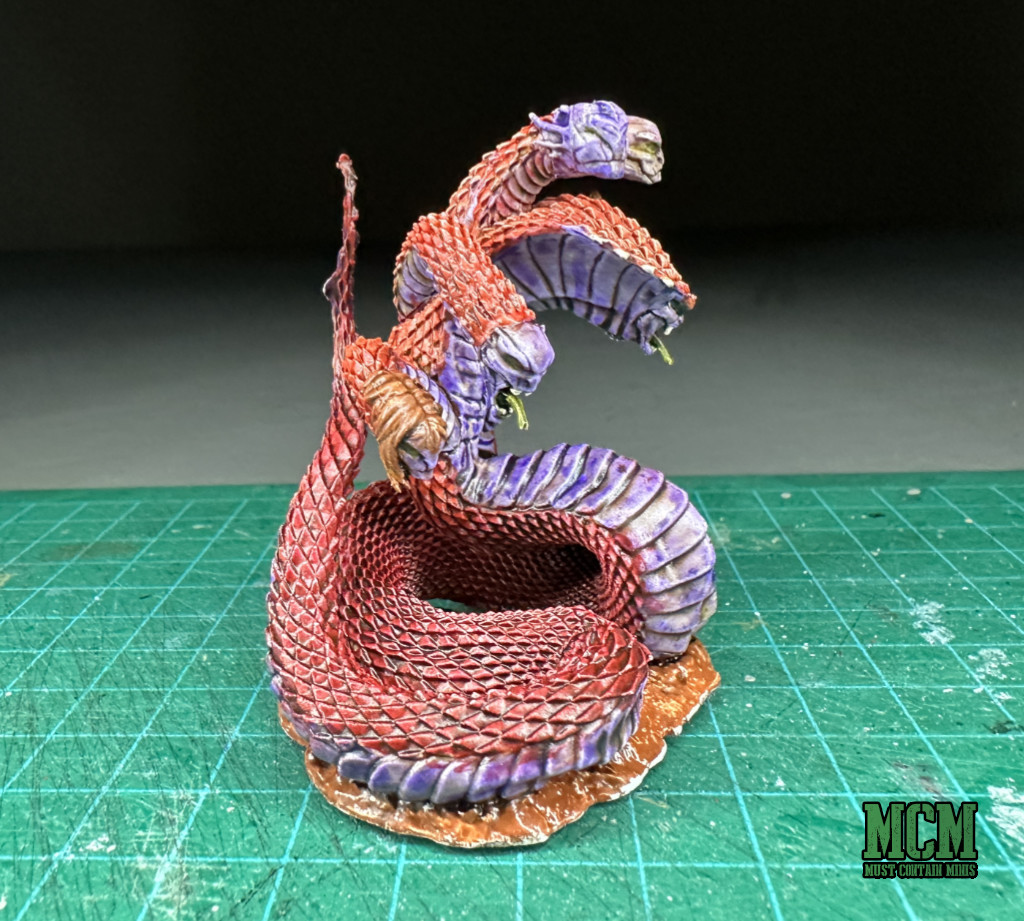
I painted the bottom with Velvet Red and the top with Plasma Red.
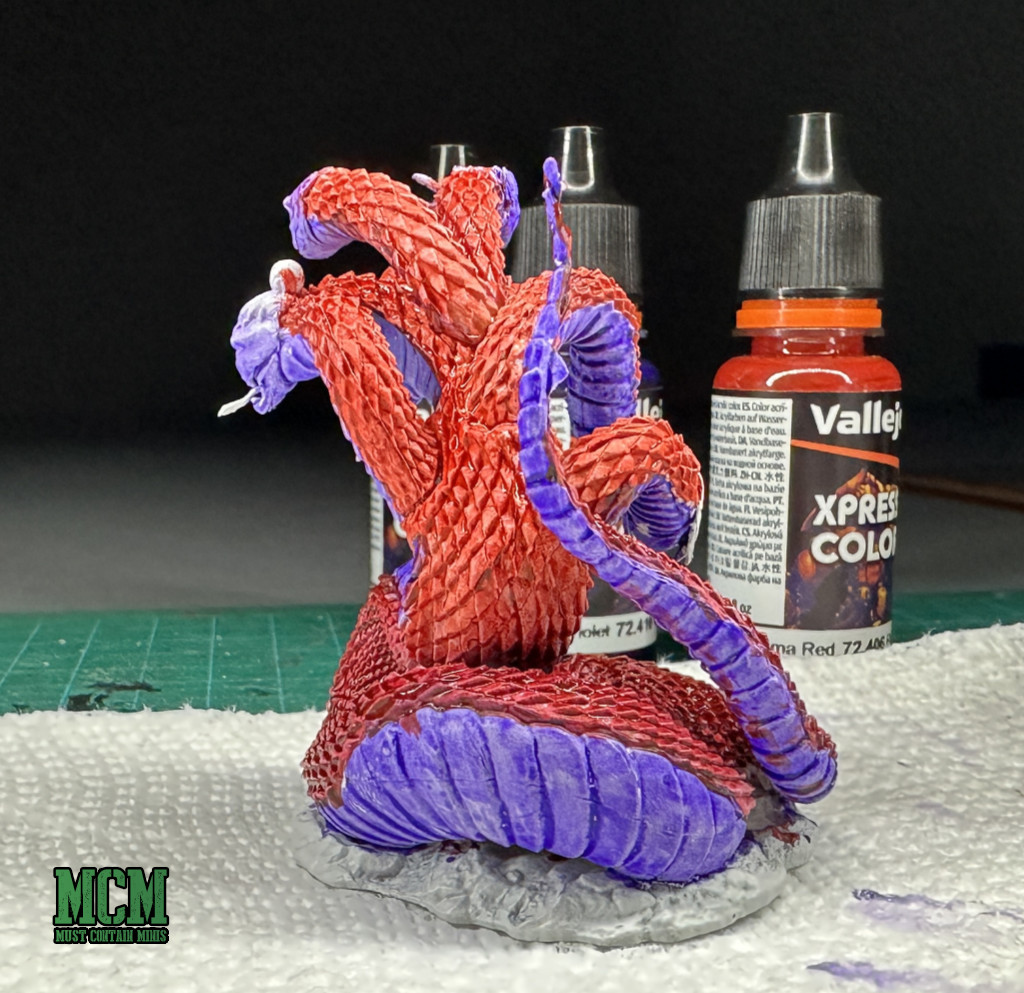
While the two colors were wet, I blended them a bit in the back of the model. The end result looks pretty good!
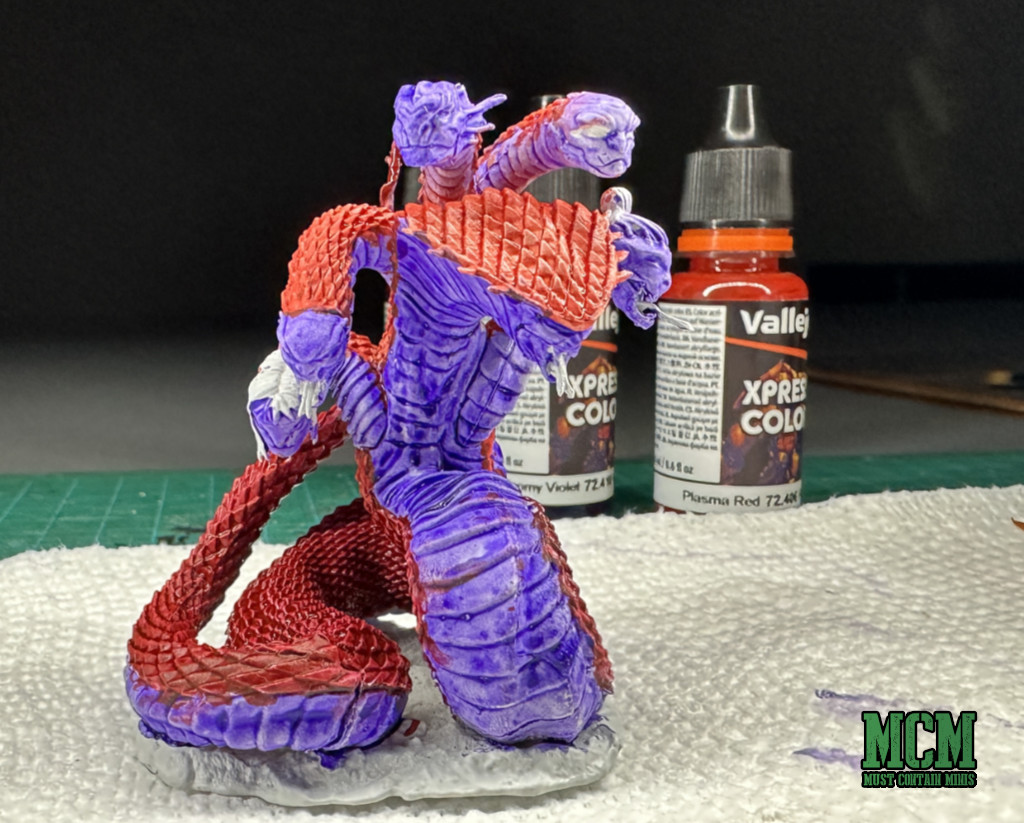
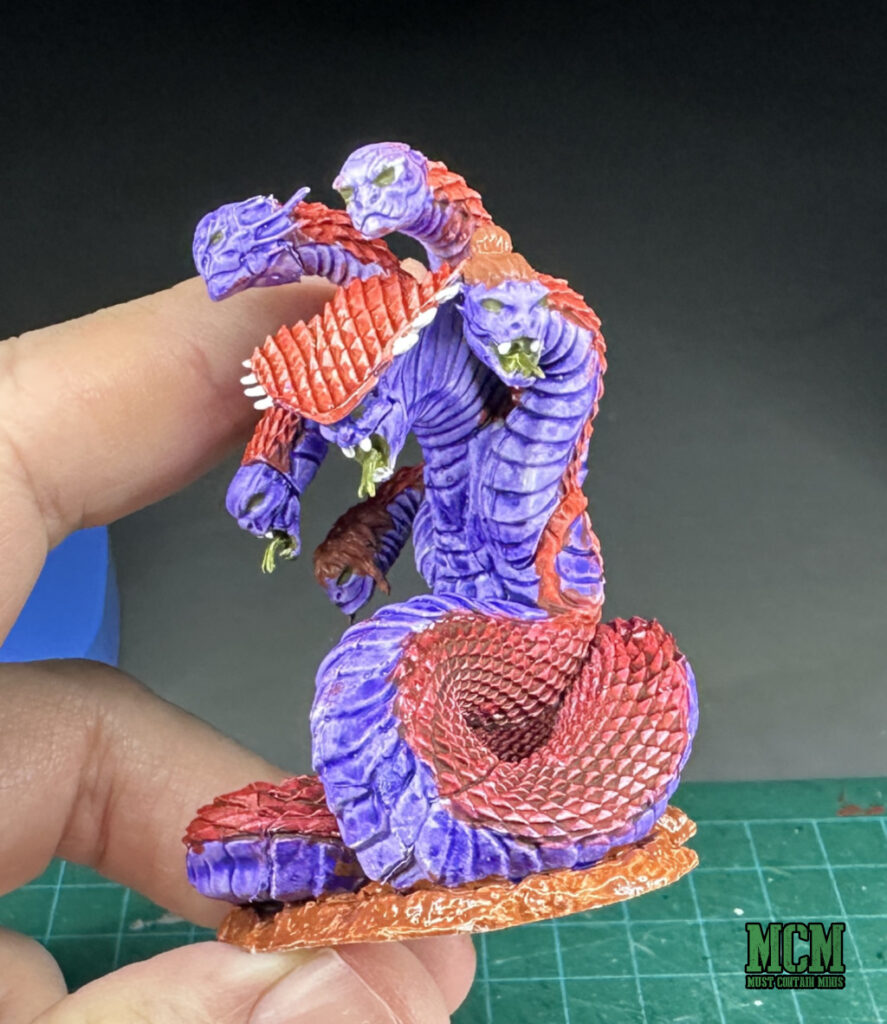
This is the model before any highlighting or shading work. The paint does most of the work on its own. In the end, I didn’t bother with any highlighting work, but I did use shades on this miniature.
The model at this point is just primer, white paint and Xpress Color paints. It looks great for under 20 minutes work.
At this point, I decided I wanted to add a few more colors. I moved back to traditional paints at this time.
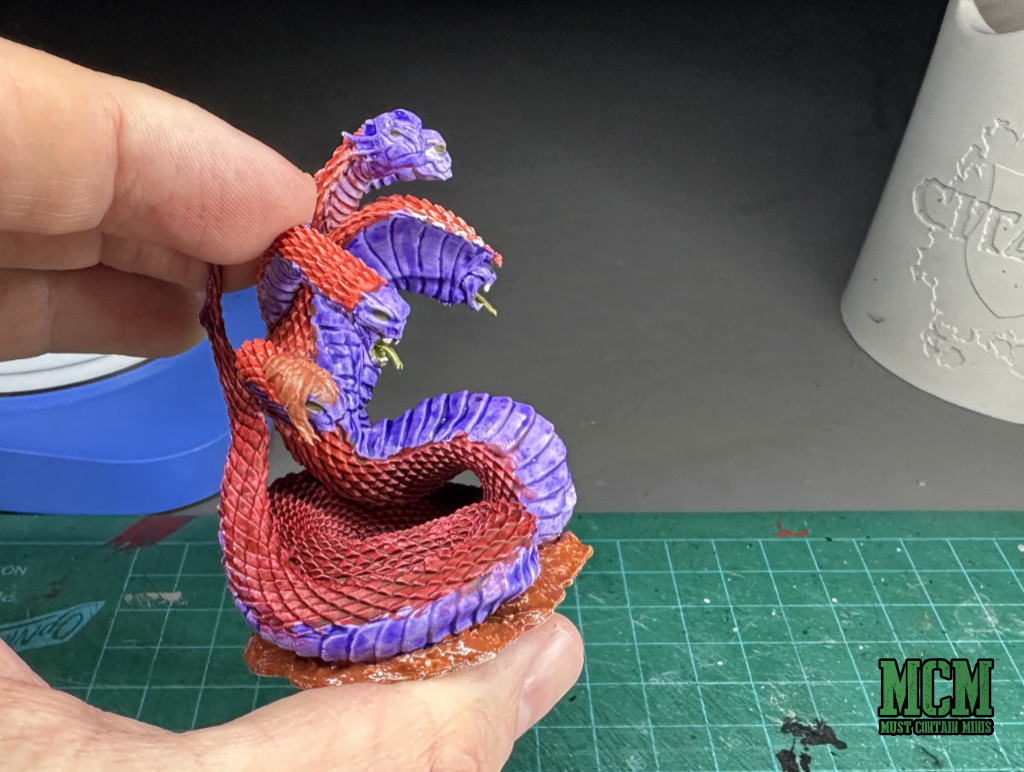
Step 4: Add More Colors – Traditional Paints
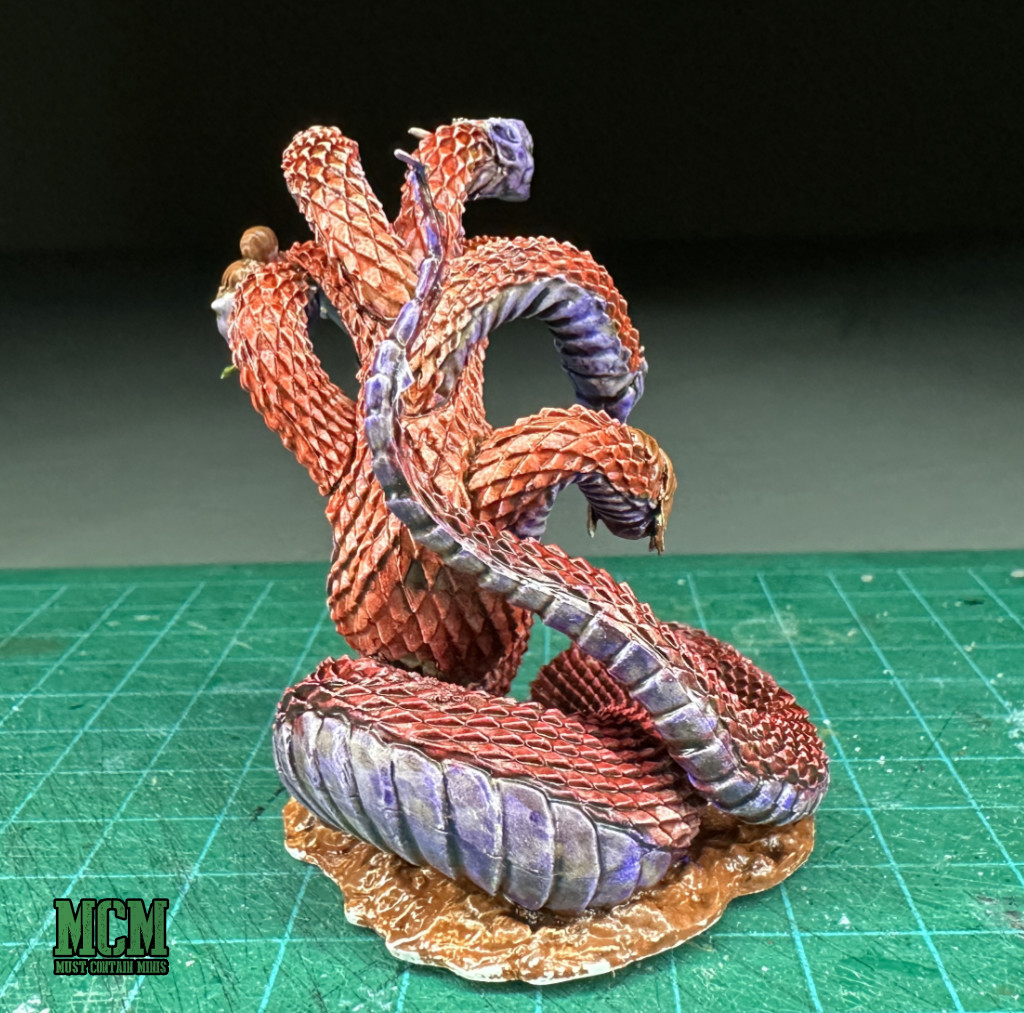
To continue the model, I painted the hair brown, the teeth and spikes white, and the mouths and eyes of this miniature green. This time, I used my normal hobby paints. Nothing special.
Honestly, I could have finished the model here and it would be good enough, but I decided to do another step after this one.
It looks awesome with minimal effort. I think this took me all of 20 minutes. It wasn’t long – especially compared to the normal method I use to paint miniatures.
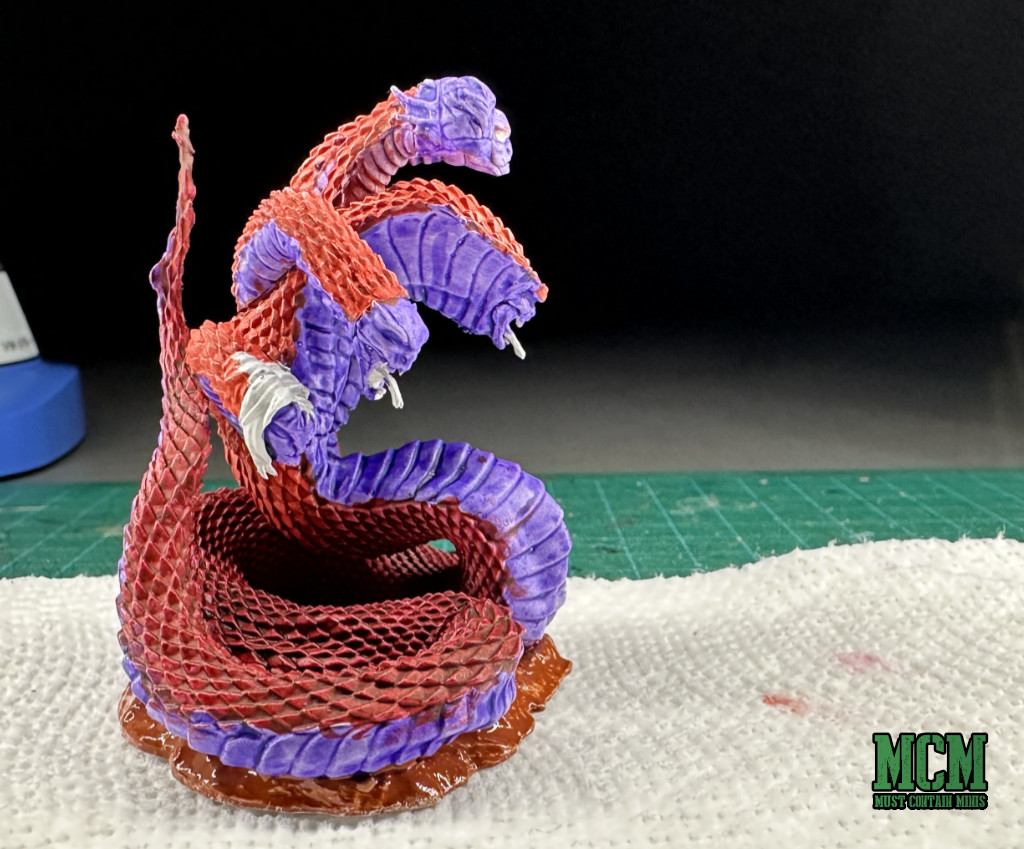
Step 5: Apply Shade
At this point, I figured the model was good enough, but I wanted to make it even better. To do this, I hit the whole thing with a strong tone wash. The wash was by another company. I just used the paints that I have on hand for this project, so not everything was by Vallejo.
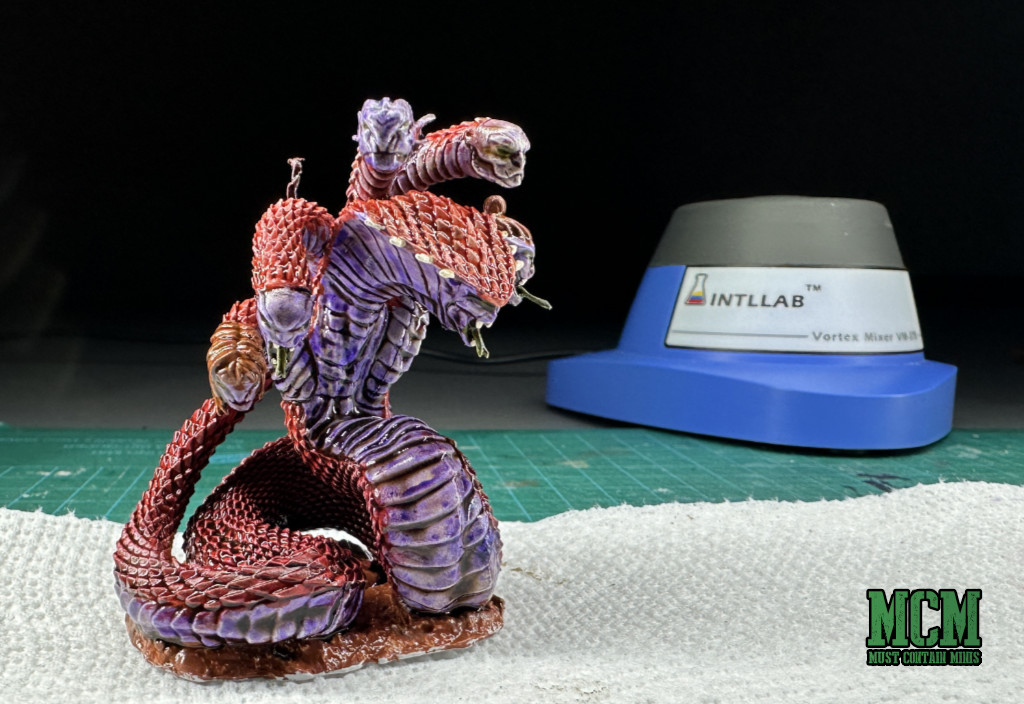
Above is a picture of the miniature after the shade was applied. It is not yet dry, so it appears darker than it will be. In the background is my Vortex Mixer by Intllab. It is still going strong despite being a couple of years old now.
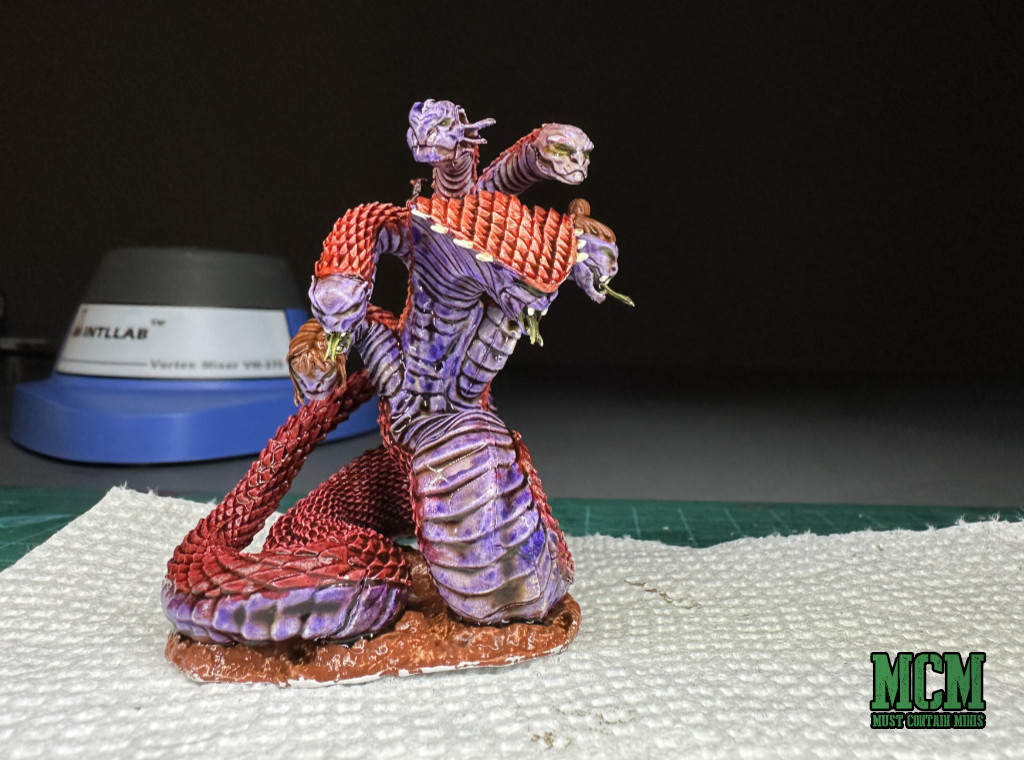
Another shot of the model as the shade dries. The shade is creating a really nice look on this miniature.
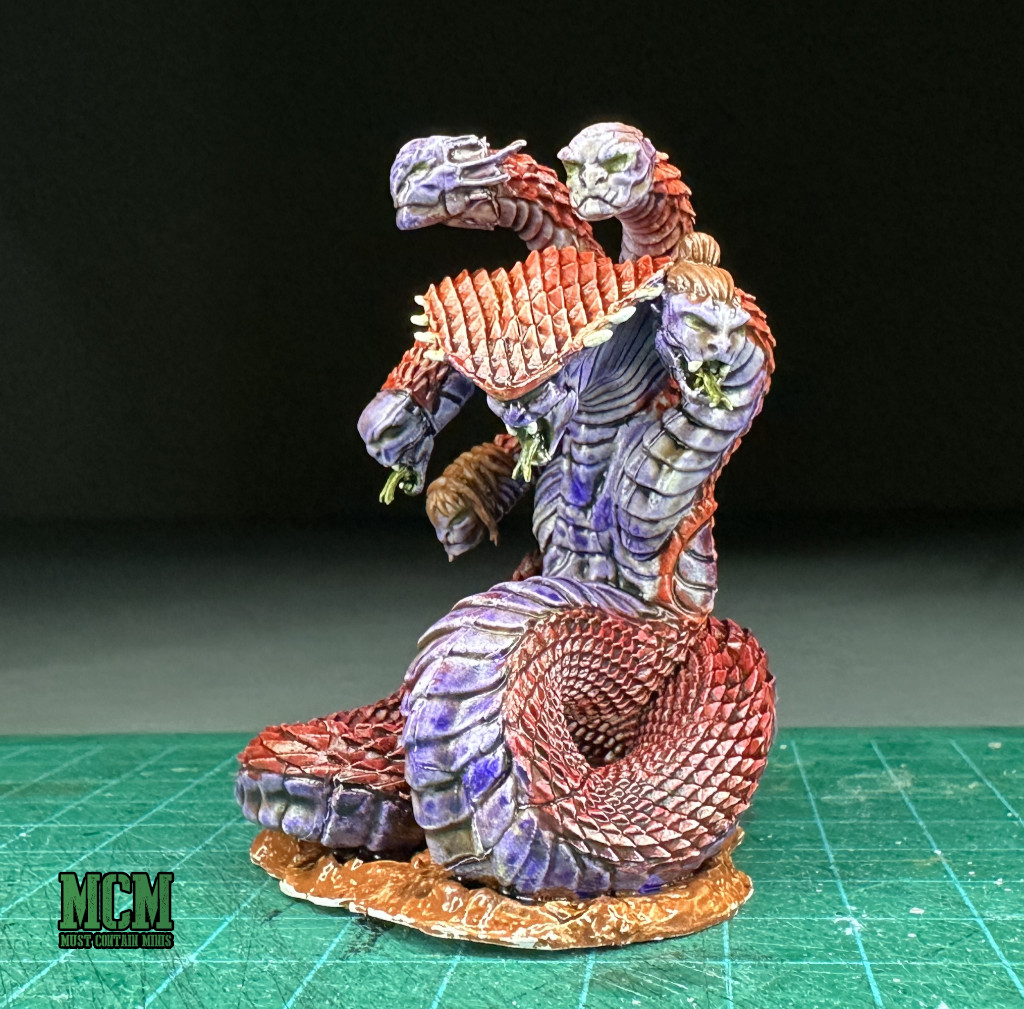
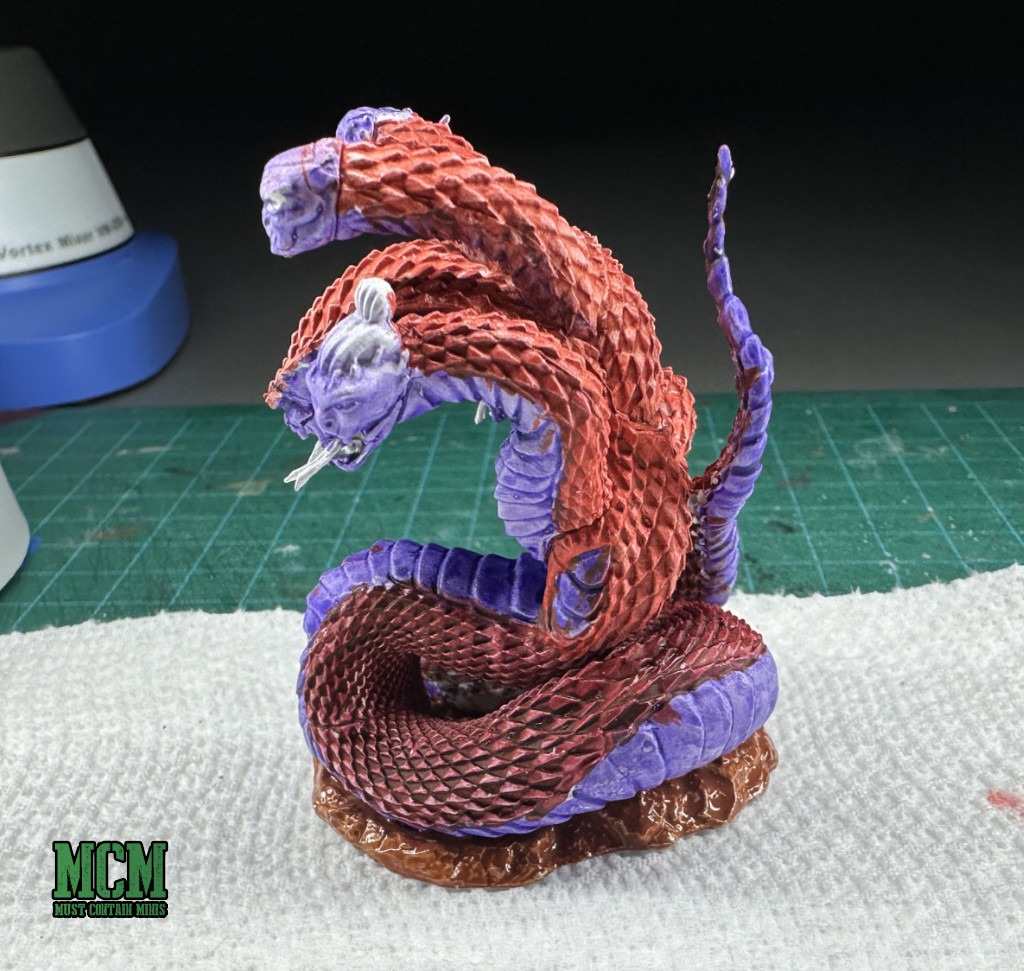
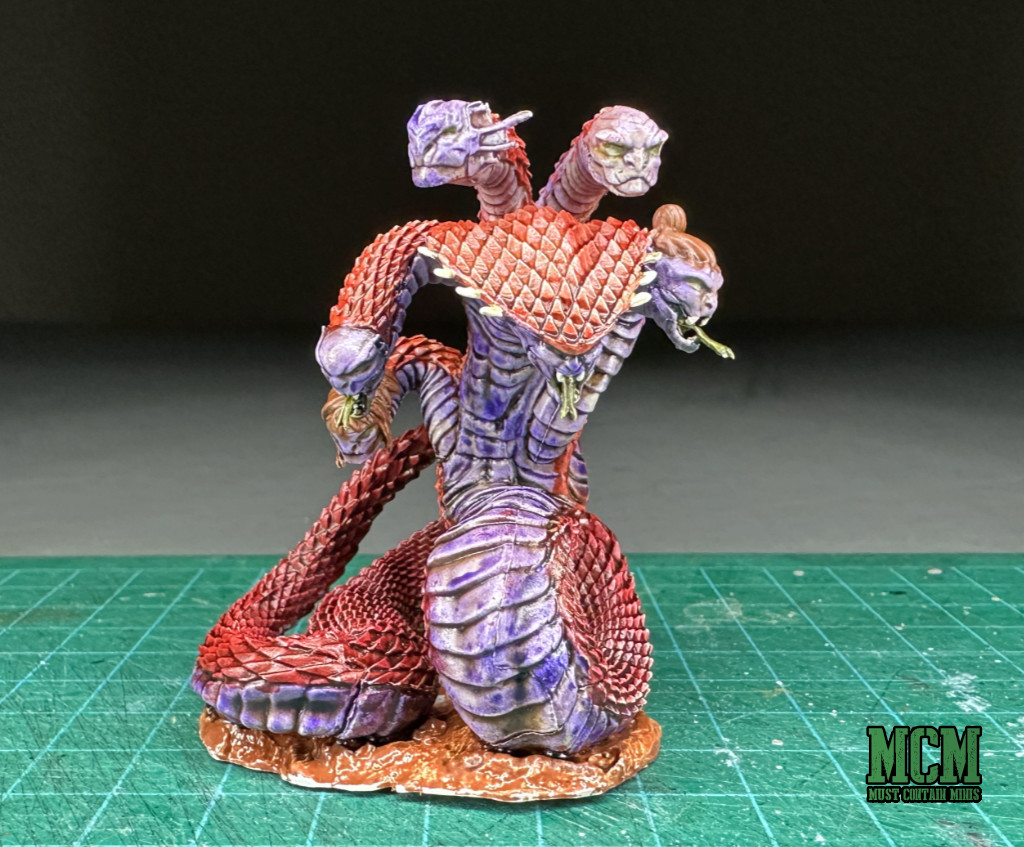
The Completed WizKids Critical Role Naga Abomination
After letting the shade dry, I decided to end this project. Testing Xpress Colors was a huge success. I will be using them again.
For not a lot of effort, this paint nets great results. I will be testing with these paints more and doing another video and post about them in the future.
I am very happy with the results of this miniature painting project. This miniature painted up in under an hour, and that includes drying time.
I am very happy with the transition between Plasma Red on the top and Velvet Red on the bottom of the miniature.
Wrapping it up…
Vallejo Xpress Color Paints are awesome! I will be using these again. The approach that I took on this WizKids miniature is essentially the Slap Chop method that has been super popular on the web lately. It took me a long time before I actually gave it a try. The results – really good for the effort required.
Is this the right approach for beginners? I am not sure. It is faster than the traditional method, but you really have no idea how the paint will look until it is on the model. You also can’t go over the paint to clean it up later. To me, that is not beginner friendly. That said, Vallejo has awesome Game Color Paints too.
Will I be incorporating Xpress Colors into my painting repertoire? Absolutely!
Special thanks go out to WizKids for providing me with this miniature. They have plenty of unpainted miniatures that come pre-primed. Perfect if you want to paint some figures without worrying about assembly or priming miniatures. If you want to try Vallejo paints, check your favorite retailer.
Thank you for checking out this post!

The above image is pretty much the end of the process for me. I took the model one step further to finish by varnishing the model (to protect the paint job) and by adding another layer of base paint too. These two last steps do not make much of a difference from what you see here.
Until next time, Happy Gaming Everyone!!!