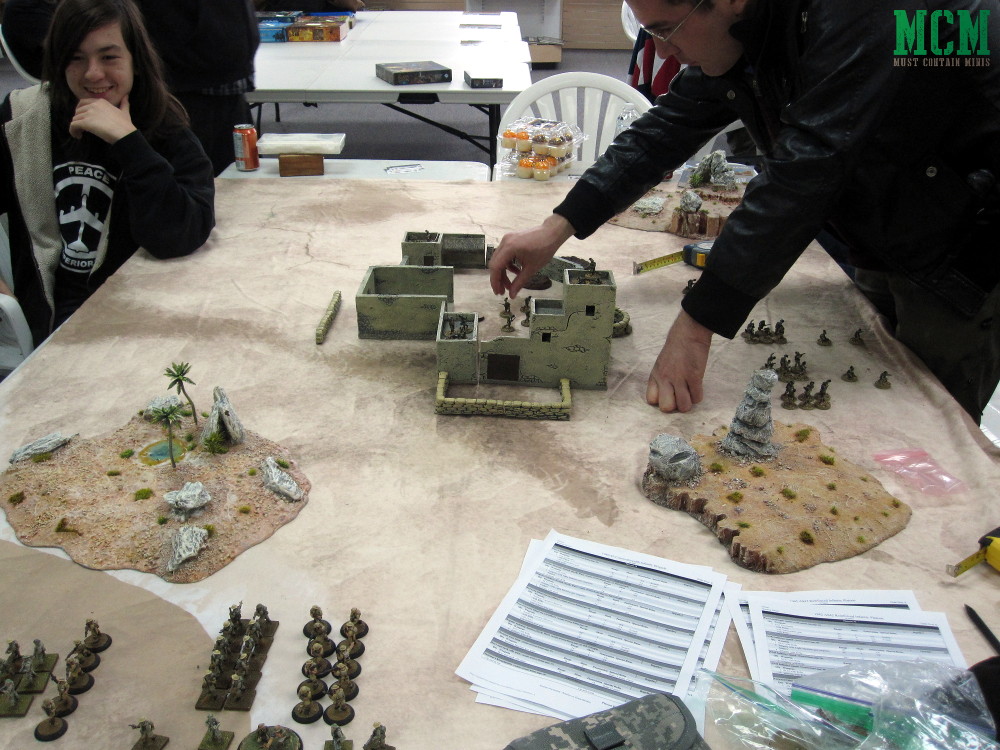
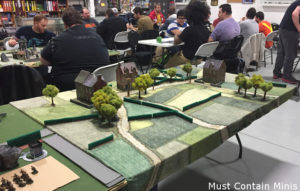
This past October, Crucible Crush asked me to run a Bolt Action Demo Game on their behalf at Council Fires 2018. Wanting to help, I came to the convention and Game Mastered (GM’d) the game. Unlike other Demo Games I ran in the past, Crucible Crush provided me with all the terrain and miniatures for the event. Travelling so far to get to the event, I really appreciated that they helped me out with supplies and even gave prizes for the participants at my table.
Being that I ran the game, I did not get as many pictures of the game as I wished. That said, this article is a demo report of the game I ran and the fun had at this table for Council Fires 2018.
If you don’t know of Bolt Action, it is a fantastic World War 2 Miniatures game by Warlord Games and Osprey Games.
The Scenario
When performing Demo Games, I like running the Manhunt Scenario. The reason for this is because it gives an objective other than the destruction of the opponent’s force. You can kill all you want on the table, but if you do not capture the enemy’s leader (or have the leader survive if you are the other side) then you do not win.
This scenario also happens to be in the main rule book, which means that people can purchase the starter box (or base rule book) and try out the same scenario that they played with me.
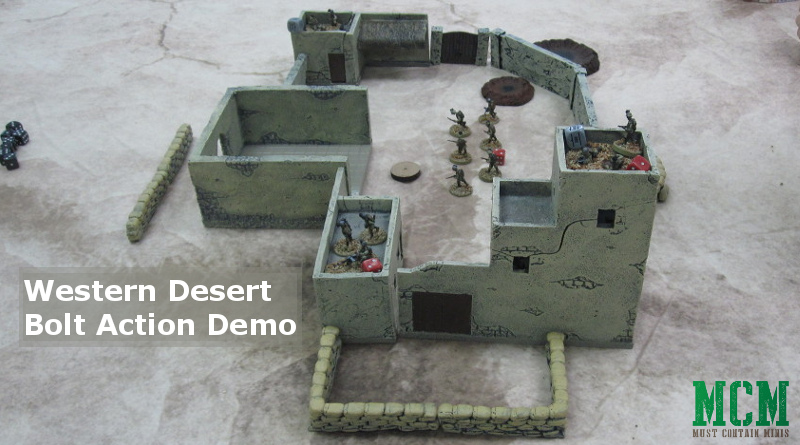
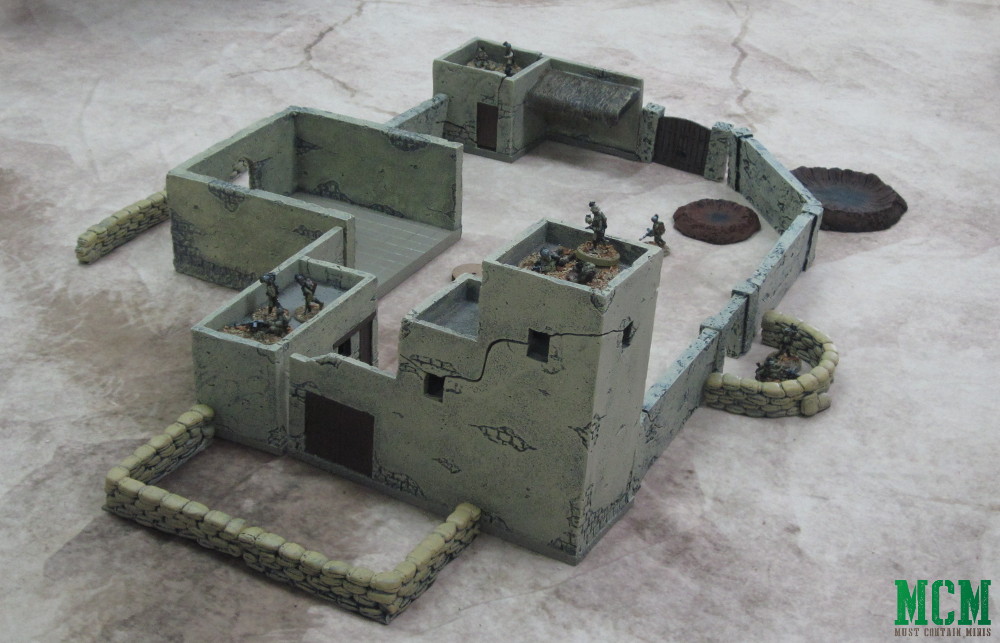
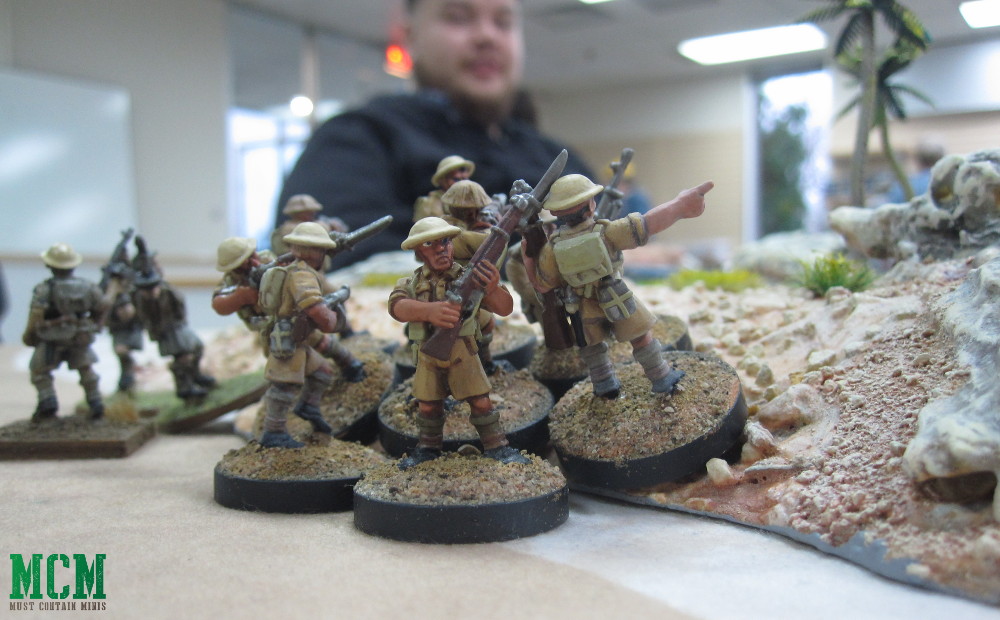
In this game, a Common Wealth Infantry Brigade must capture an Italian Captain that parachuted into the Western Desert fortress below.
Generally, players would have 6 to 7 turns to complete the objective. I gave the players 8 turns because I used a surface a little larger than 6′ by 4′.
The Armies
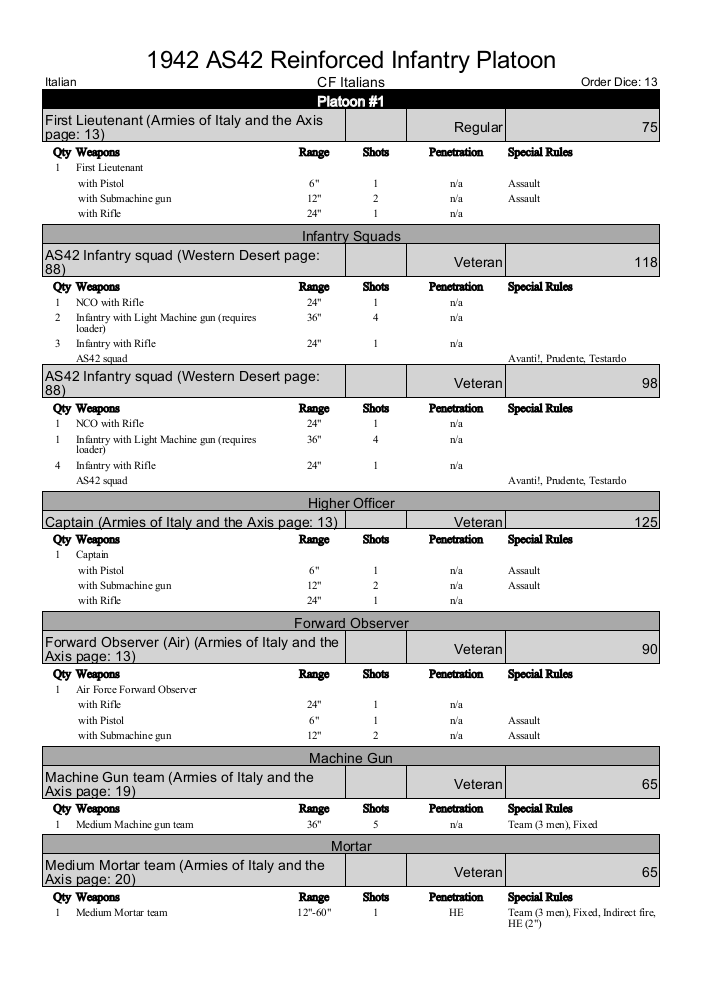
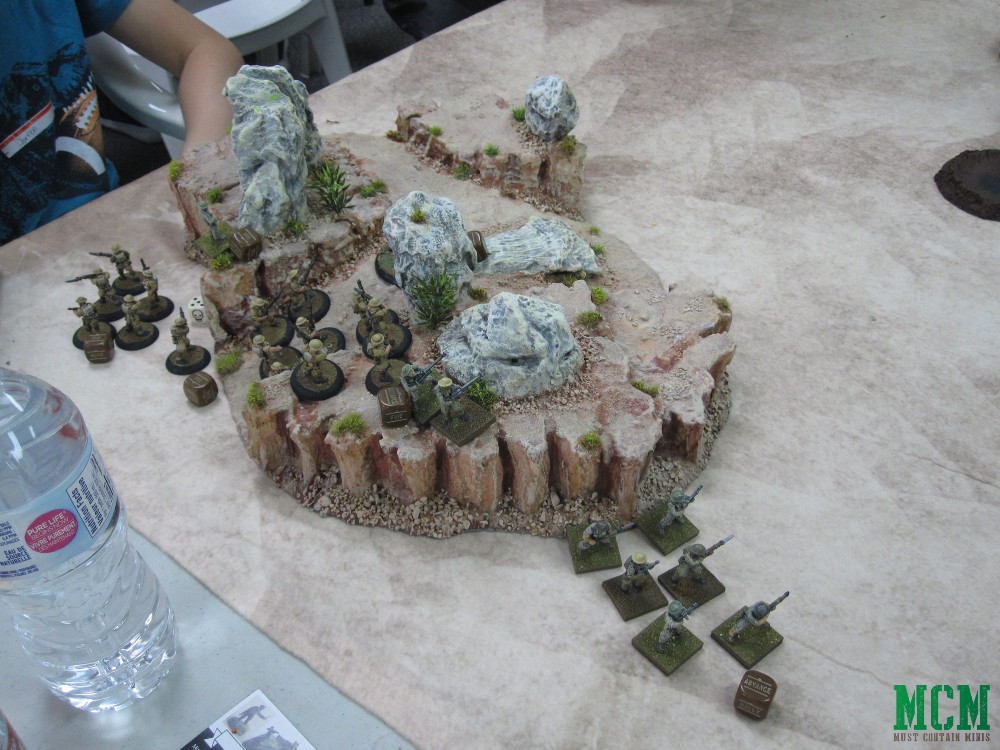
I created the Demo Games for this army through The Western Desert Campaign book. We used 1160 point lists. Being that all the units were infantry based, this got a lot of squads on the table.
My initial plan was to run this game for four players. You will notice while you look through the lists that the forces are fairly equally divisible into two platoons per side plus higher command. Two attendees came to the event specifically for this game but missed the sign up sheet. To accommodate them, I changed the game to six players with the players distributing their forces across three players a side.
Below are the lists from EasyArmy. Feel free to skip this section if you just want to see how the game played.
The Common Wealth Infantry Brigade
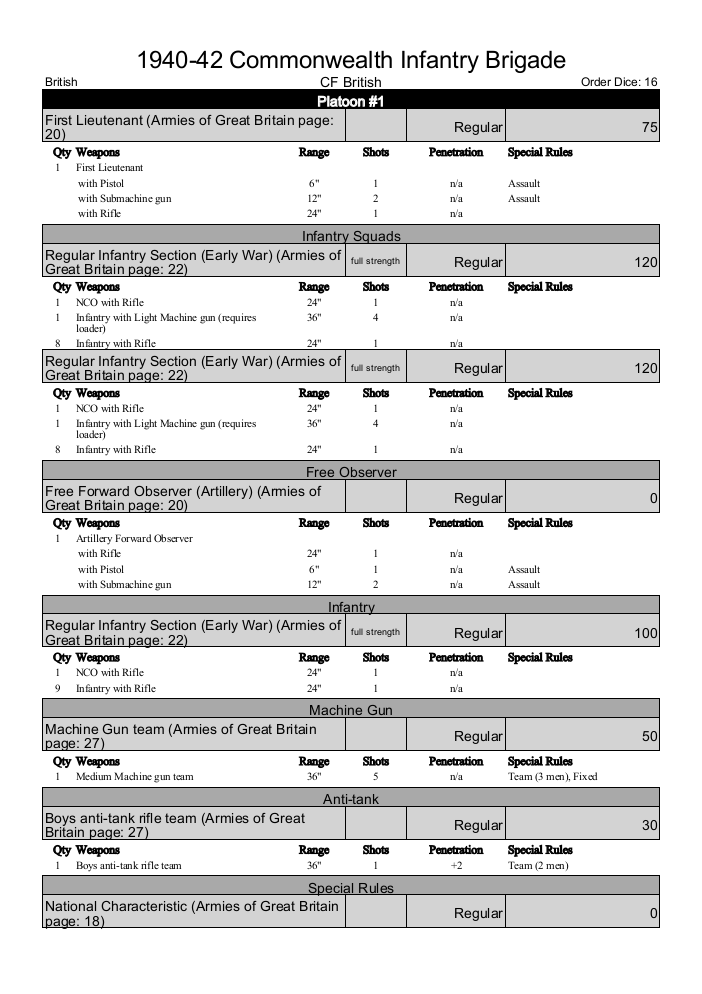

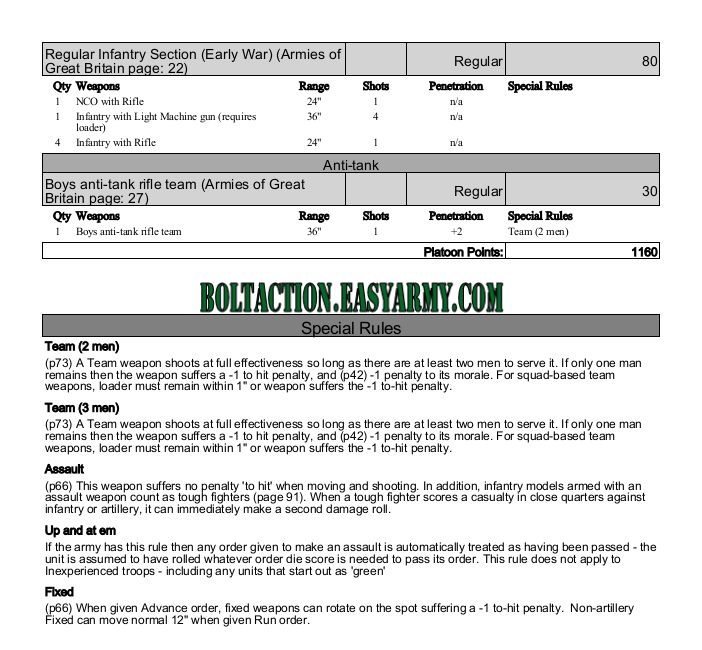
Notice that I made all of the British troops regulars. I rated the Italians as Veteran. This allowed the two armies to have similar compositions but still be asymmetrical. Below is the list for the Italian force. It is much smaller, but their main objective is to prevent capture of their Captain for 8 turns.
The Italian Paratroopers (AS42 Reinforced Infantry Platoon)
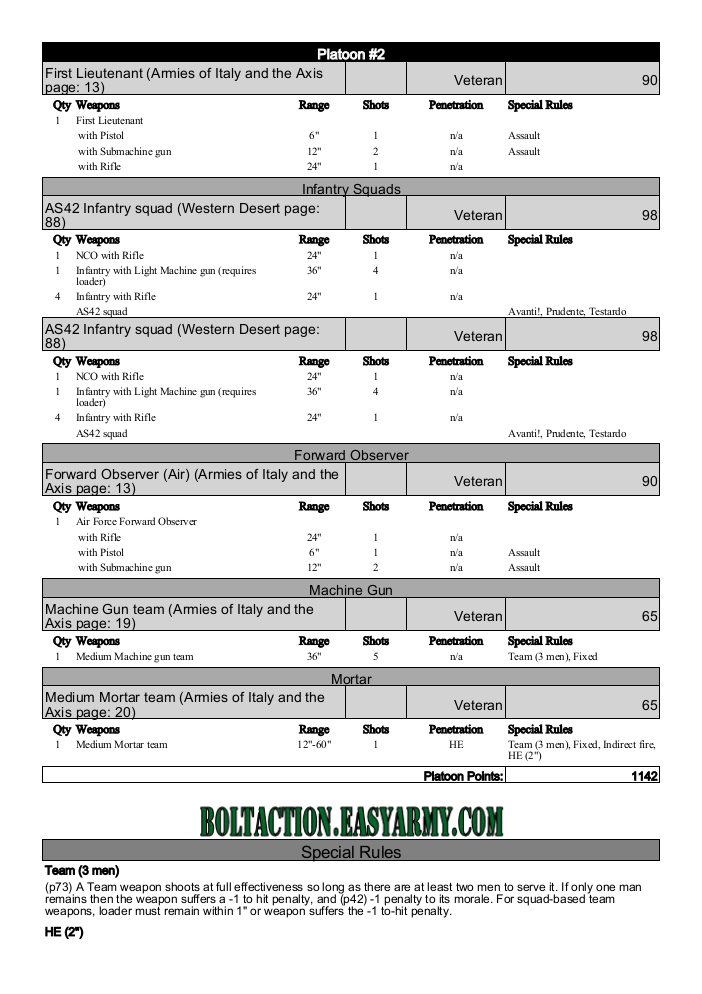
Unfortunately I did not get a picture of the Italians before the game. As you can see though, the Italians have a little more fire power than the Brits while the Brits have more boots on the ground.
Setting Up…
The Italians were to choose half their force and start them in the fortress. Meanwhile, the British had to choose half their force to come in on the first wave with the remainder coming in as reserves on both sides. Forces would be able to enter from whichever table edge they wish as long as it was not the same edge that their opponent last used.
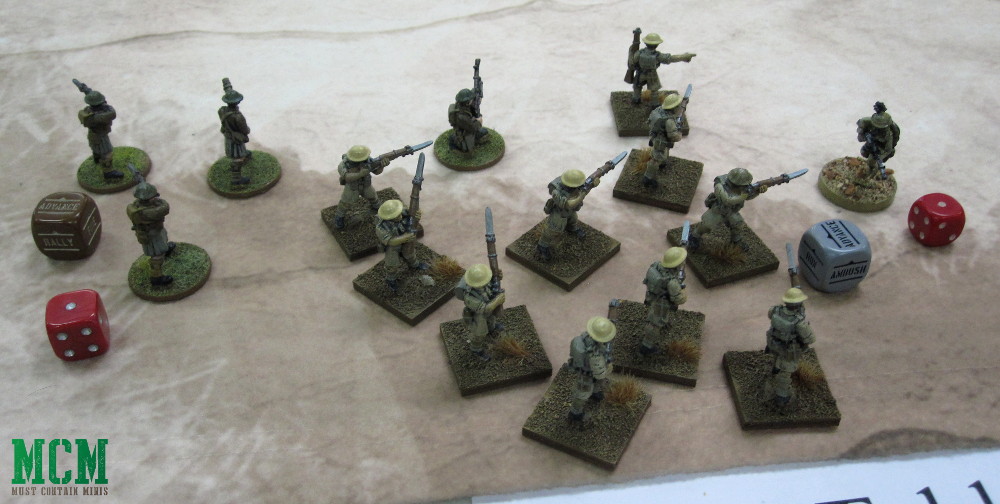
The British brought on the bulk of their first wave on the side of the board furthest from the commander.
Hard Lessons
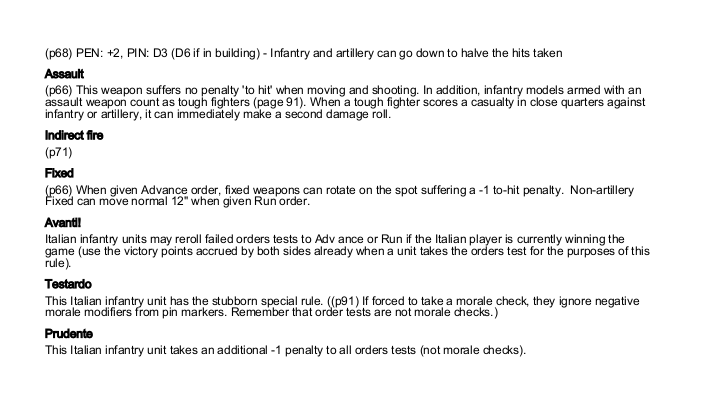
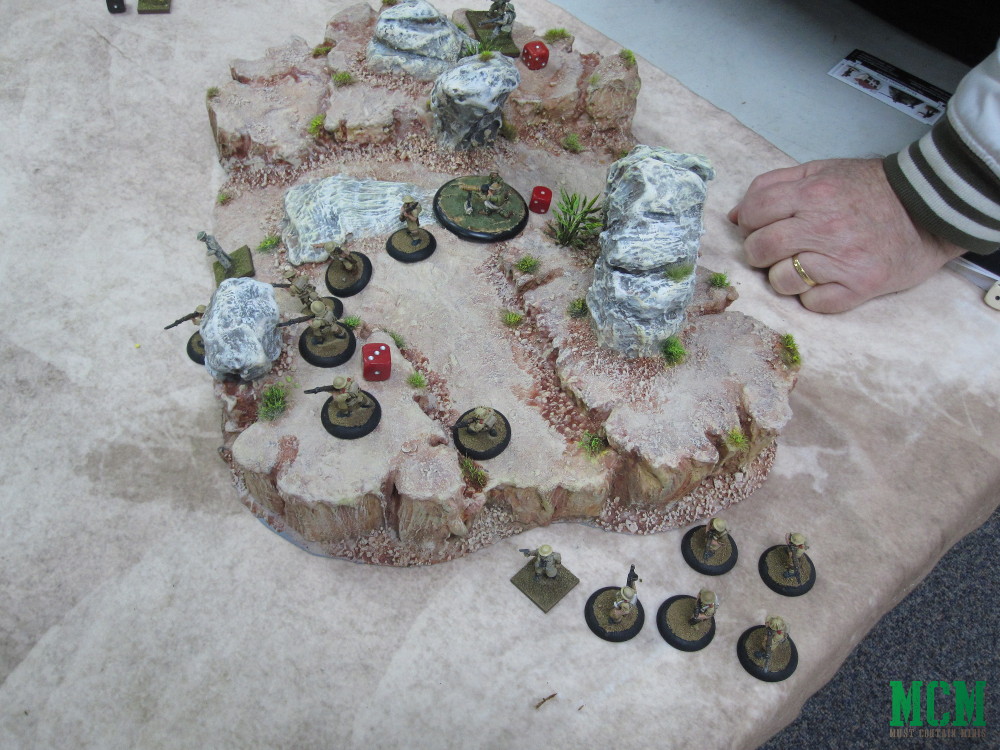
Forward Observers are Dangerous!
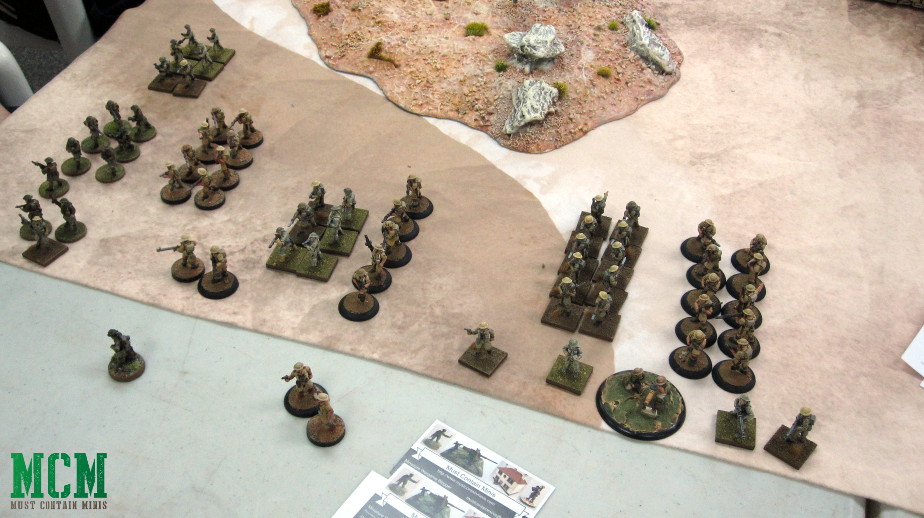
Seeing the grouping above, the Italian Commanders called in an airstrike to good effect. Lots of pins everywhere and a couple of soldiers dead. The Brits learned that it is not good to clump all your troops together when the enemy can call in Airstrikes.
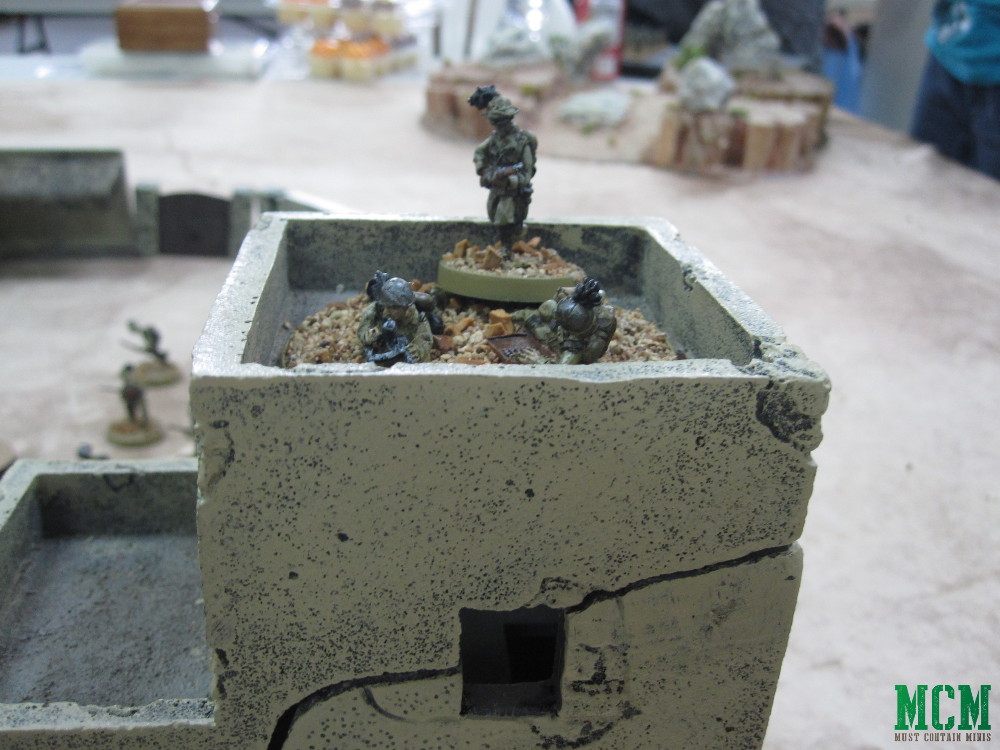
Likewise, the Italians had some lessons to learn about the heavy guns of a Forward Observer. Right off the top the Brits called for some supporting fire right in the heart of the Italian Fort.
Luckily for the Italians, it would take a couple of turns before that strike came in. Instead of hitting the intended target it moved by accident closer to the forward tower on the right hand side. If the rolls were too good, it could have destroyed the building that contained the Captain. This would have resulted in a draw for both sides.
Instead, the blast dealt around pins. The second strike would come in a little more powerful and again in the same area.
It is hard to hit a unit with Double 6s
The Anti-Tank Guns would have helped in the firepower tests against the fort, but both failed to score any hits as they were firing at hidden units (looking for double 6’s to hit) for most of the game.
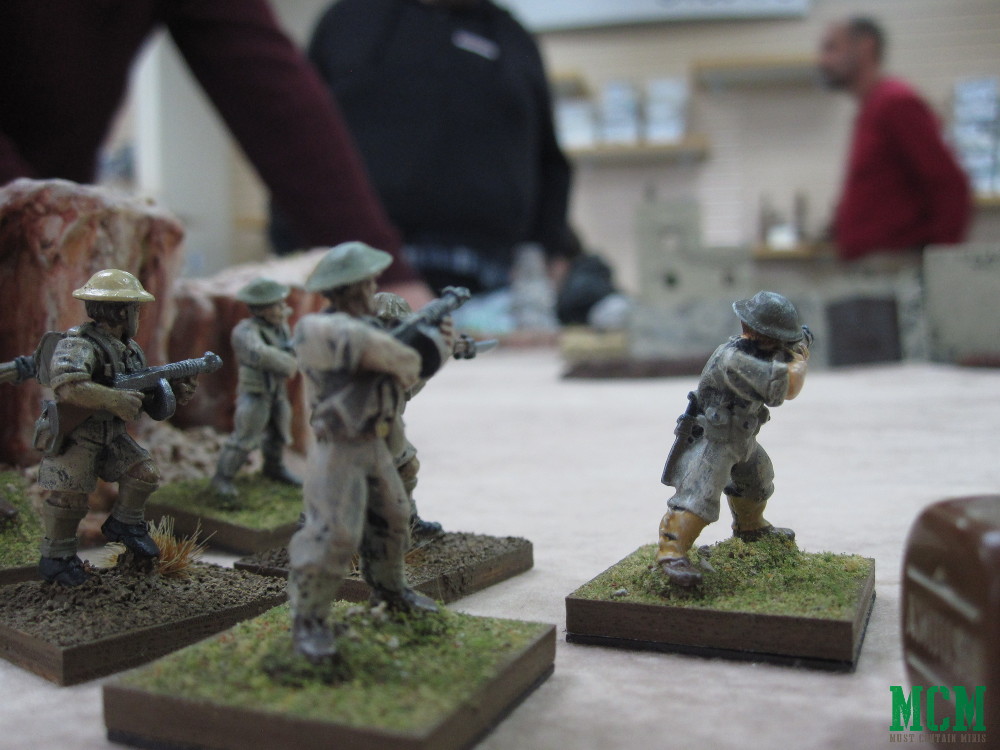
Getting in close to a numerically superior force does not work out well
The next lesson for the Italians was fairly entertaining for me, but not so fun for the Italian players. In this mission, you could deploy on any edge not last used by your opponent. The Brits deployed really close to the corner of the board so the Italians Advanced a small unit of six men and laid fire on the group of Brits in Kilts. They killed a few men, but then the Brits brought in a second unit from the edge near the corner. Their 10-man in this squad killed all but one of the Italian soldiers.
The soldier passed his moral test. I figured the Brits would be better off ignoring him and rushing towards the man they have to capture. Instead, they spent another round firing at this poor guy and putting him out of his misery.
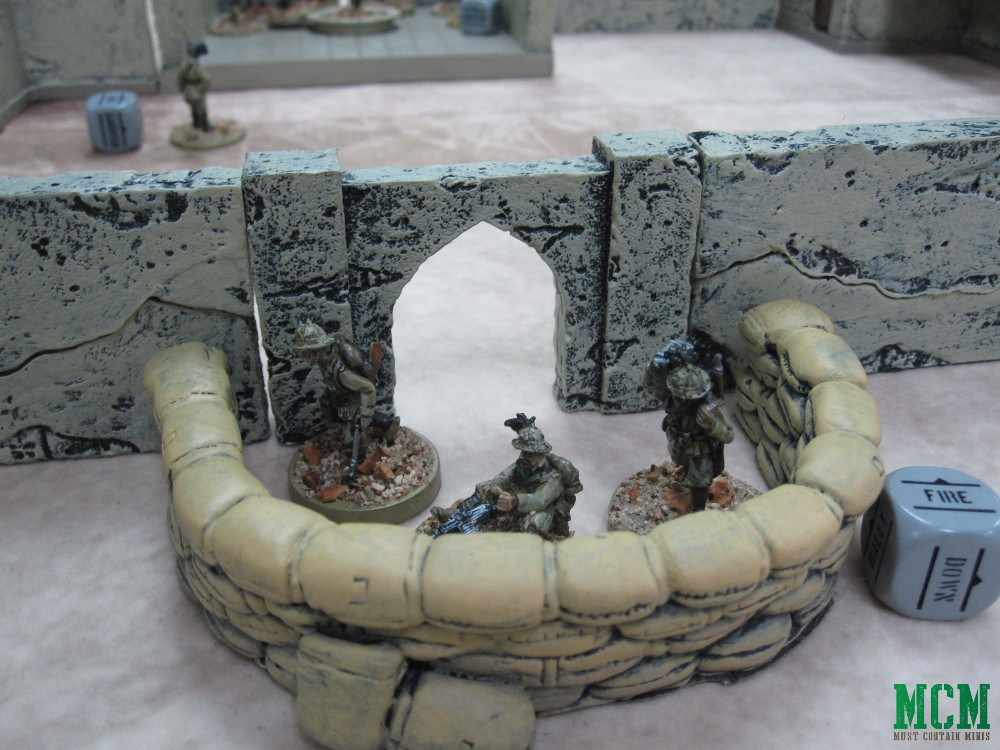
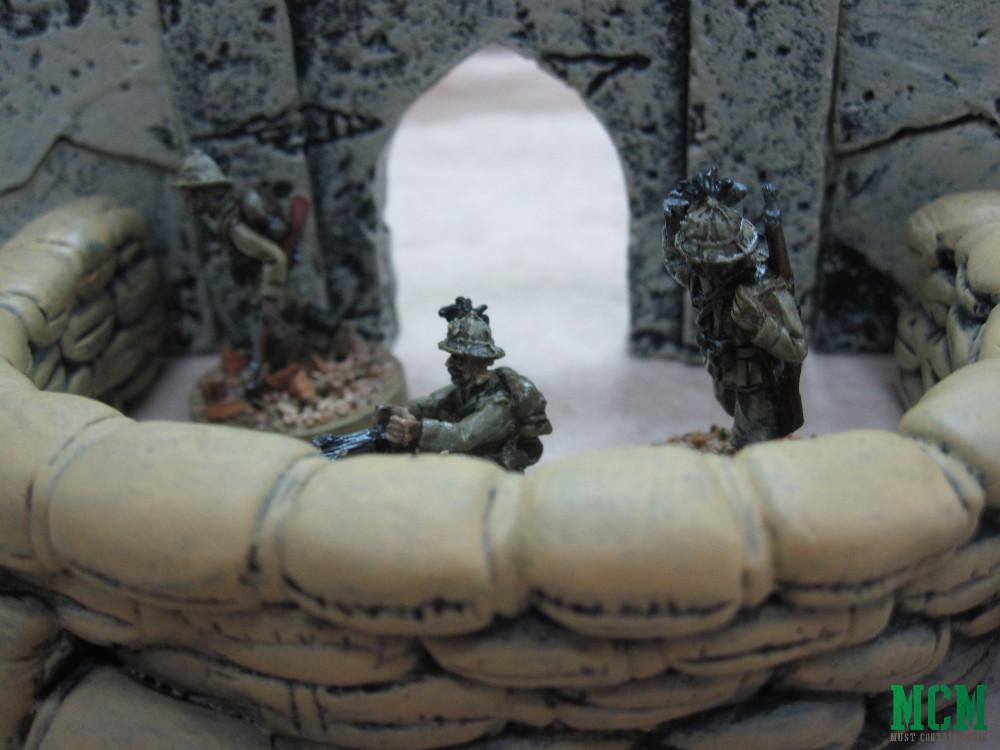
Fortified Positions are Good
Hidden behind cover, the Italian forces remained safe until they were ready to open fire on their enemies. Once they opened up, they used the advantage of better terrain to their benefit.
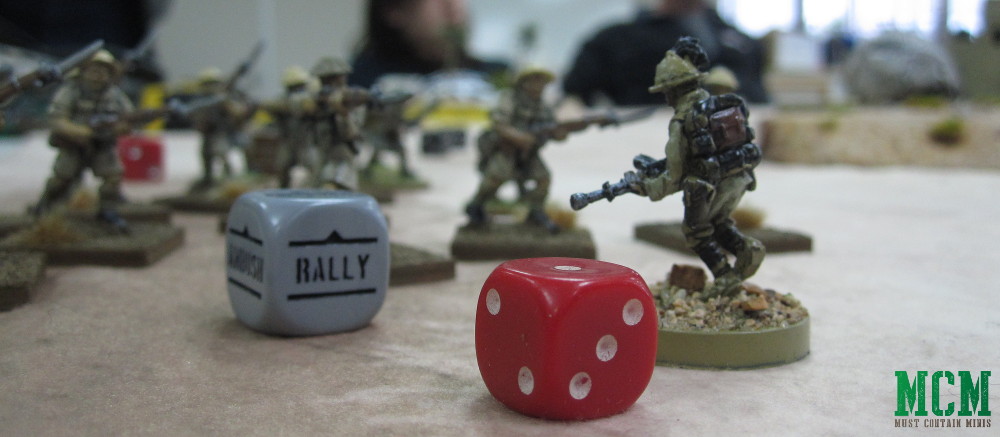
Snap to Action is Awesome!!!
Both sides made great use of their commanders using the Snap to Action rules to good effect.
Ending the Game
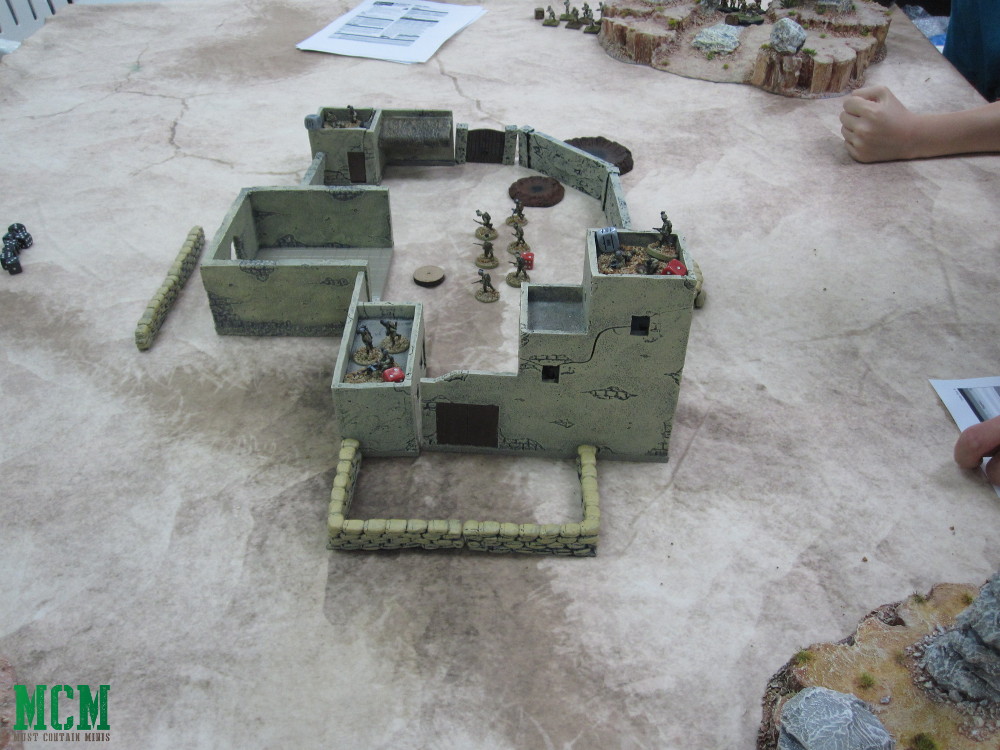
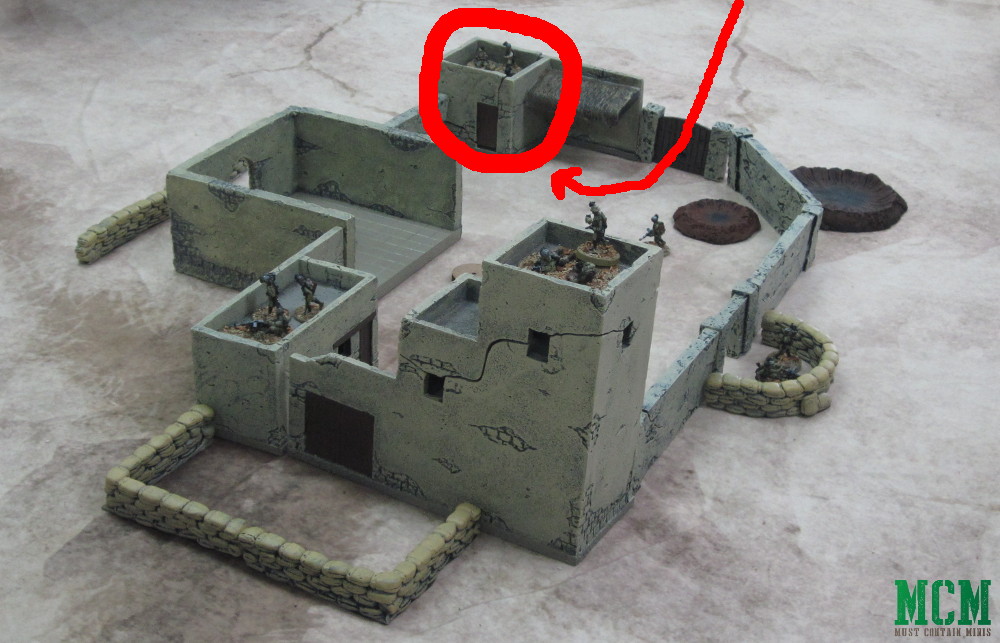
By the end of the game, the Brits closed in on the tall tower so the Italian Captain retreated to the small tower circled in red. He hid on the ground floor and another bombardment was called in on the middle of the fortress. The front remained fairly well defended.
Meanwhile, two groups of Brits rushed from the other side of the fort to try to capture the Captain. They would come in through the route of that red line with an arrow. An even larger force was on the other side of the fort. The Italians were fighting this battle from two sides making it difficult to just move their captain out of harm’s way.
The first unit to break through was a single forward observer that already called in his special attack. He alone got within a few inches of the door. Next round he would enter the building in attempt to capture the Captain. Knowing this, the Italian Captain aimed his pistol out the door and shot the Observer in the head with a very decisive shot from his pistol.
The next turn, the second assaulting group would make it to the fort. The Bombardment moved and went off near the front towers. On the Eighth turn, the Brits got the first activation die and assaulted the Captain in the tower. They won and therefor captured the commander.
The Game Came Down to One Die Roll
Had this unit failed, the victory would have gone to the Italians. Funny how one die draw and assault at the end of the game was enough to determine the winners and losers of the Battle. It makes for a very cinematic experience.
Eye Candy
Below are some pictures that didn’t make the report, but I wanted to include because they look cool.

Wrapping it up…
Crucible Crush really pulled through in putting together a beautiful table for this game. Thank you Lee for bringing out all of the materials for this event. The buildings are by The Miniature Building Authority, the Brits were all by either Crucible Crush or Pulp Figures, the Italians by Warlord Games, the mat by Cigar Box Battle, and the sandbags by Six Squared Studios.
Of course, I also used the Bolt Action Rule Book too along with the Western Desert Campaign Book. Thanks goes out to Osprey Games for sending me the Campaign Book to check out. It got some good use at this local convention. 🙂
Together these items pulled off a fantastic table and gave me the honour of running both a stunning and fun game!
Finally, Crucible Crush distributed plastic Bolt Action Infantry frames as prizes to everyone at my table. So Awesome!
Hopefully you enjoyed this Bolt Action Demo Game Report. I had a ton of fun running the game!
Until next time, Happy Gaming Everyone!!!
[amazon_link asins=’1472814940,1472834356,B07HK4ZV5V,B07H7MFBGD,B07H7MDLSX,B01LYTW70N,B00V65WI1M,B07H8CT572,B07H89TLRH,B07H7MZ71G’ template=’ProductCarousel’ store=’mustcontainmi-20′ marketplace=’US’ link_id=’9f14acc8-e0b3-11e8-ac5d-85813e06f558′]

Pingback: Bolt Action Skirmish Battle Report - Must Contain Minis [MCM]