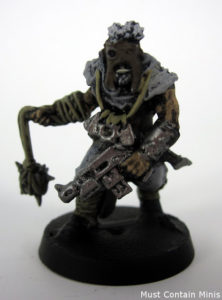
In this post, we take a look at my Living Dead Peasants made by Fireforge Games. These models come in boxes of 18 for roughly €20.00 at this time. For me in Canada, the models did take a little bit of time to get here, but I am very happy with how they look and the level of detail on the models.
After this post, I plan to do another taking an even closer look at the models. This post will talk about the Living Dead Peasants and look at my painting process with the models. I will list out the exact colours that I chose and go through my painting steps.
Special thanks goes out to Fireforge Games for sending me these models for review.
The Beginning
To start, I primed the miniatures with white Gesso. I use this when the weather is not nice and I don’t want to prime outside with my spray. Let’s face it, I live in Canada and the weather is not always conducive to working outside.
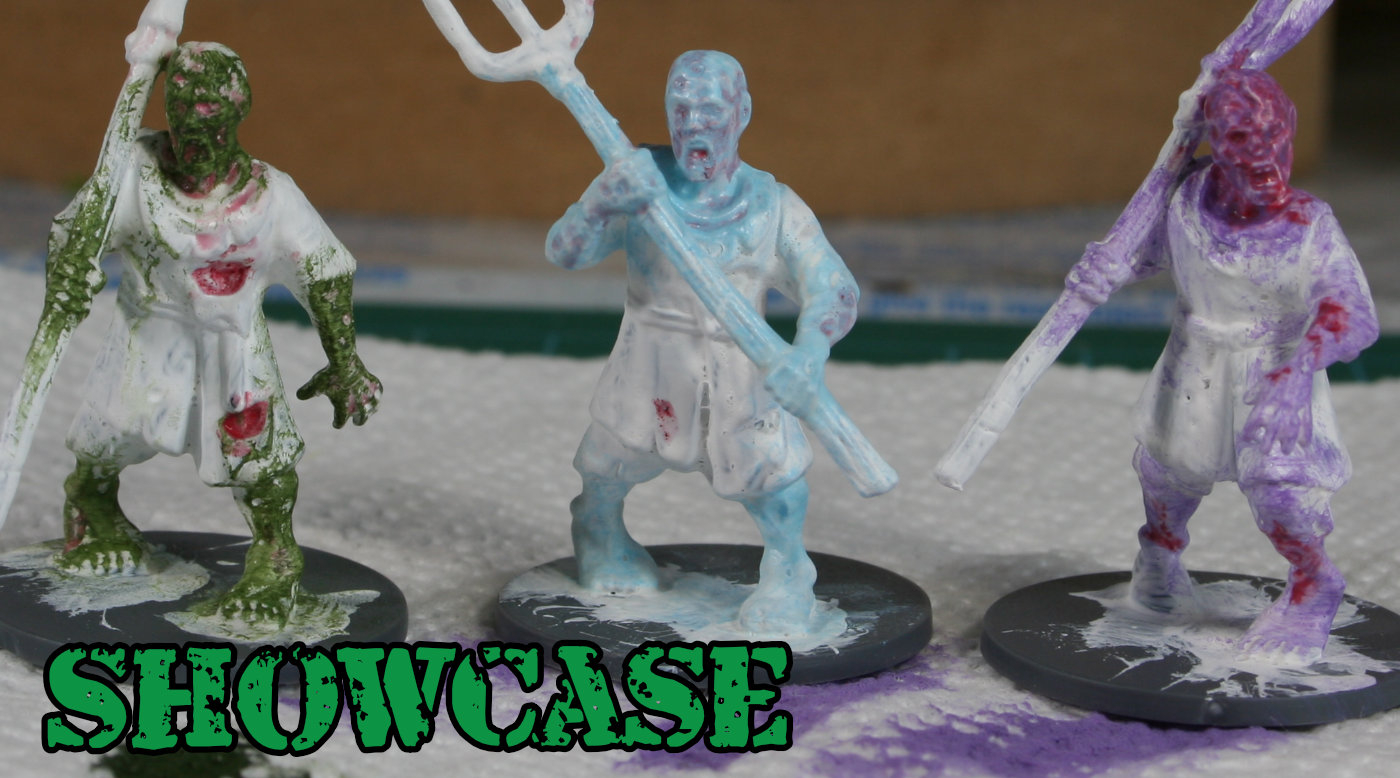
After that, I did three test models with different colours of flesh. The idea is to figure out the colour scheme for my undead mob of peasants.
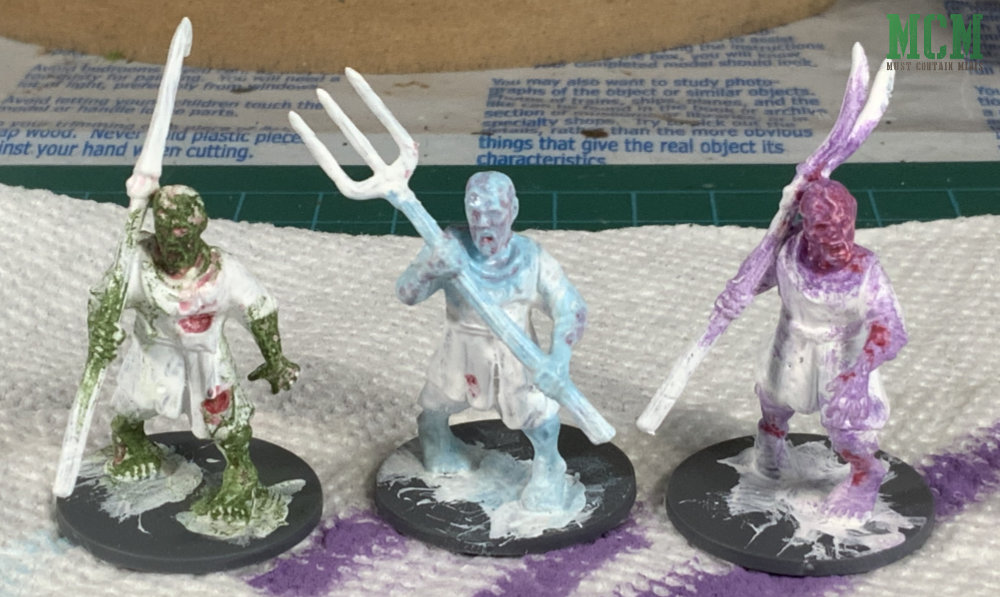
You may recognize the pictures above before from my social media feeds. I took a vote from the readers for which colour to go with. The blue and purple were tied. Mrs. Must Contain Minis came up with the tie breaking vote. She said go with the purple because it looks like magical energy re-animated these models. So, I did.
Base Coating
The first step after priming for me is putting on the base coat. At this step, the models don’t look great, but it is just the first step in a process to some good looking gaming miniatures.
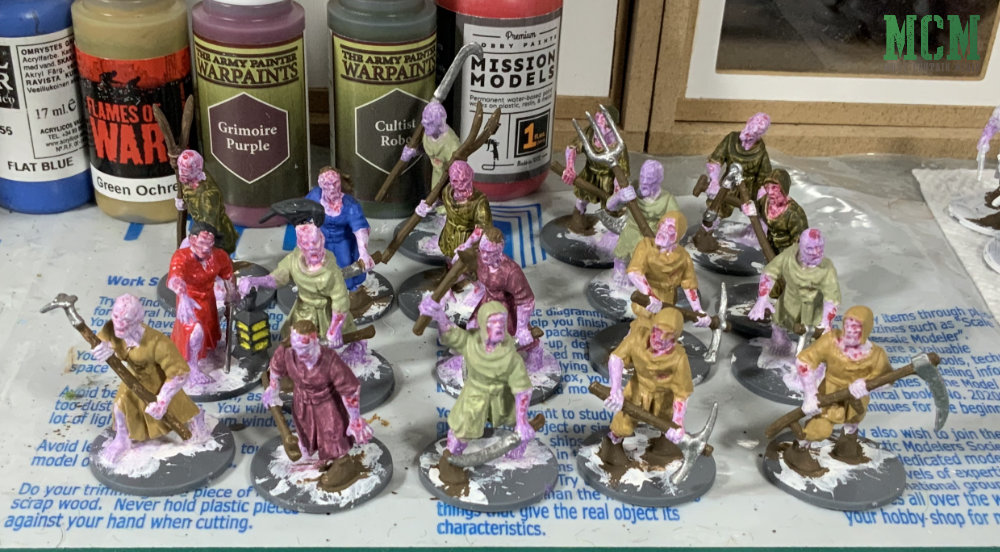
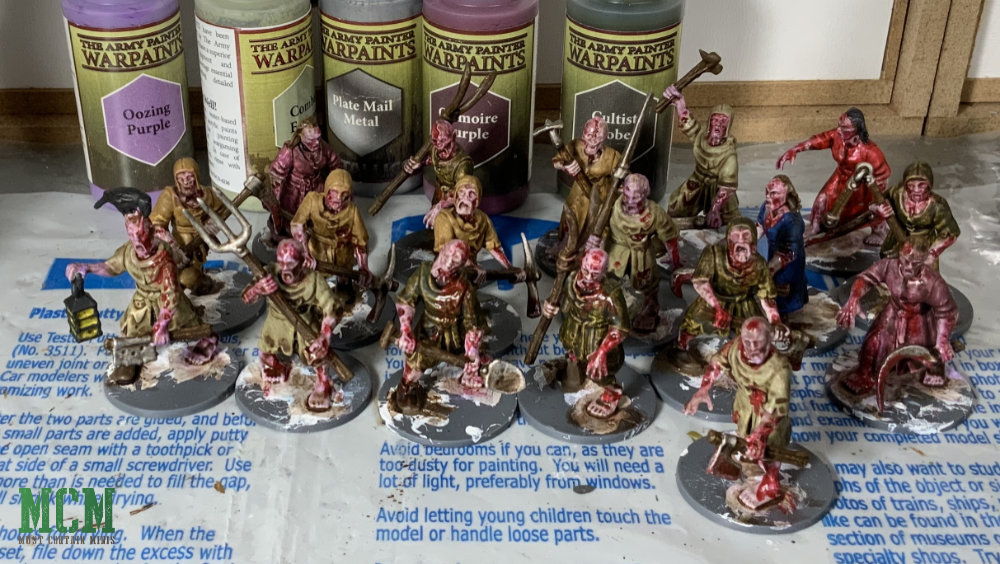
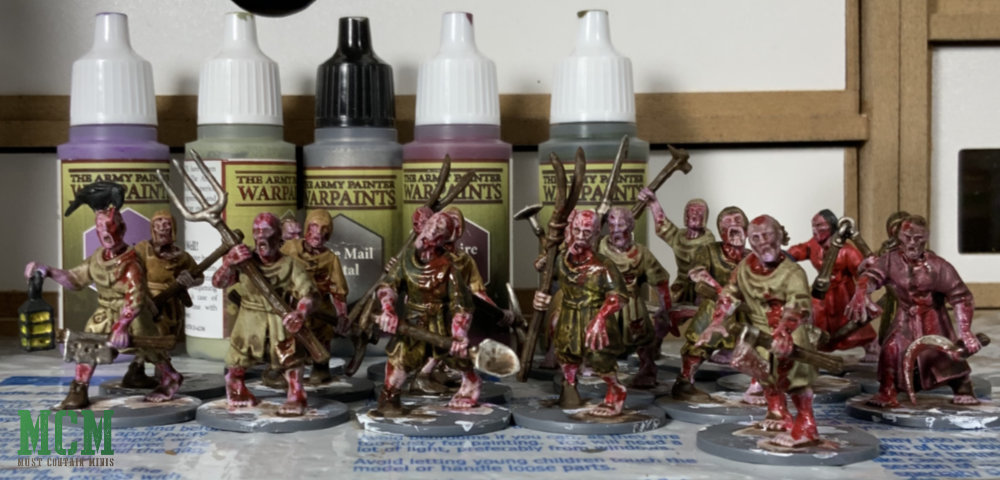
For the base colours, I used the following for the flesh.
- Undercoat for flesh – Vallejo White Grey (993)
- Second layer of flesh – Oozing Purple by The Army Painter
- Around the flesh blemishes – Glistening Blood Red Effect by The Army Painter
For the clothing, I used the following colours.
- Vellejo Flat Blue (70.962)
- Flames of War Green Orcher
- Grimoire Purple by The Army Painter
- Cultist Green by The Army Painter
- Combat Fatigues by The Army Painter
- Mission Models Peril Red
For the other items on the miniatures, I used the following.
- Lantern Metal and Crow – Vallejo Black Grey (70.862)
- Lantern Light – Mission Models Iridescent Lemon Yellow
- Wood handles – Vallejo German Camouflage Medium Brown (70.826)
- Metal Bits – Plate Mail Metal by The Army Painter
In retrospect, I likely could have waited on the blood effects until after the model was completed.
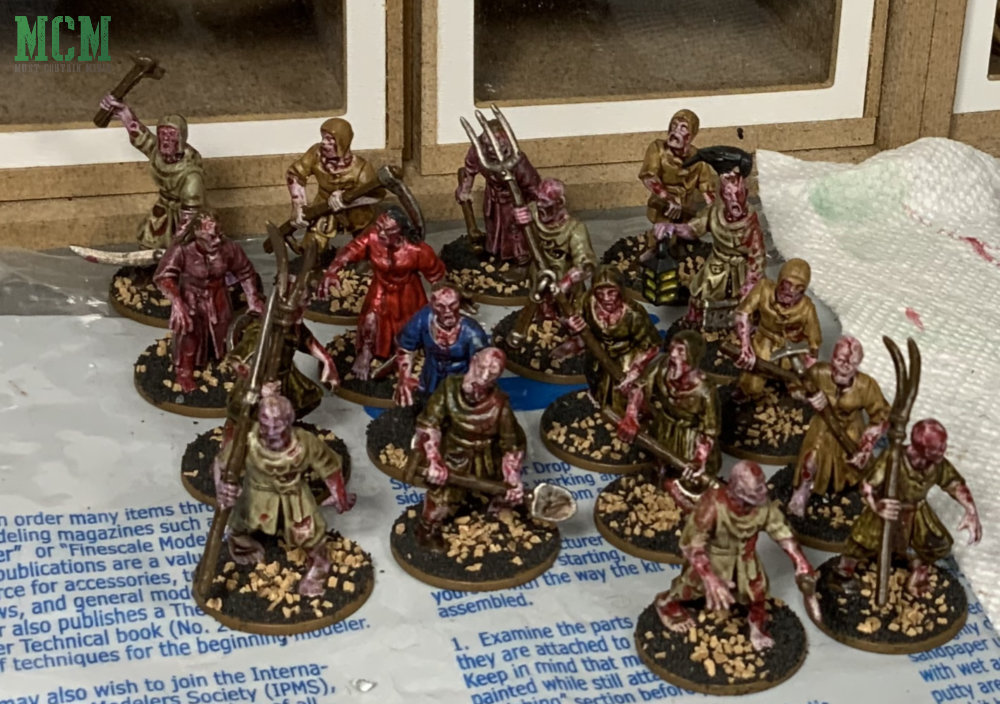
Shading
After base coating the models, the next step is shading them. To do this, I ran a coat of Citidel Shade: Agrax Earthshade across the entire set of miniatures.
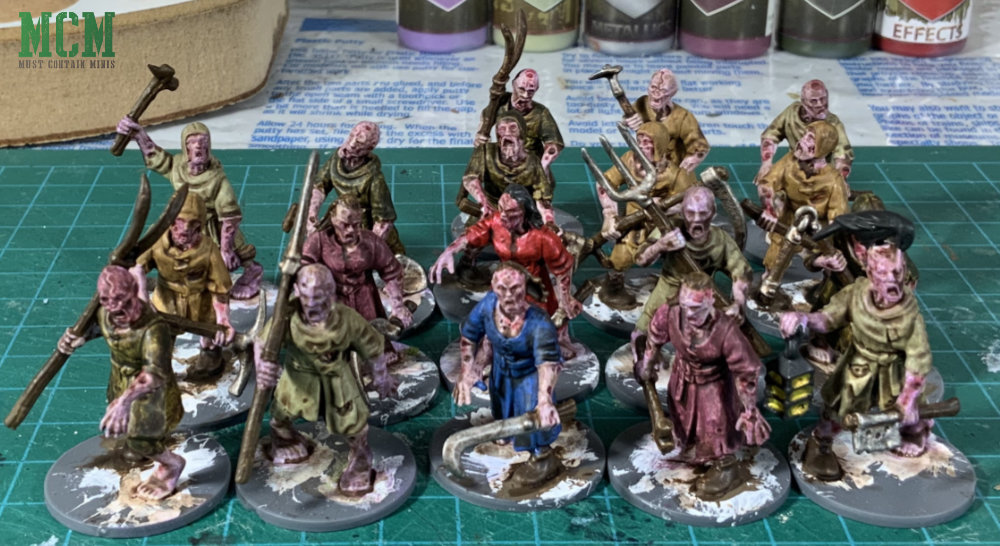
Highlighting
The next step for me after shading is always highlighting. I have two tools in my playbook for this. Edge highlighting, which is when you trace the raised edges or areas with a brush with paint. And, dry brushing, which is when you lightly brush the raised areas with the dry paint pigments on a brush. There are lots of tutorial videos out there on the web if you want to know more about edge highlighting or dry brushing.
Looking at these models, I figured they look good enough. Plus, they are supposed to be re-animated, so I figure it is okay if the colours are a bit darker. That said, I wanted to add more of something, so I decided to do it with BLOOD!!!
I placed the blood effect wherever there was a wound indent on the model, or wherever I saw a painting blemish that I wanted to hide. At this point, these guys look pretty much done to me. So I proceed to the next step.
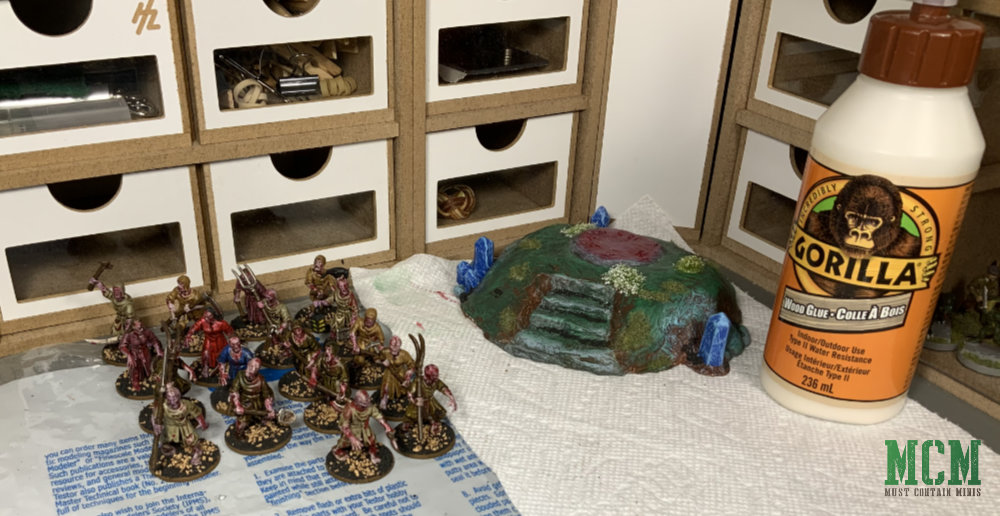
Finishing Touches
The final step for me when I do up models is the finishing touches. What are the finishing touches?
For me, it is adding base textures to the model and then coating it with varnish. I used to add the basing materials before priming the miniatures and painting them for better effect. These days, I just add the basing materials to the base of the model after it is completed and call it a day.
At this point, all that is left for me to finish up the models is a coat of matte varnish. Some people say not to varnish the terrain on the base, but I have been doing so lately and am unbothered with the result.
Wrapping it up…
Thank you for following along with this painting showcase. Personally, I like these Living Dead Peasants by Fireforge Games and I think they turned out pretty good. What do you think? Do you have any painting tips that you want to share? If so, please do so in the comments below.
Thanks goes out again to Fireforge Games for sending me these models for review.
For more about these Living Dead Peasants, please check out our review of them and second part of the review showing off even nicer pictures of the made (but unpainted) models. I plan to do one more showcase article of these miniatures in the future taking a closer look at these painted miniatures.
Until next time, Happy Gaming Everyone!!!
Very nice work. Such a relatively simple process but they look great.
Thanks so much Thor. I use a similar process for most of my minis (with the addition of highlighting).