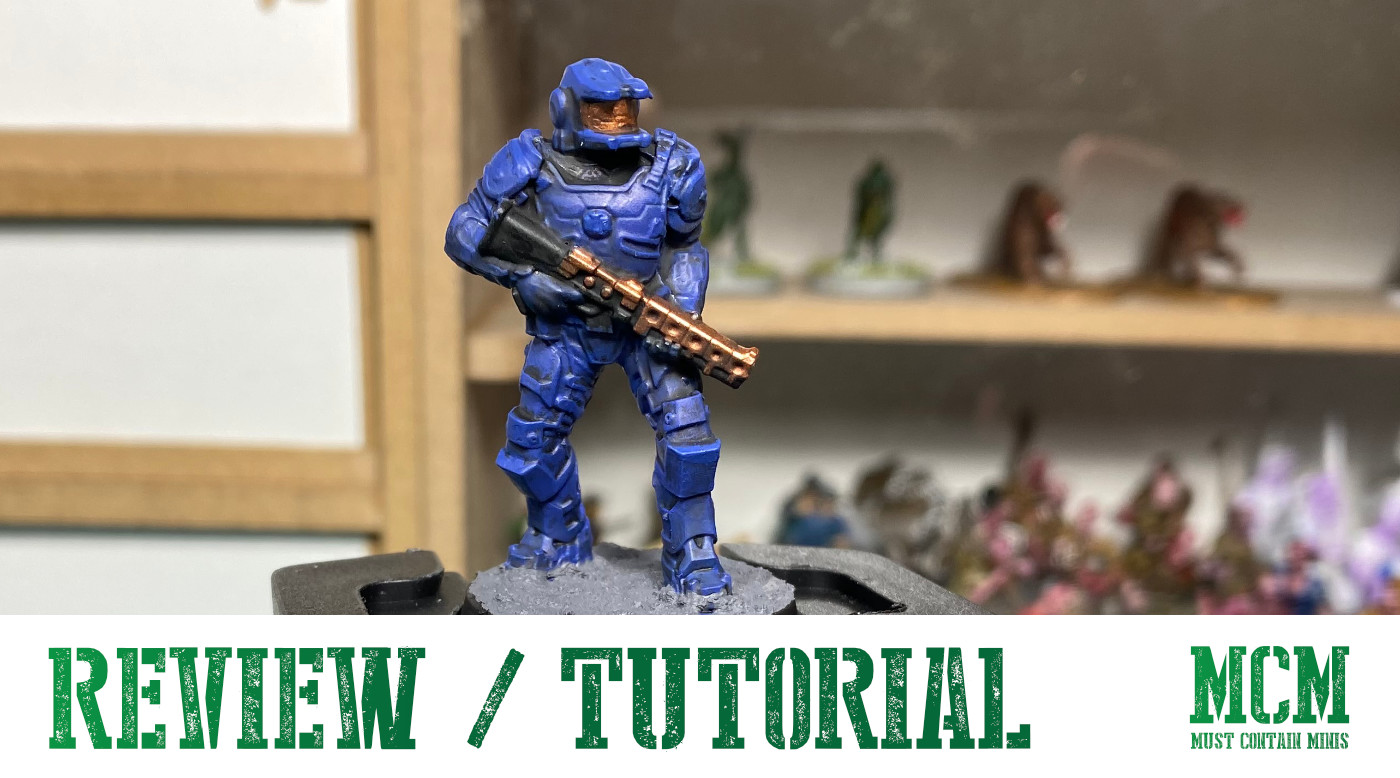
In this post, I discuss painting a Legions of Steel Miniature. As you may recall from a recent post, Raybox Games sent me some miniatures for review. These miniatures are from their upcoming game Legions of Steel on Kickstarter.
Legions of Steel is a game from the 90s, but the new Kickstarter brings the game back with a new edition and all new miniatures. Aside from just looking at the unpainted miniatures, I wanted to get some paint on them.
At the end of this post, I tossed in a video that covers many elements of this post.
Now, let’s get into it.
Disclaimer: Raybox Games sent Must Contain Minis a package of preview miniatures for review purposes. While I accept review products, I am in no other way compensated for my posts. I reserve the right to give positive and negative reviews of the products.
Painting the Miniature
To paint my Legions of Steel miniature, I followed a process that paints them to a standard GW would call “Battle Ready.” I also happened to use Games Workshop colours on this miniature. I painted it in the same methodology as I would my other miniatures. I detail that process here.
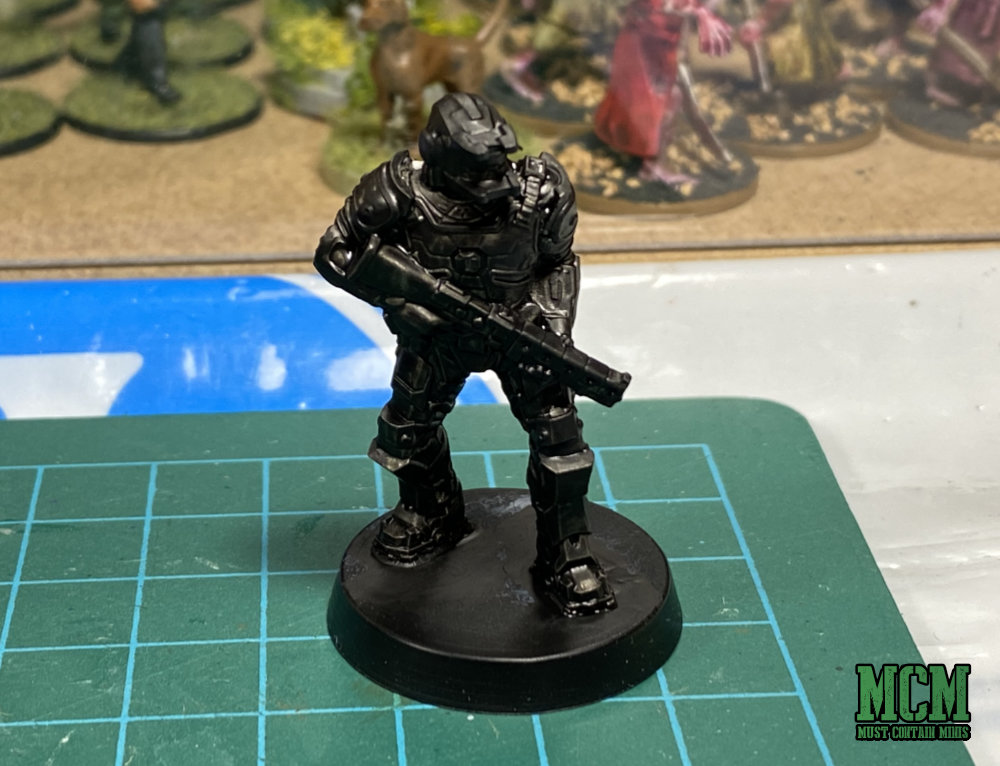
Step One – Prime the Miniature
Being a Canadian and not wanting to go outside, I base coated the miniature in GW Abandon Black as a primer. I just brushed the stuff on the figure and base. It seems to work and even recommended by GW if you can’t use their spray primer instead.
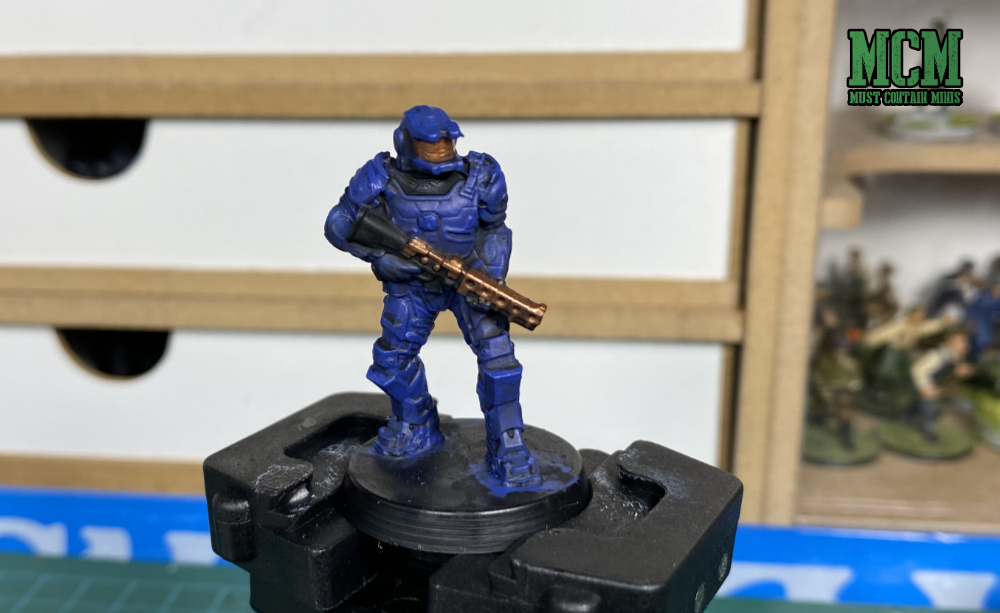
Step Two – Base Coat the Miniature
Next, I painted the miniature with my main colours. I used Macragge Blue for the armour, left parts of the gun black and painted the rest of the gun and visor Balthasar Gold.

When I first started painting miniatures, this is where I would stop. Now, take a few more steps before stopping.
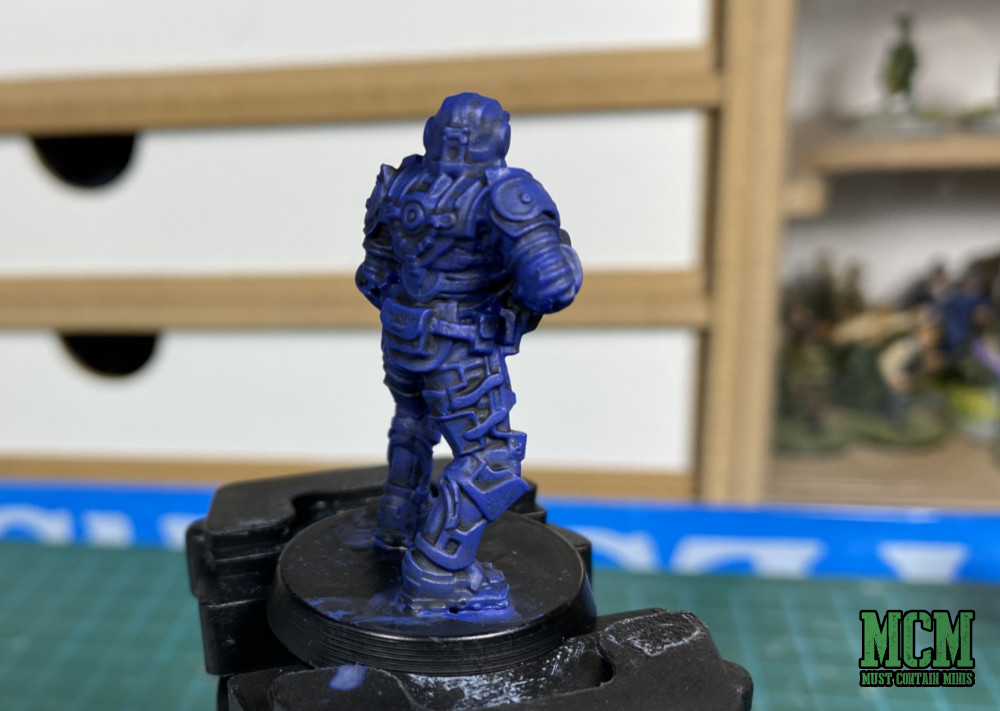
Step Three – Apply Shading
Now, apply a shade. Usually I like to use a really dark shade like GW Nuln Oil, but I wanted to paint this mini up using only the paint in the Space Marines: Assault Intercessors + Paints Set that I reviewed earlier. In this box, GW gives you Agrax Earthshade as the shade for the set. It is a little lighter and browner than Nuln Oil.
I just slop that stuff on. If there is a better way, let me know.
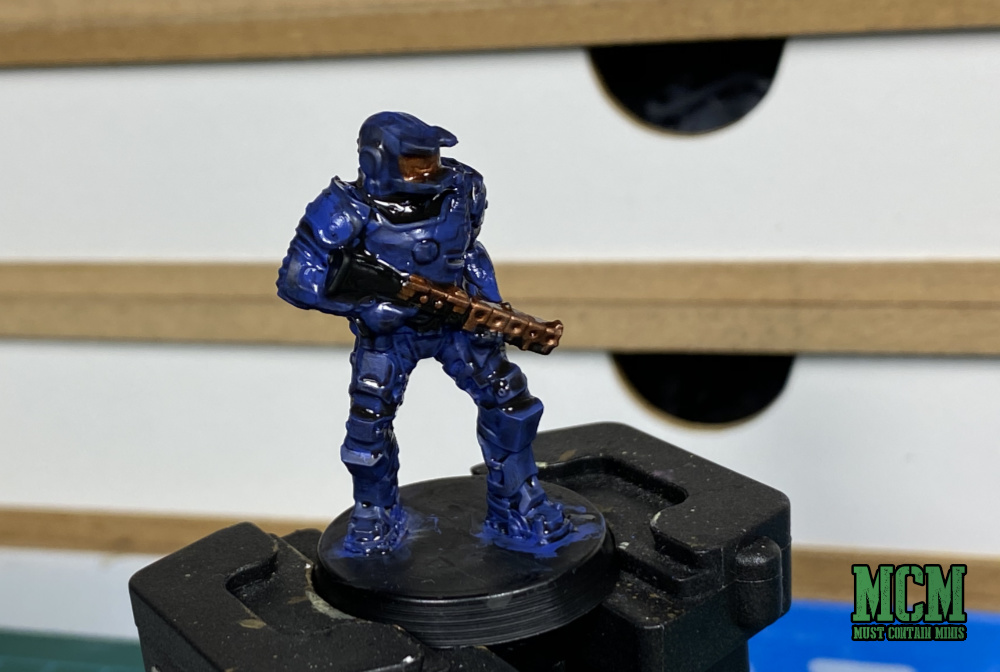
At this point, GW states you could base the model and then consider it “Battle Ready.” When looking at it from a table distance away, or even close up, the model certainly looks good enough. That said, I like to take my miniatures another step.
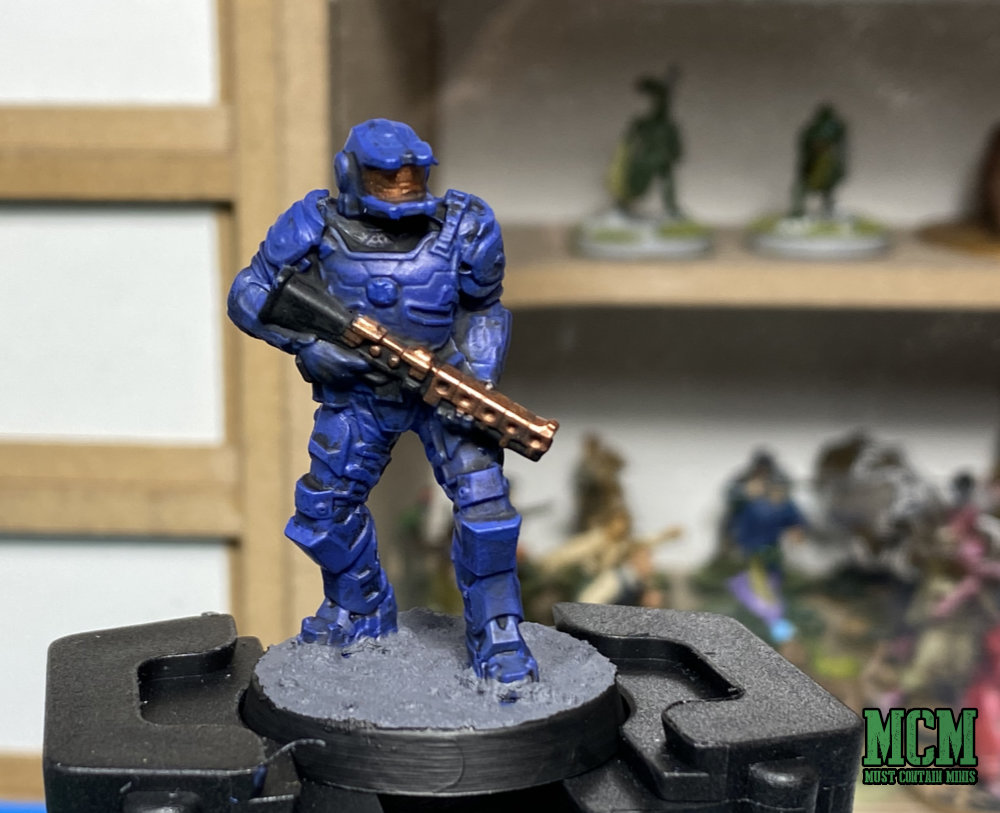
Personally, I find the visor a little dark and like having a little more depth in the colours. To do this, I got back and highlight the miniature with my original colours. This will increase the contrast (or difference between the brightest and darkest colours) on your miniature.
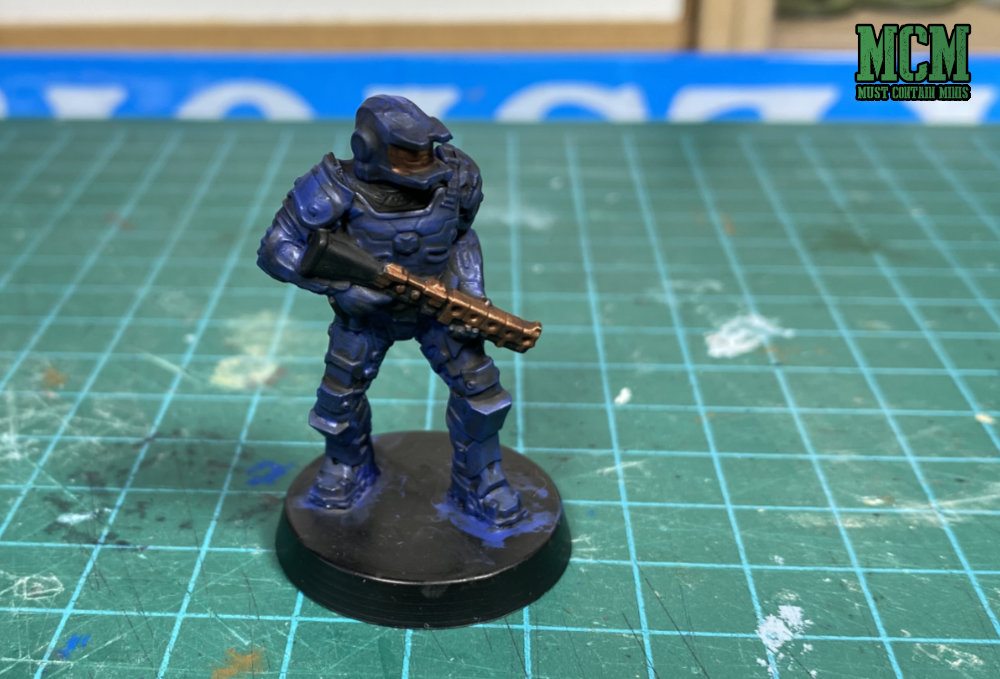
Step Four – Highlight the Miniature
By using dry-brushing and edge highlighting, I enhance the brightness of my miniature.
To dry-brush, you put some paint on your brush and then brush it off on a paper towel until it is mostly gone and then brush what is left on your miniature. This will make it so only the top levels of the miniature will take on the extra colours – leaving your lower levels shaded. I did this to the armour of the entire model.
To edge highlight, you use a small brush and apply the paint directly the the edge of the details you want to highlight. I did this using Balthasar Gold on the raised edges of the gun. I also went in and gave an extra coat of Balthasar Gold to the visor.
Some people take the highlighting even further with different tints of the colours, but for me, this is good enough. I decided to base the miniature.
Step Five – Base the Miniature
To finish the miniature, I painted the top of the miniature with Astrogranite. Astrogranite is not normal paint. It will destroy your brushes. Instead of a brush, I applied it with a small modeling tool instead. It is really a dental sculpting tool that I picked up for cheap from a surplus store. That works well.
Finally, when painting a Legions of Steel Miniature I painted the rim of the miniature black. Here is how the miniature looked once finished.
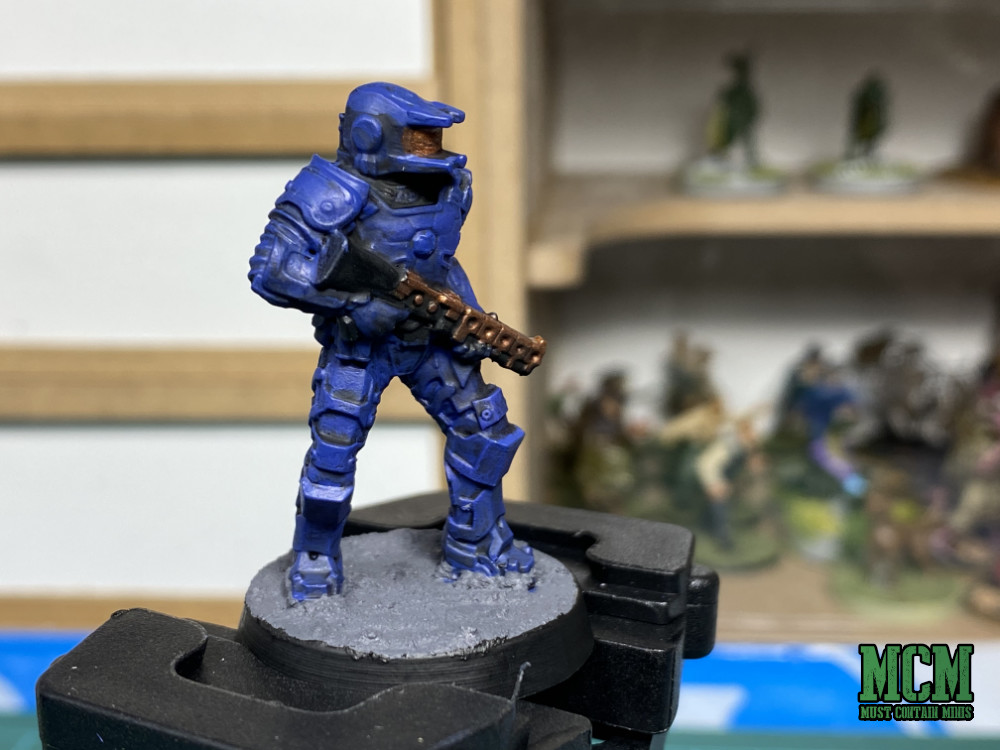
Overall, I really like how this miniature turned out.
The Video
Wrapping it up…
Thank you for joining me in this painting tutorial and review of this Legions of Steel miniature. For scale comparison pictures, be sure to check out my earlier review. For those interested in these miniatures and the game, there is a website to keep an eye out for the Kickstarter.
If you buy into this game, you can paint the miniatures up how you want. I painted them to a “Battle Ready” or “Tabletop Standard” using only the paints in the Space Marines: Assault Intercessors + Paints Set by Games Workshop. For more, there are some samples of Legions of Steel Marines painted to an even better standard on the Legions of Steel Facebook Page.
Until next time, Happy Gaming Everyone!!!

Pingback: Tutorial & Review - Painting New40K Space Marines - Must Contain Minis
I love the Halo look your paint job has given this guy!
Thank you so much Steineriksen!